powerautomate , powerplatform , tips
Power Automate: Sending Email Reminders to close Dataverse record

I think you guys mostly notice. When faced with low-code features (Power FX or Power Automate), it took me longer than creating the same solution using code 😭. So to make myself smarter, today, we will learn how to implement email reminders to close the Dataverse record.
Dataverse Table
First, I just created the below Demo table:
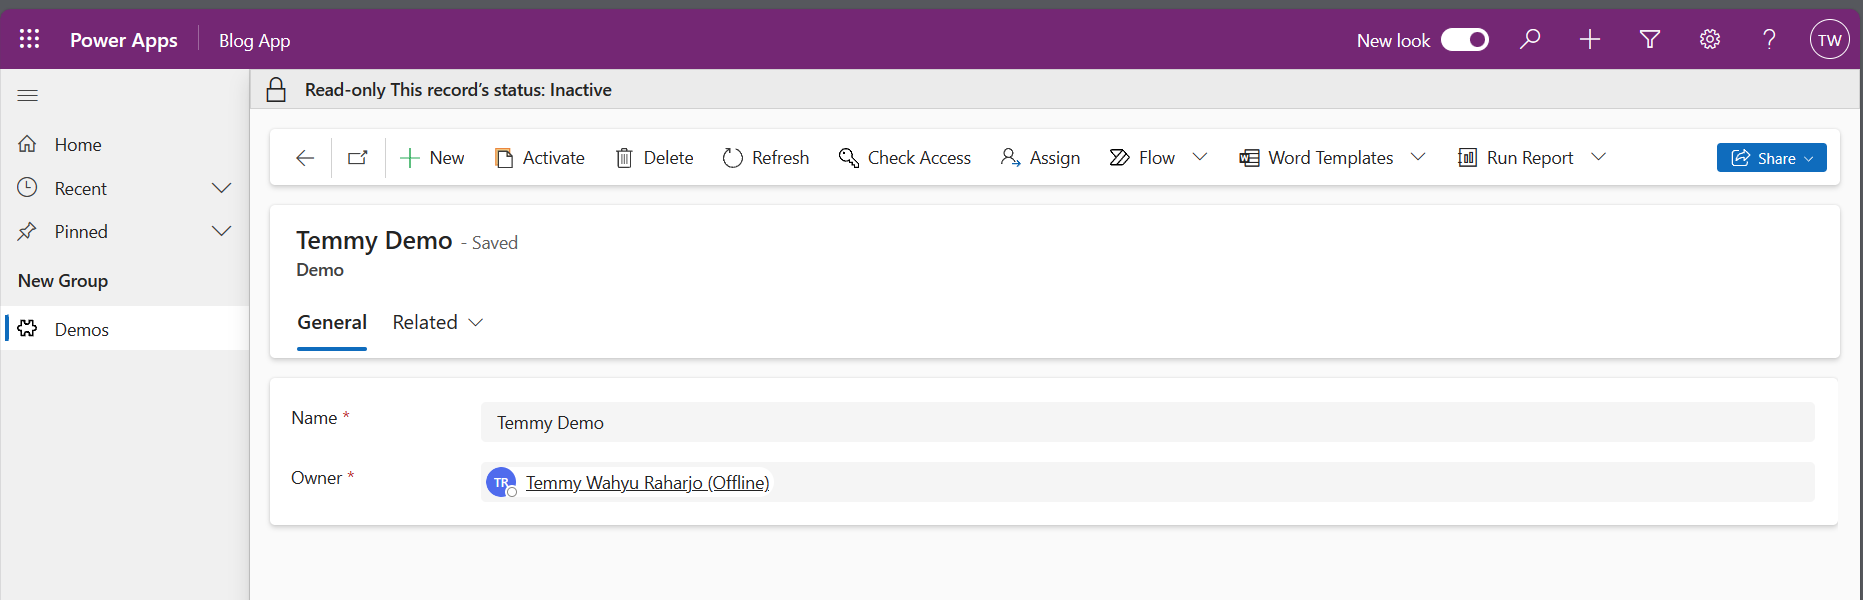
For implementing the "Close" state, we will just use the "Deactivate" feature.
Flow Send Email Notification for Demo
For the first flow, we will create a manual trigger "Send Email Notification for Demo". For this flow, we need to have the DemoId (string) parameter:

For the "Get Demo Record" step, we will retrieve the Dataverse record by the ID which we will obtain based on the DemoId parameter.
On "Get CRM Record URL", we will populate the link to open the record (you can learn more about how to open a specific record, list, or anything related to the Dataverse in this link). Then, to get the CRM Base URL, I followed this blog post. TL/DR, here is the code how to set the URL:
https://@{uriHost(body('Get_Demo_Record')?['@odata.id'])}/main.aspx?etn=blog_demo&pagetype=entityrecord&id=%7B@{triggerBody()['text']}%7D
Next, on the "Check If Demo record is Active", we just need to make sure the status is "Active". If not active, then it will flow to the "No" step which does nothing.
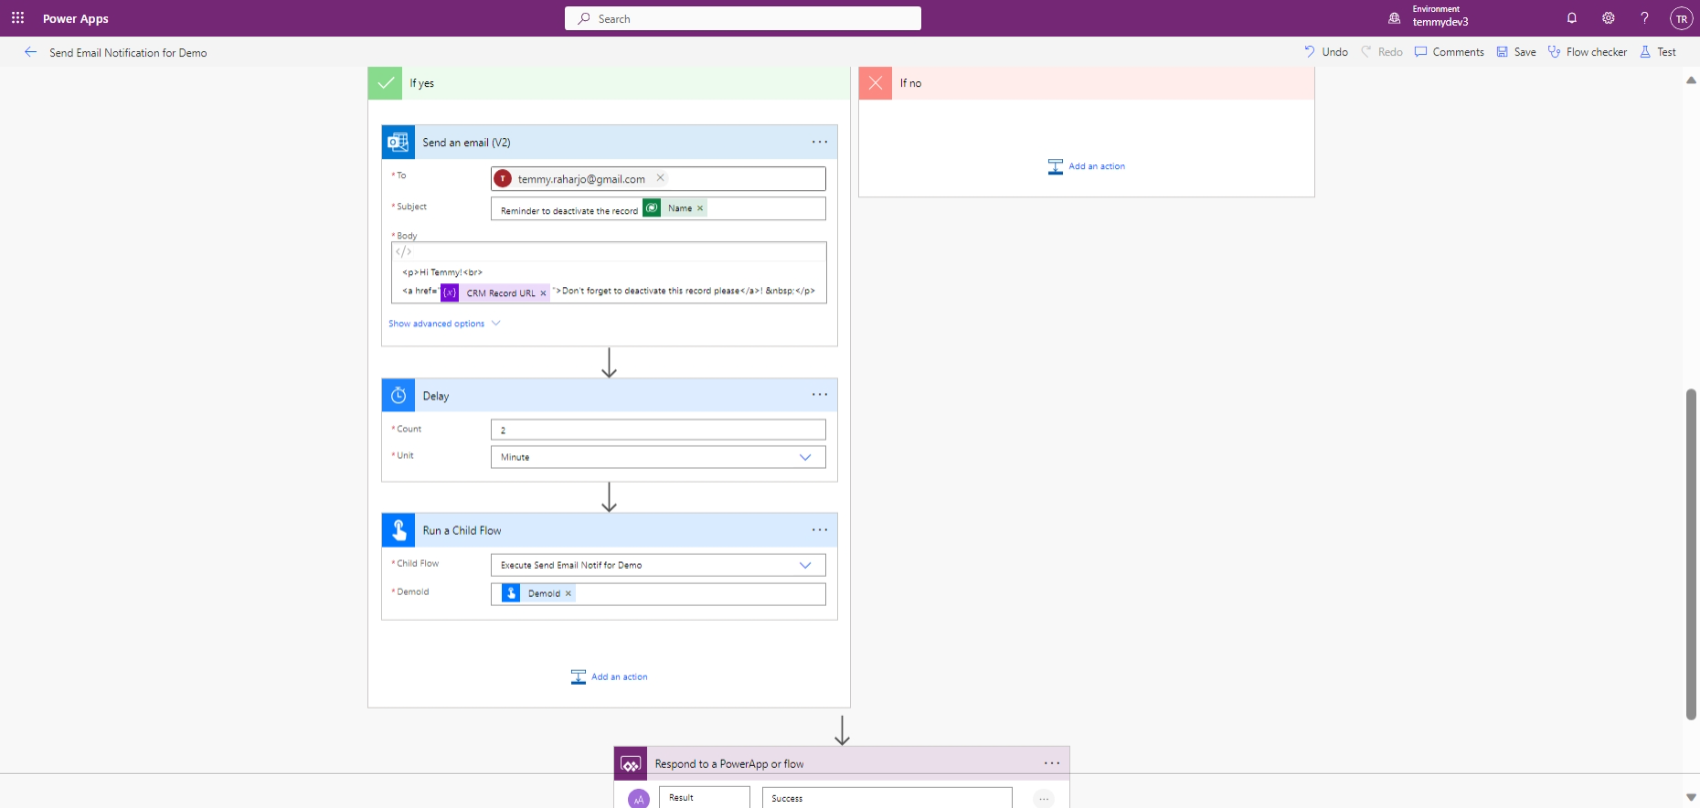
For the "Yes" section, we are using send the email using Outlook Send an email (V2) action. And we will put a delay (in our demo, I just put 2 mins. But in reality, you can set per daily/weekly/anything).
Next, we will use the action "Run a Child Flow" which will called "Execute Send Email Notif for Demo". This flow actually will just call the "Send Email Notification for Demo" after the delay passed.
Because this flow will be called by another flow, we need to set the "Respond to a PowerApp or flow" response.
One thing to understand, we need to set the "Run only users" (in my opinion this kinda of enforcing run as the user we set in the Connection Reference):
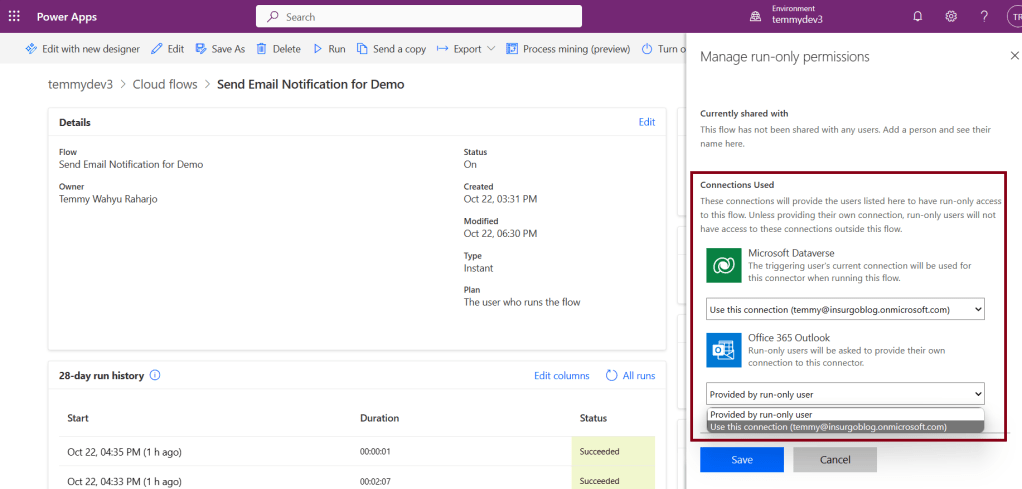
If we are not set the above, then we will get the below error when calling the Parent Flow:
![Error: Failed to parse invoker connections from trigger 'manual' outputs. Exception: Could not find property 'headers.X-MS-APIM-Tokens' in the trigger outputs. Workflow has connection references '["shared_office365"]' with invoker runtime source.](https://temmyraharjo.wordpress.com/wp-content/uploads/2023/10/image-28.png)
Flow Execute Send Email Notif for Demo
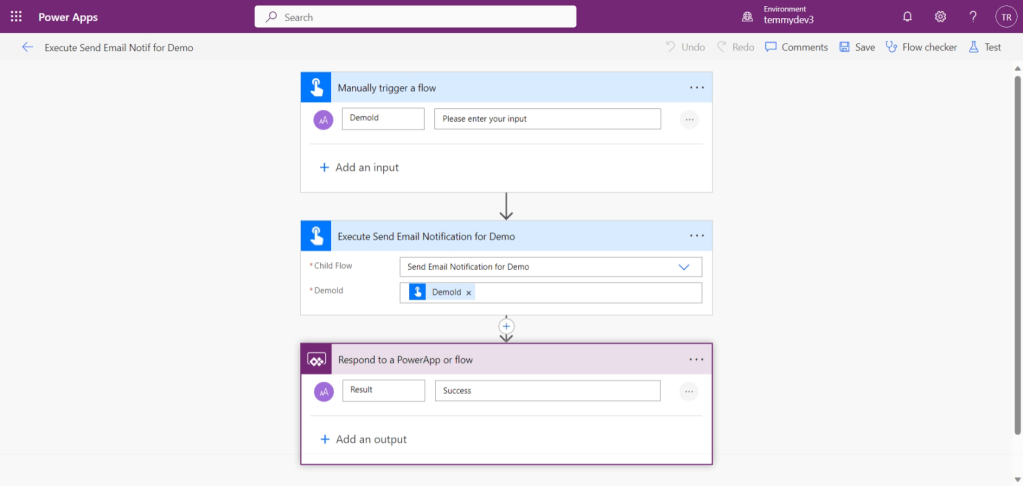
As mentioned before, this flow works as a wrapper to calling "Send Email Notification for Demo". So the logic is just to prepare the DemoId (string) parameter, and then call the "Send Email Notification for Demo" flow. Because it will be called "Send Email Notification for Demo", we need to add the "Respond to a PowerApp or flow" action.
You might be noticing, this flow and the previous calling each other (circular dependency). So before we can save the first flow, we need to skip the "Run a child flow" step. Once everything settles, only we can add it.
Flow On Create Demo
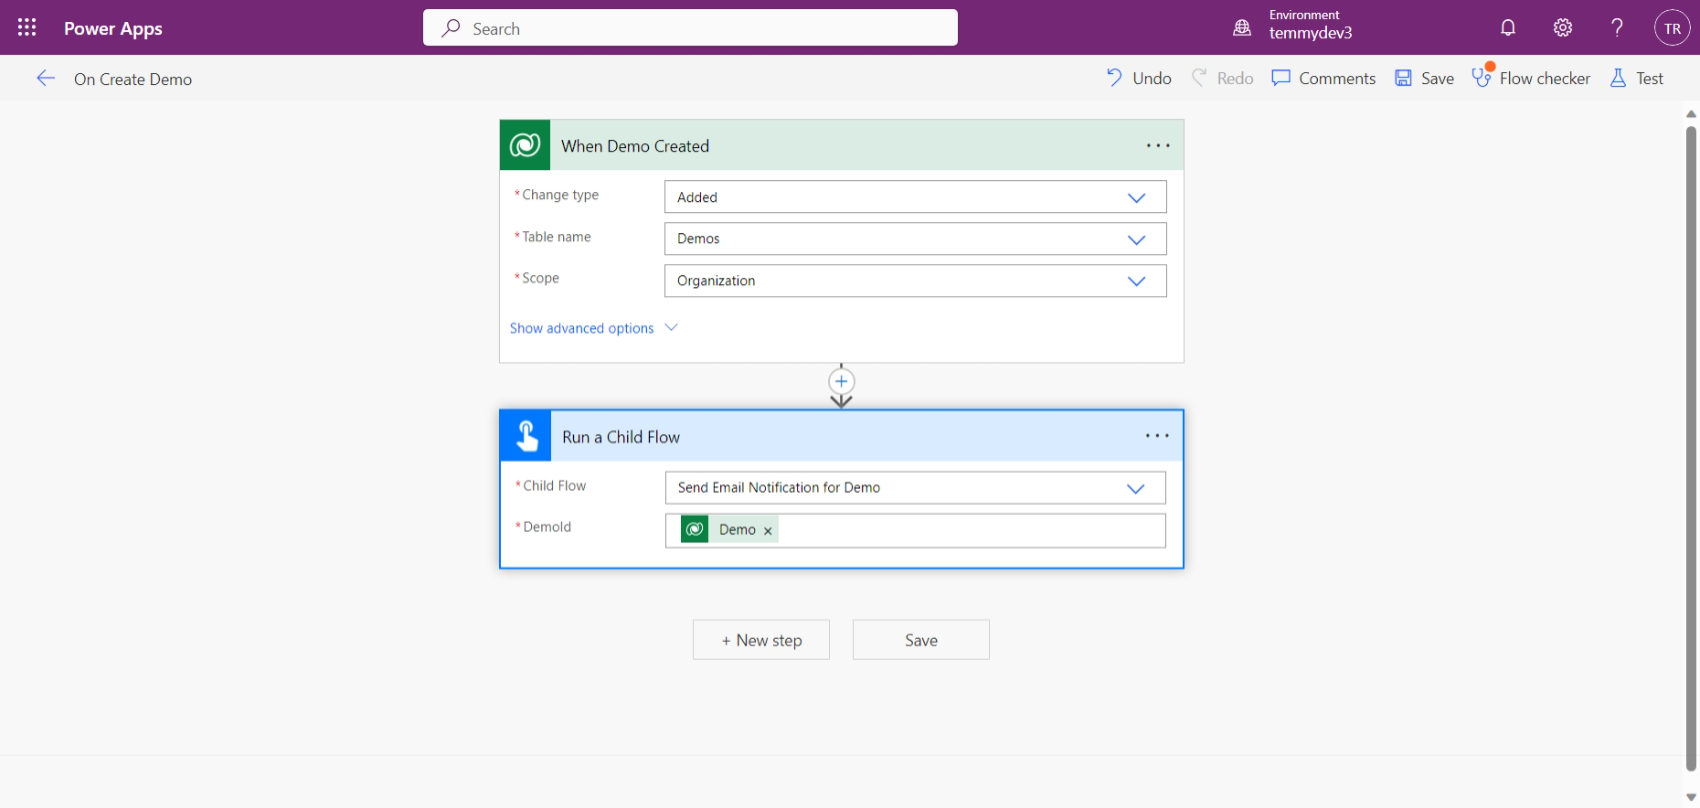
The last piece to finish the puzzle is this flow. We only need to add a trigger based on the "Added" of the Demo table. Then call the child flow which is "Send Email Notification for Demo".
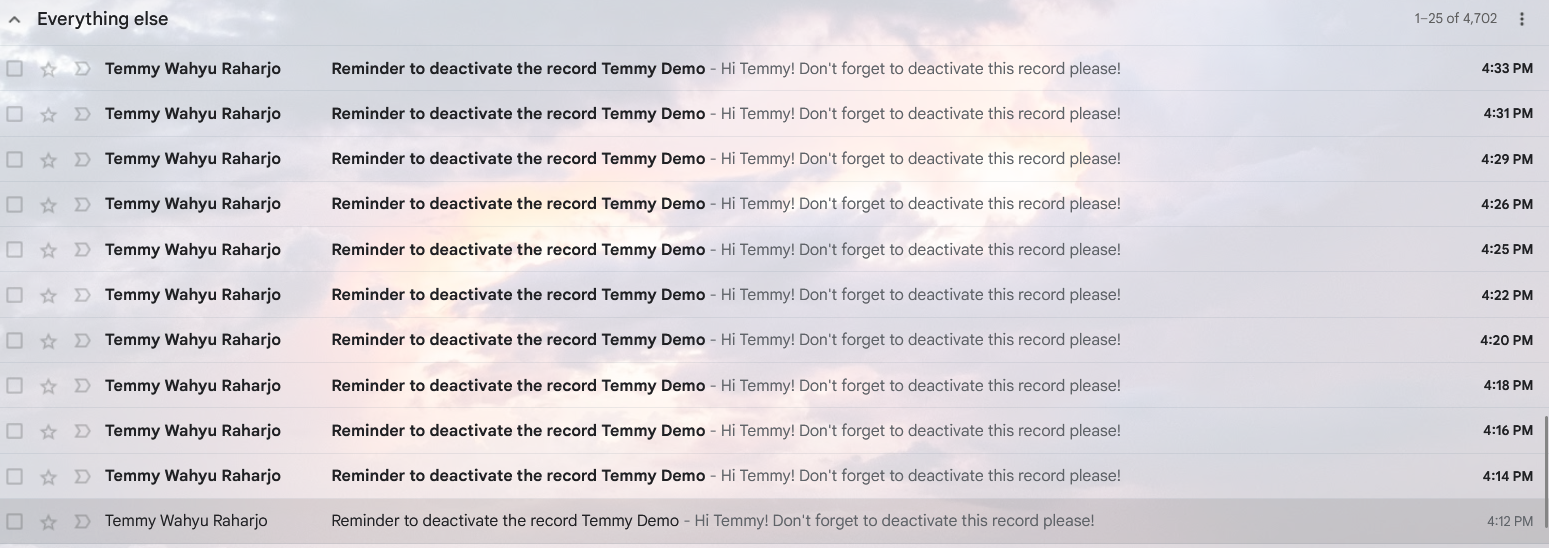
Below is the email result from my demo:
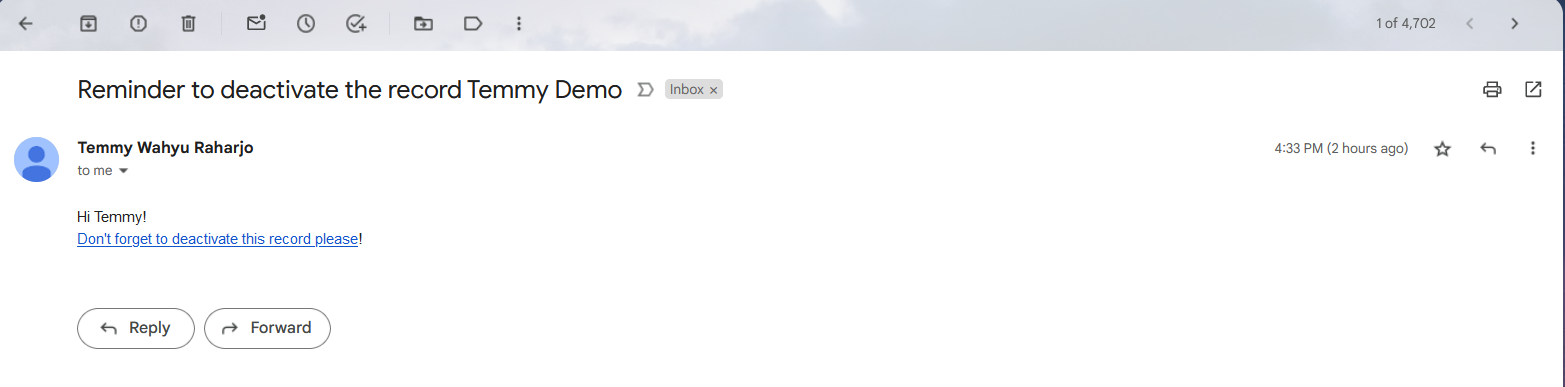
And here is the sample email of the result:
Happy CRM-ing!
Leave a comment
Your comment is sent privately to the author and isn't published on the site.