.NET , Architecture , Azure , dynamics-crm , powerautomate , powerplatform
Dataverse: Send WhatsApp Messages using Azure Communication Service (Preview)

I just read this article that makes me want to try it so bad because it has lots of possibilities for sending WhatsApp messages with many opportunities to be implemented in the Business Apps. So, the idea is to use this feature inside Dataverse (using Custom API - for reusability purposes). Without further ado, let's deep dive into how to do it!
Prepare Azure Communication Service + WhatsApp Business
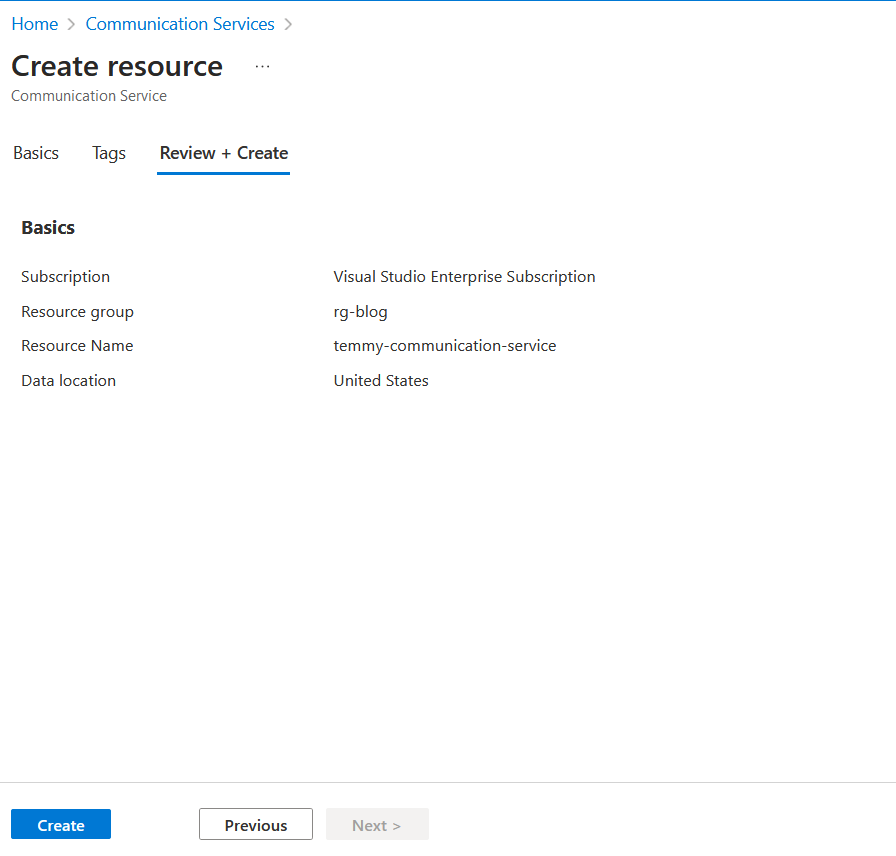
Go to portal.azure.com > Communication Services > new > fill Resource Name (unique) > Data location must be in United States for now:
Next, go to the Channels > hit Connect > follow the necessary steps to register the new WhatsApp for business (you can follow step by step in this article). In my testing, I need to buy a new number 🤣:
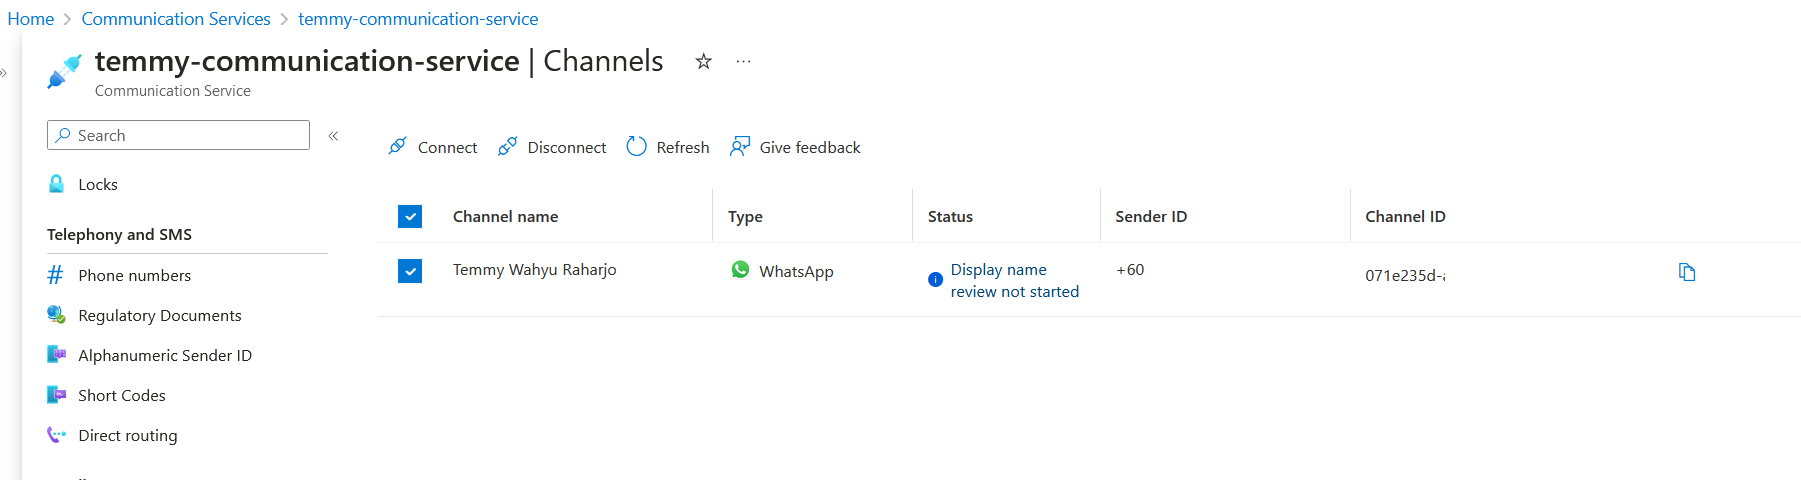
Don't forget to copy the Channel ID for the later step.
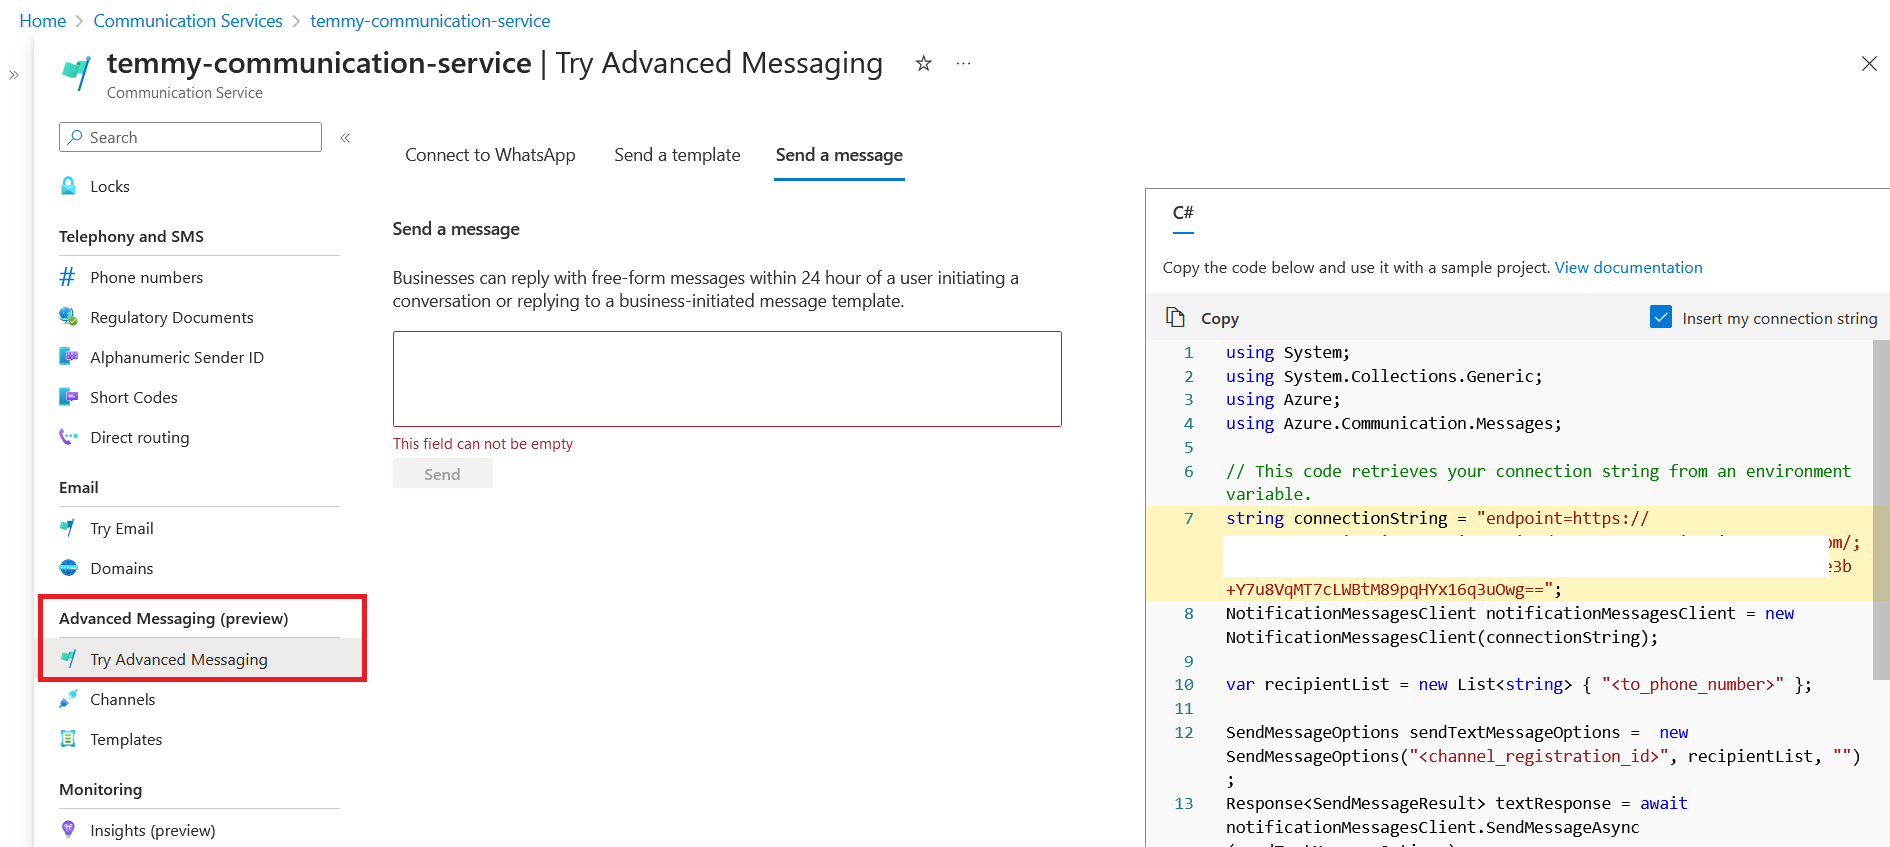
Before we go further, let's try to open your Communication Service > Advanced Messaging (preview) > Try Advanced Messaging. Once it is opened, click the "Send a message" tab. There you can see the code to send the chat:
Create Dataverse Custom API
Next, we need to prepare the Plugin Project (because we need Dependent Assemblies, the easiest route is to create the project using PAC CLI - Plugin init). Then, we need to install below NuGet Package:
dotnet add package Azure.Communication.Messages --prerelease
Once the NuGet package is already installed, then this is the code that we need:
using Azure.Communication.Messages;
using Microsoft.Xrm.Sdk.Extensions;
using Newtonsoft.Json;
using System.Collections.Generic;
namespace BlogPackage
{
    public class SendWhatsapp : PluginBase
    {
        private const string ToArgument = "To";
        private const string MessageArgument = "Message";
        private const string OutputArgument = "Output";
        public SendWhatsapp() : base(typeof(SendWhatsapp))
        {
        }
        protected override void ExecuteDataversePlugin(ILocalPluginContext localPluginContext)
        {
            var to = localPluginContext.PluginExecutionContext.InputParameterOrDefault<string>(ToArgument);
            var message = localPluginContext.PluginExecutionContext.InputParameterOrDefault<string>(MessageArgument);
            var valid = !string.IsNullOrEmpty(to) && !string.IsNullOrEmpty(message);
            if (!valid) return;
            string connectionString = "endpoint=the-url-;accesskey=the-access-key";
            var notificationMessagesClient = new NotificationMessagesClient(connectionString);
            var recipientList = new List<string> { to };
            var sendTextMessageOptions = new SendMessageOptions("paste-your-channel-id", recipientList, message);
            var textResponse = notificationMessagesClient.SendMessage(sendTextMessageOptions);
            localPluginContext.PluginExecutionContext.OutputParameters[OutputArgument] = JsonConvert.SerializeObject(textResponse.Value.Receipts);
        }
    }
}
From the code above, the Custom API needs 2 parameters. The To and Message parameters. The implementation of the code is also self-explanatory. We just need to prepare the connection string > instance the NotificationMessagesClient with the connection string. Then call the SendMessage method. For the output, we will supply the Receipts object.
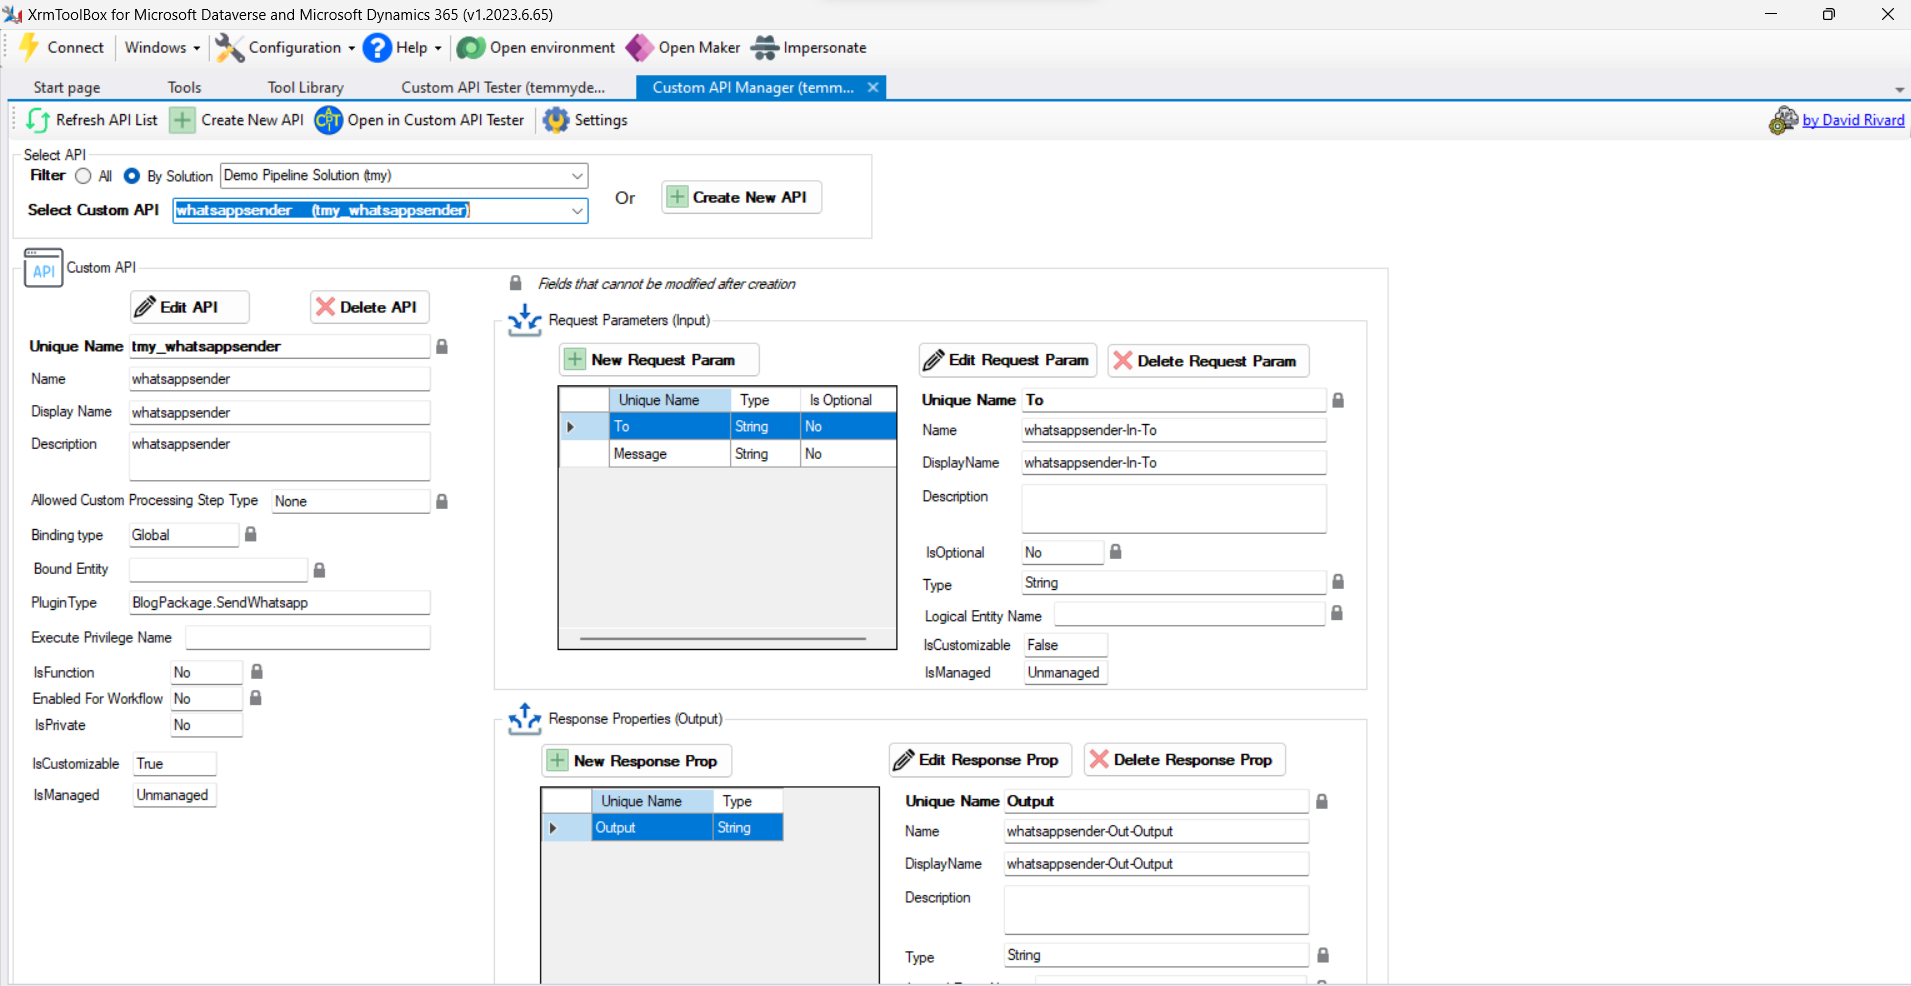
Once you build the above plugin and register it in the Plugin Registration Tool, then we just need to create the Custom API (I'm using Custom API Manager by David Rivard) > the Input Parameters and also the Output Parameter:
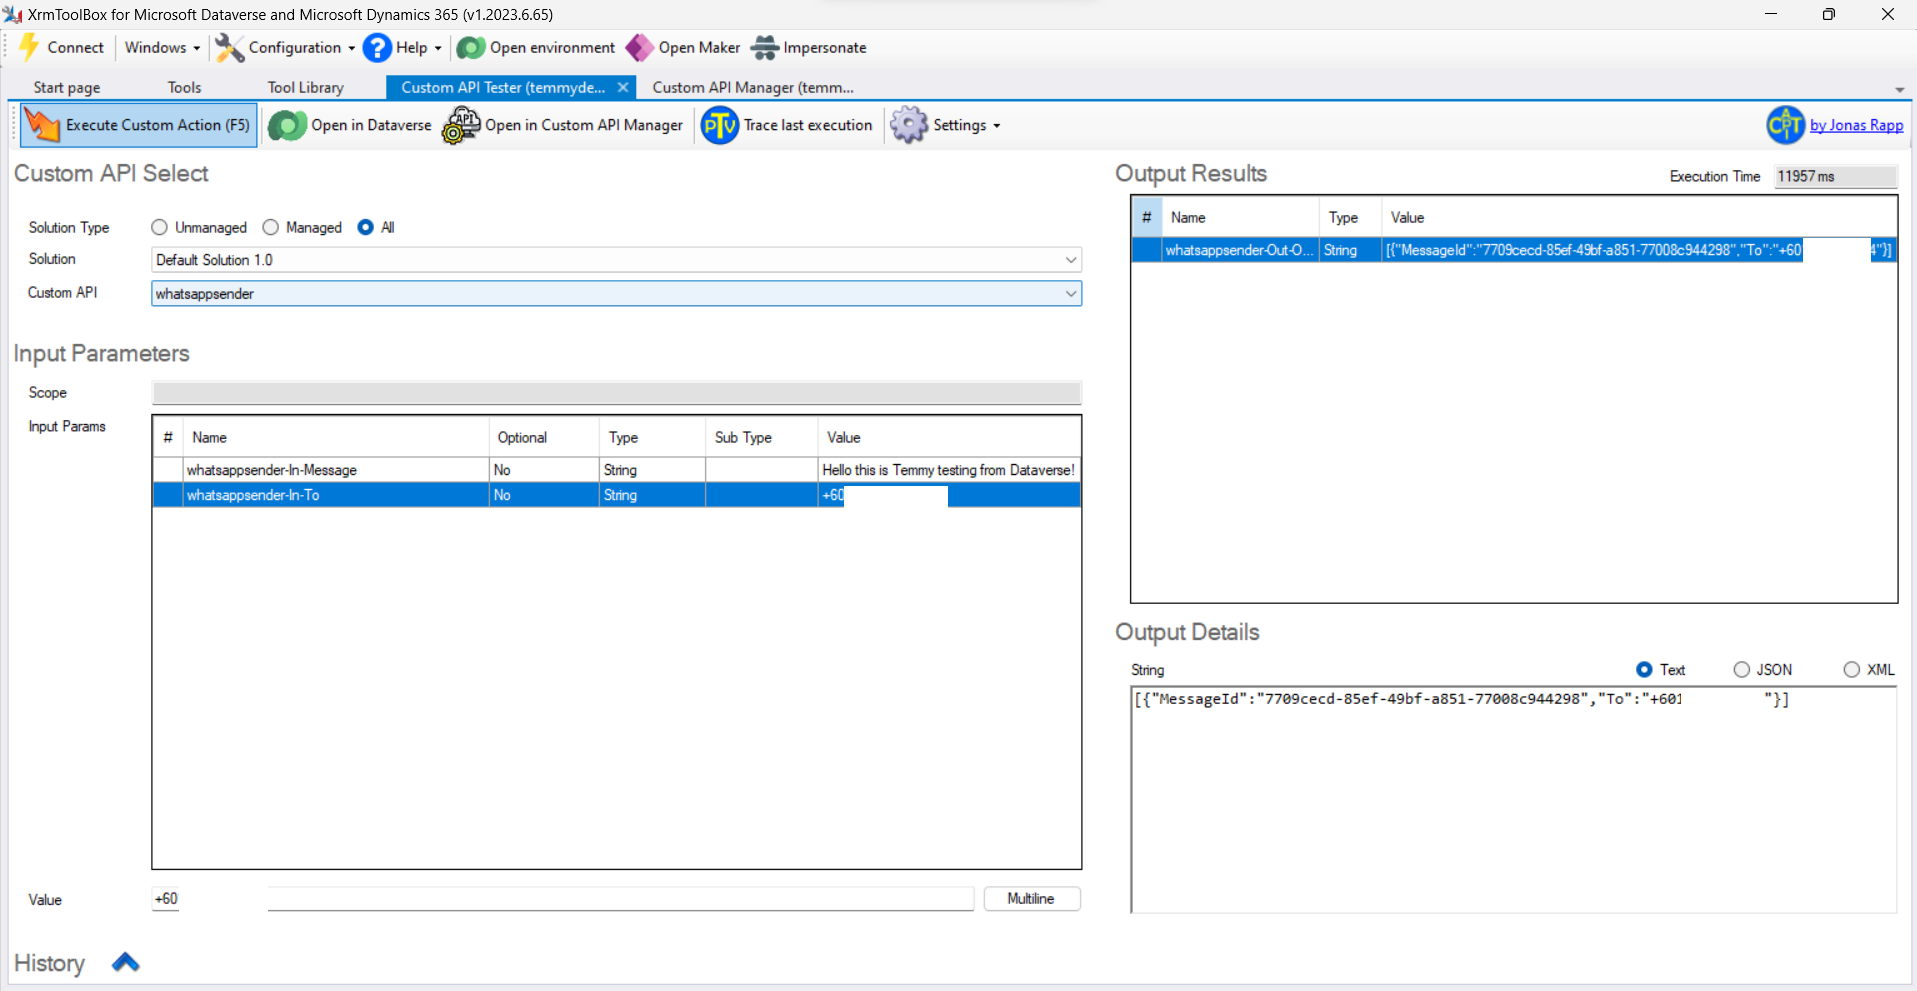
Last, we only need to test it. From theCustom API Manager, there's a button "Open Custom API Tester" that will automatically open Custom API Tester by Jonas Rapp:
Here is the result from WhatsApp:
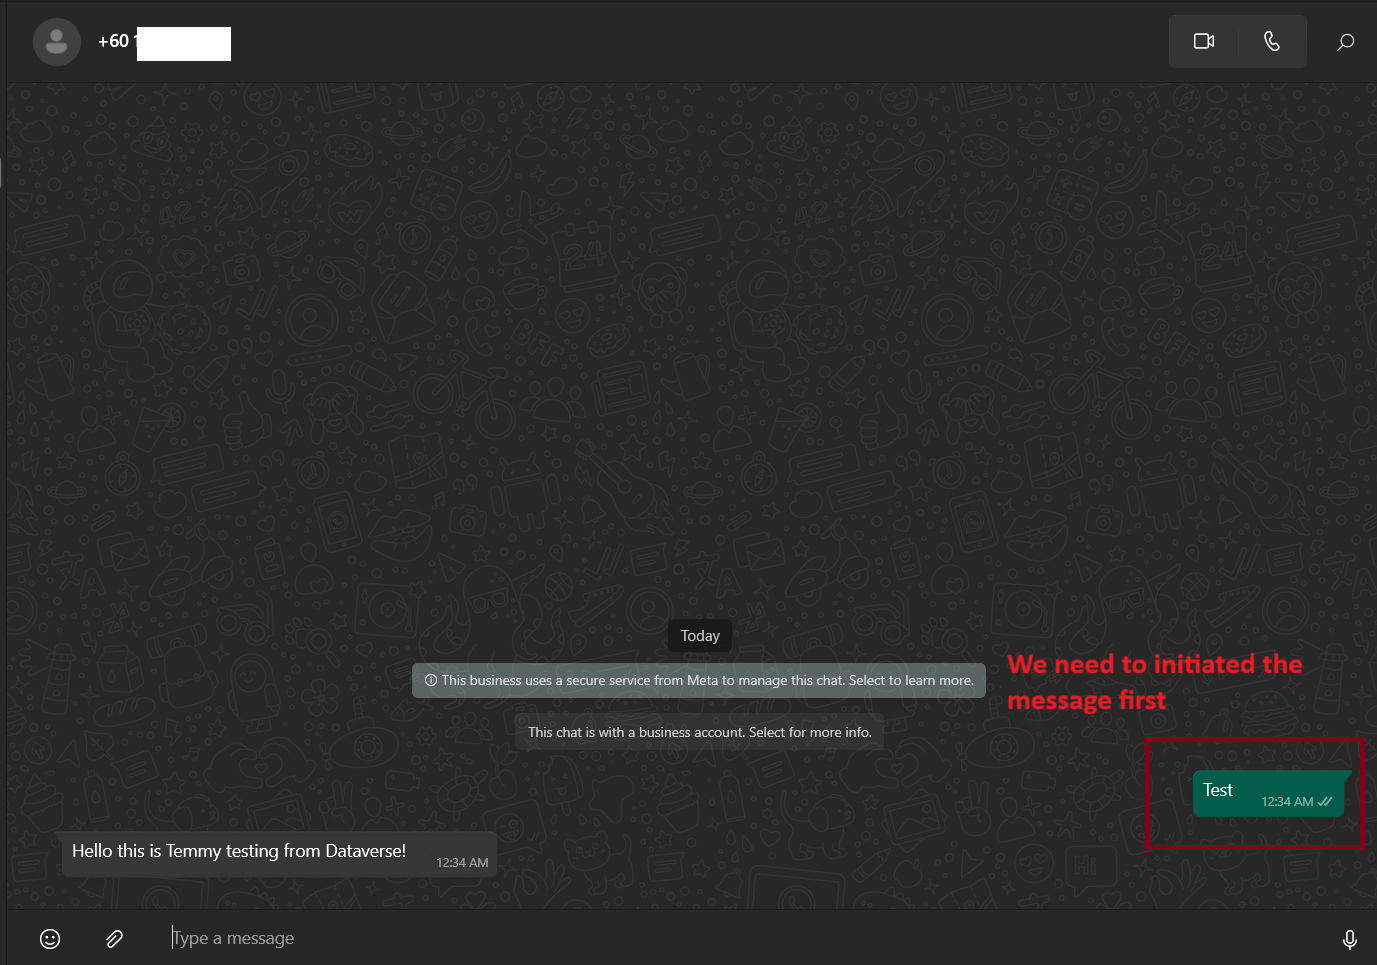
If you think this is very good, wait. From my testing, even in Custom API Tester, I can send to any number without error. Those targeted numbers must initiate the chat first. If not, there will be no chat sent. Hopefully, either Microsoft/Meta can fix this (or maybe this is the expected behavior?).
Happy CRM-ing!
Leave a comment
Your comment is sent privately to the author and isn't published on the site.