dynamics-crm , low-code , powerautomate , powerplatform
MDA: Enable SLA for Custom Entity and learn how to use SLA

SLA (Service Level Agreement) is a feature where you can define the satisfaction level of your service or support based on certain measurable metrics. For example, if someone sends a complaint to you, you need to respond to the complaint in 2 hours. We can apply this logic using the feature that Dataverse has had for quite a long time. If you are interested in learning more about the feature I recommended the blog post by Dian Taylor about the SLA which also got the link to her YouTube video which cover all the step-by-step detail here.
Prepare Custom Table
First, I created a solution > created a table named Documents > then exported the solution (Unmanaged) > once we exported the solution > unzip and open the customizations.xml > edit the IsSLAEnabled from 0 to 1:

Once you have done the above steps, zip back the files > and import the solution to our environment.
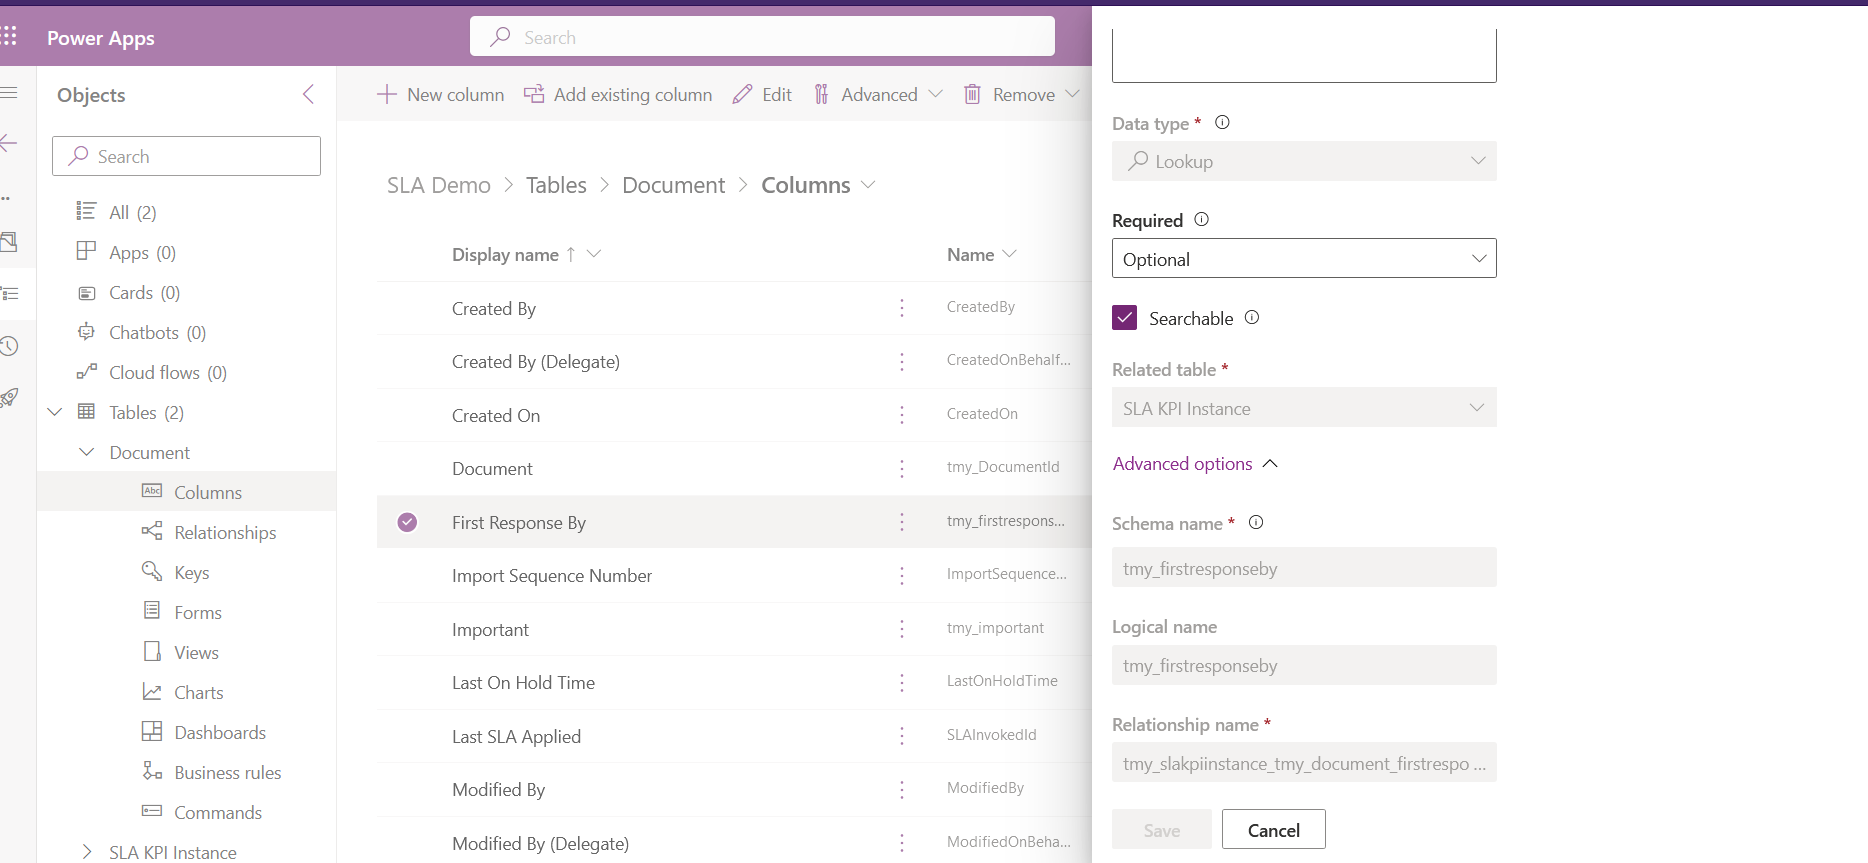
Next, I created several attributes and I'll explain these particular attributes for supporting the SLA:
| Attribute Name | Data Type | Description |
|---|---|---|
| tmy_important | Two-Options (Boolean) | For triggering the SLA purposes (flagging if necessary to run the SLA) |
| tmy_firstresponseby | Lookup (SLA KPI Instance) | We need to create a lookup to the SLA KPI Instance in order to enable the configuration (Required). |
| statuscode | Choice (OOB status) | To determine if the SLA is pass/fail during the timebox that we will set later. |
Important Columns for SLA
Here is the lookup that I created for the table:

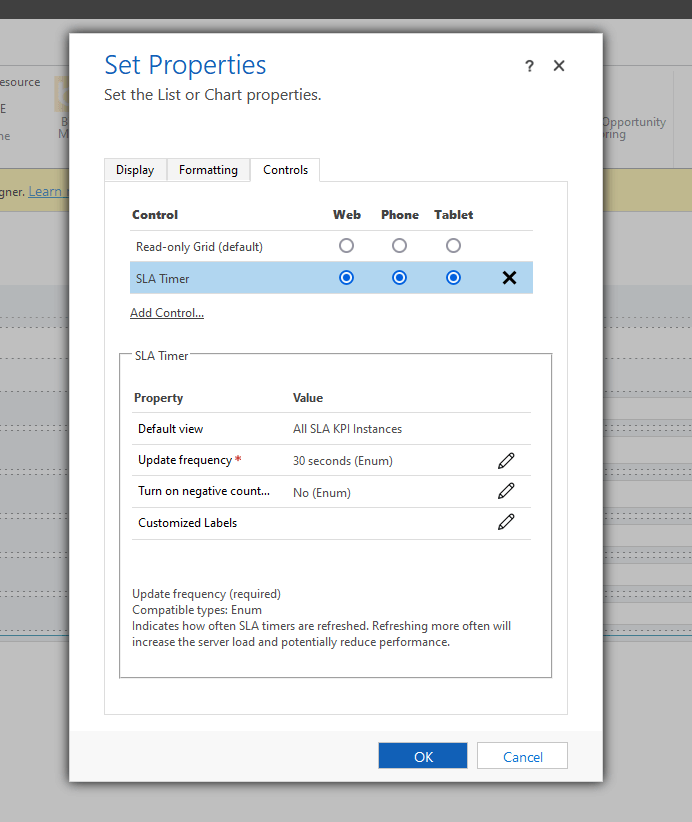
Next, we will add SLA Timer control and set like the below:
Once we have done this, the table is ready to use. We can click Publish All Customizations.
Configure Our SLA
Now, we are ready for the configuration part. Open your Customer Service Hub app > go to the Service Management area > SLA KPIs > create new SLA KPI > and activate the record:
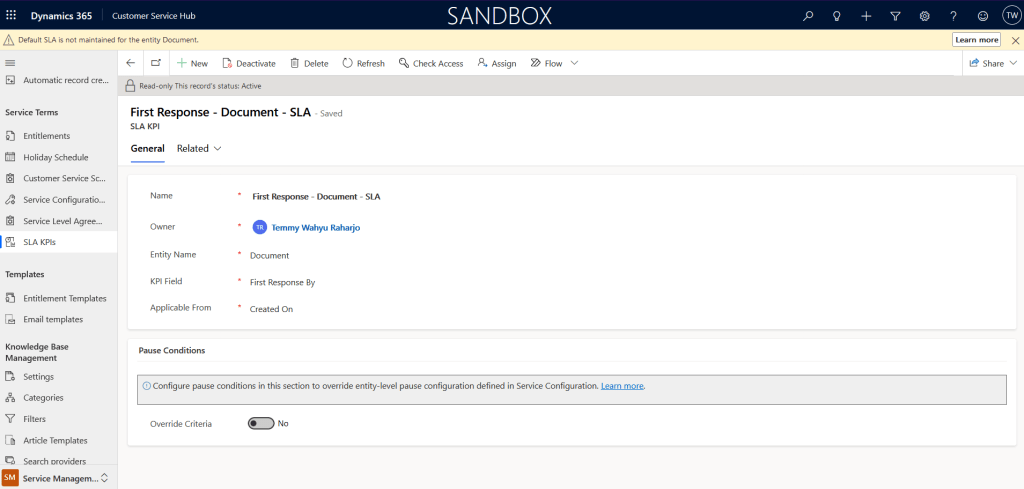
Here, as you can see, I created a KPI for the Document, where the KPI Field is "First Response By" and the Applicable From is "Created On".
Next, go to the Service Level Agreements > create new SLA > add new SLA Item based on the configuration that you want:
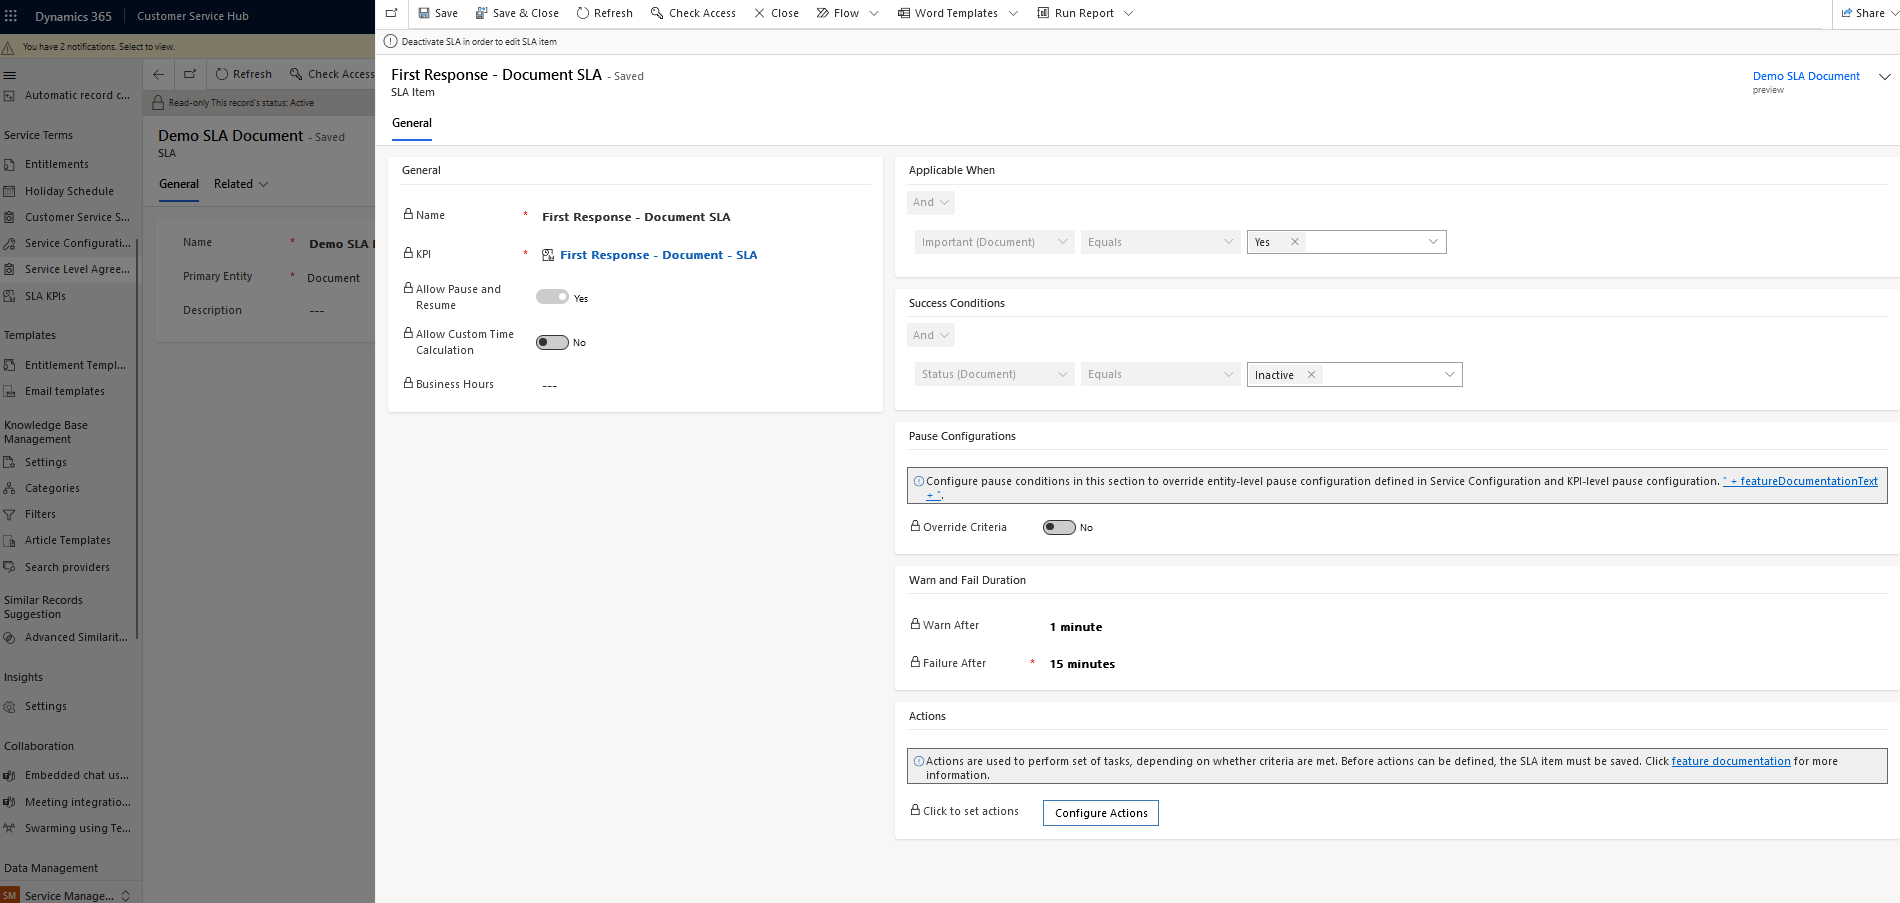
For my demo, I want to know the SLA for all the important documents. If the status changed to Inactive during the 15-minute timebox, It will be a success.
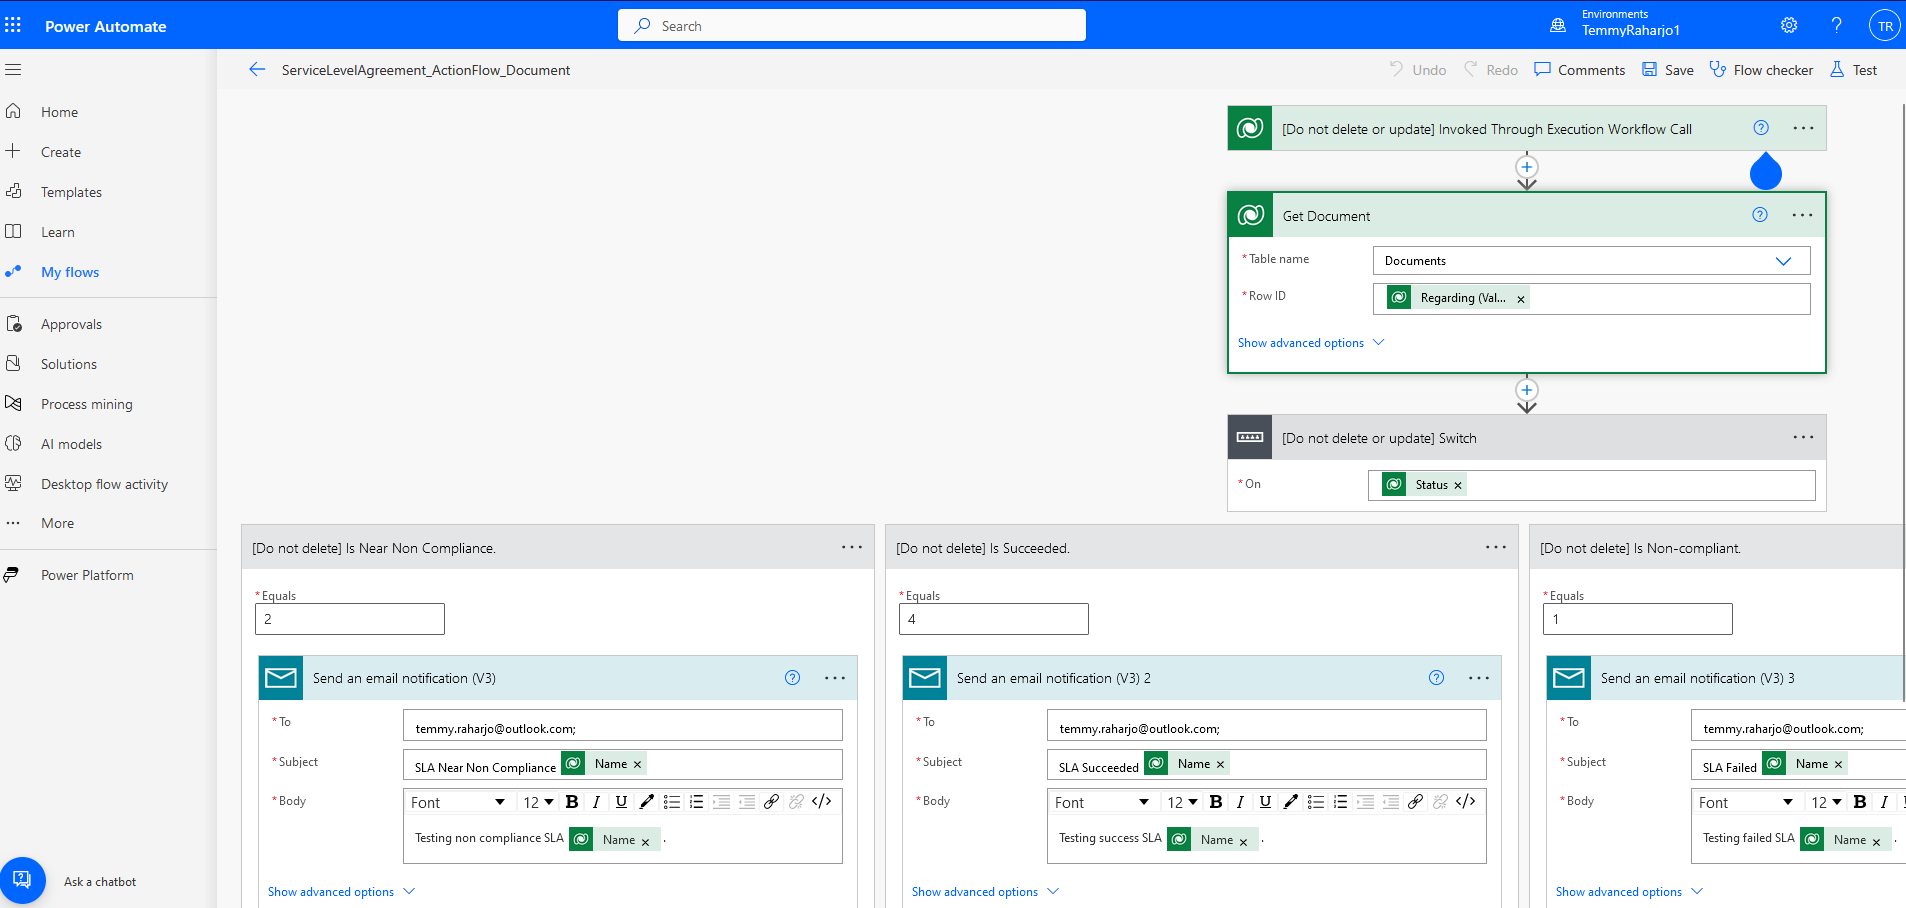
In addition, we also can configure actions (Power Automate):
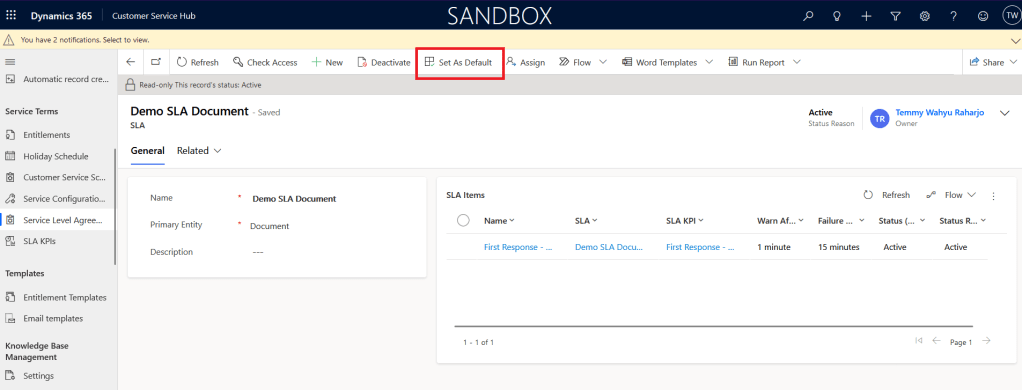
Once everything is okay, you can activate the SLA. FYI, we also can set Default the SLA so all the records created will fall under this SLA Automatically:
Result
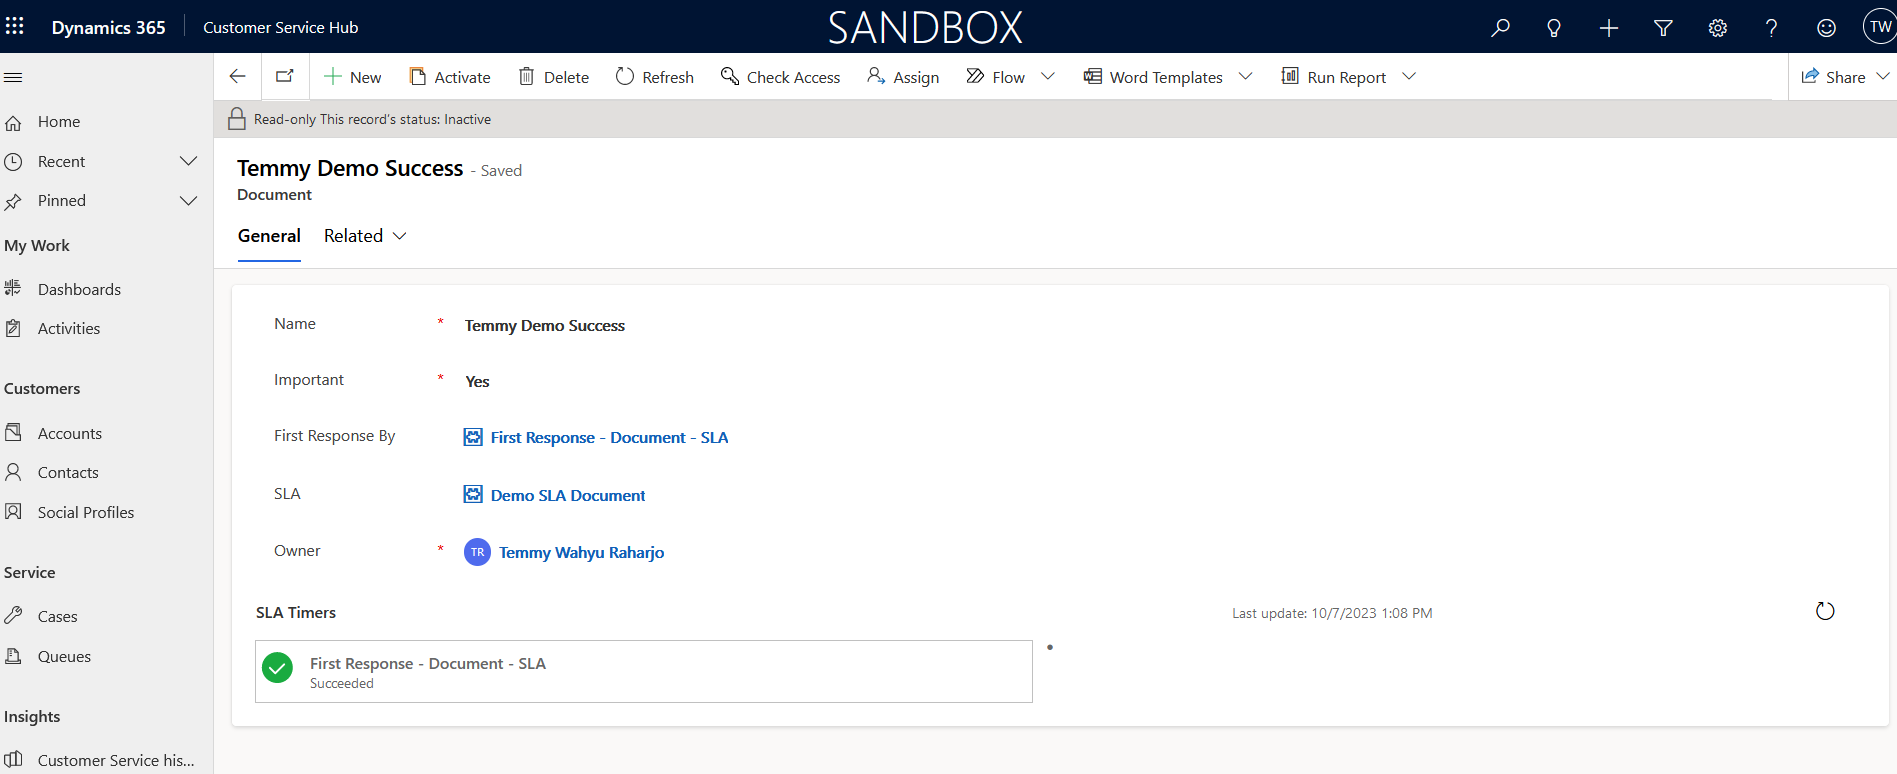
If I create a Document record and deactivate it within 15 minutes, we will get the below result:
If we create a Document but not yet Deactivated after 1 minute, we can see the SLA timer showing the warning sign:
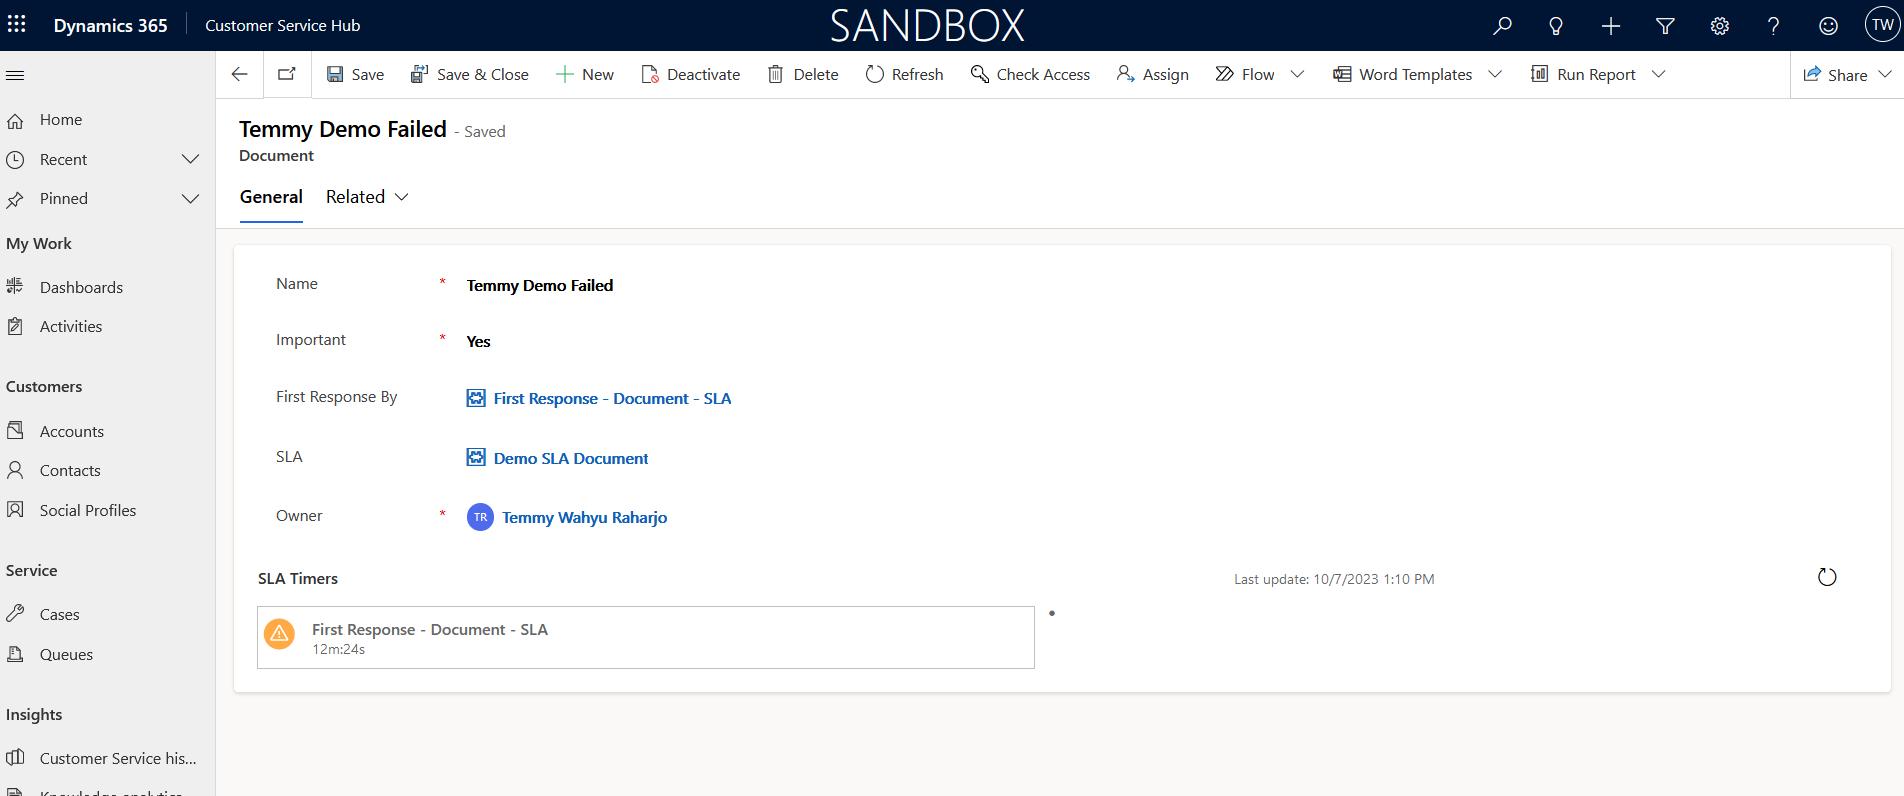
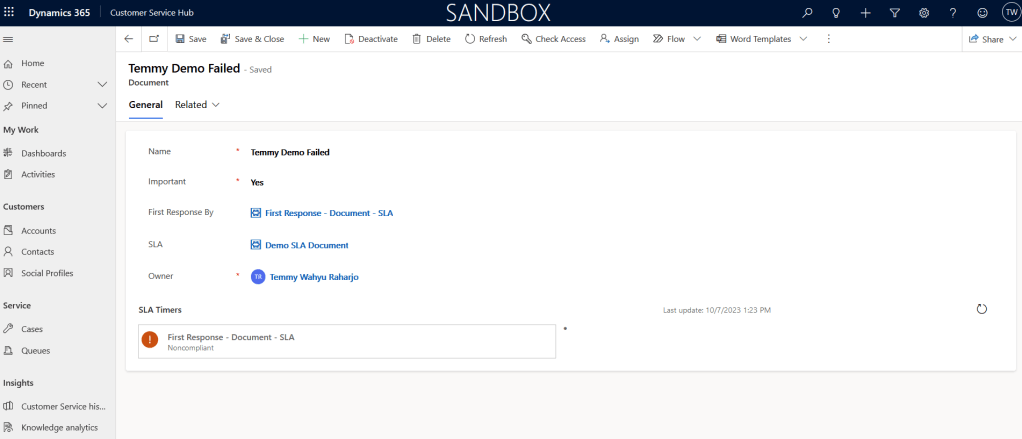
After 15 mins pass, it will show like the below:
Again, for the Flow, you can see that it is being triggered as well (but unfortunately my environment can't use the "Send an email notification" action and makes it fail):
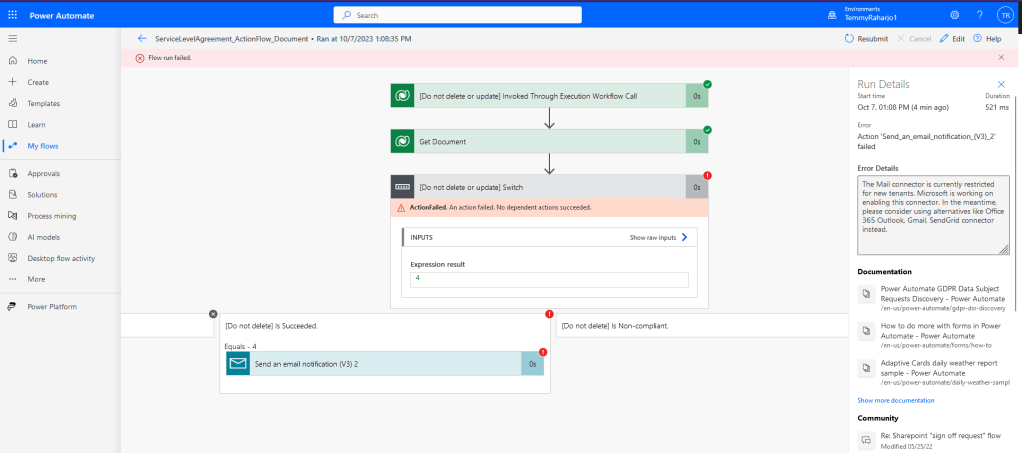
But sure if your environment is okay, it will work as expected. 🙇
Happy CRM-ing!
Leave a comment
Your comment is sent privately to the author and isn't published on the site.