dynamics-crm , Javascript , low-code , powerplatform
MDA: Use AI Copilot Control (Preview) and show it when clicking the command button

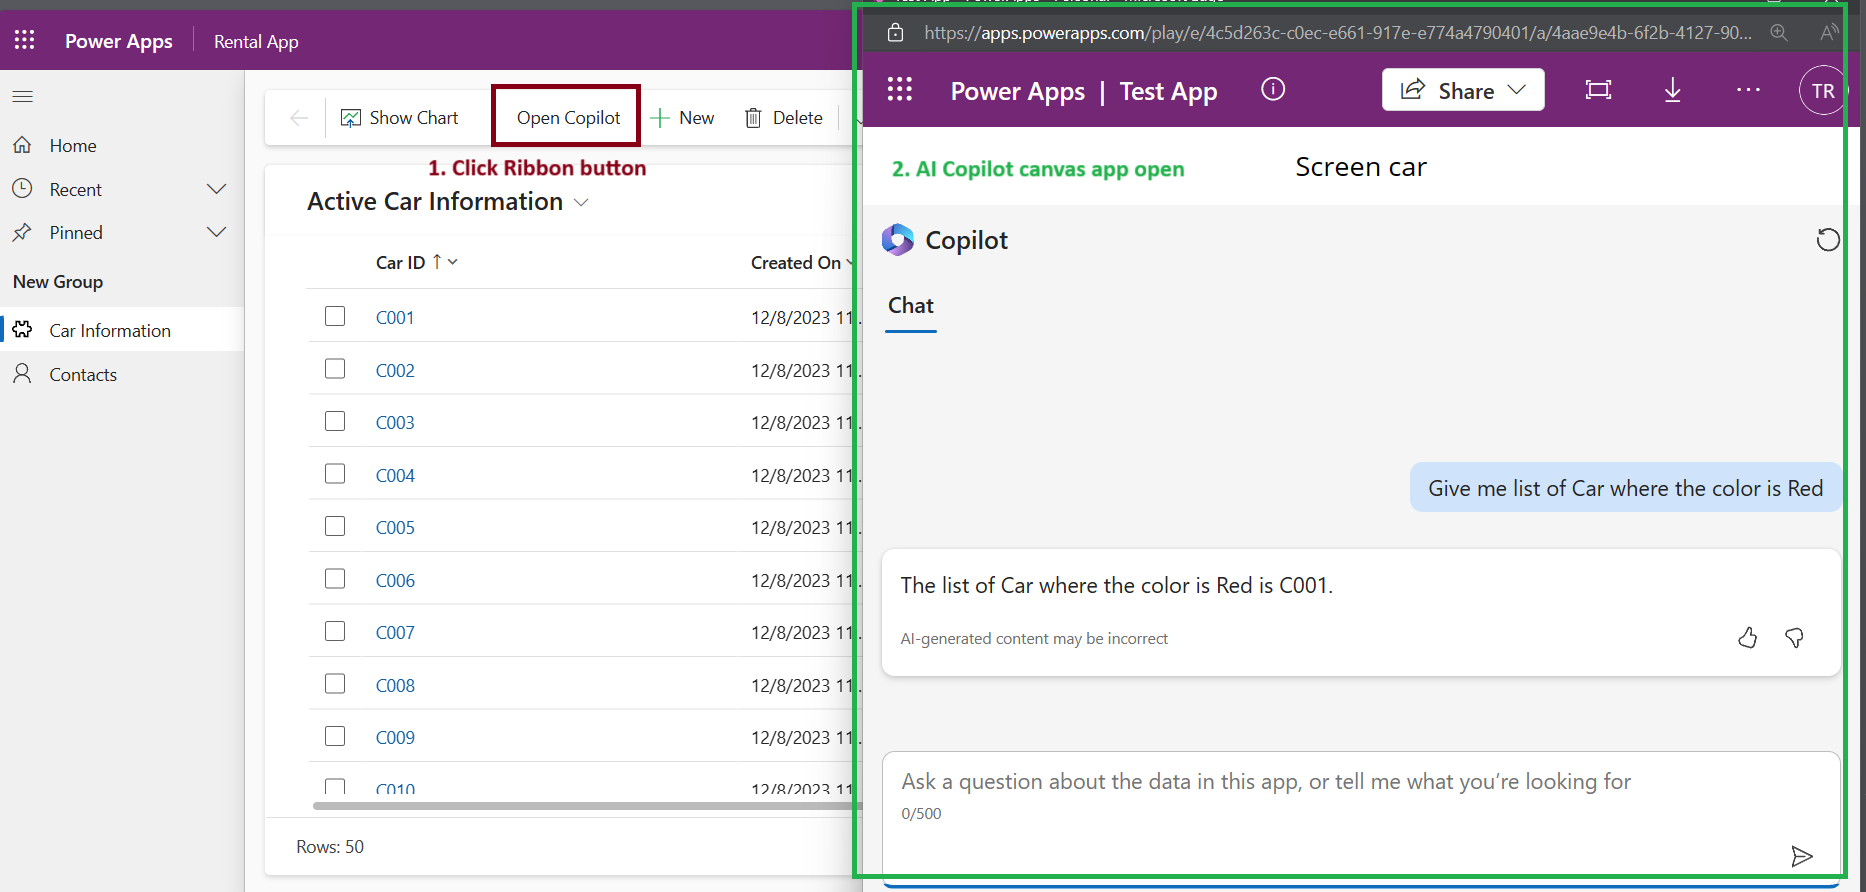
Today's demonstration will show AI Copilot Control (Preview) on the Model Driven App. The scenario I can think of is when a user clicks the command/ribbon button on selected tables, we will let the user interact with AI Copilot Control for that table.
Initially, I want to use the "Custom Page" which I believe will not require users to have a "Premium" license for running Canvas Apps. But, for now, the AI Copilot Control itself does not fully support the Custom Page (I even tried to use the Canvas Component Library). So, for now, we are stuck with this implementation.
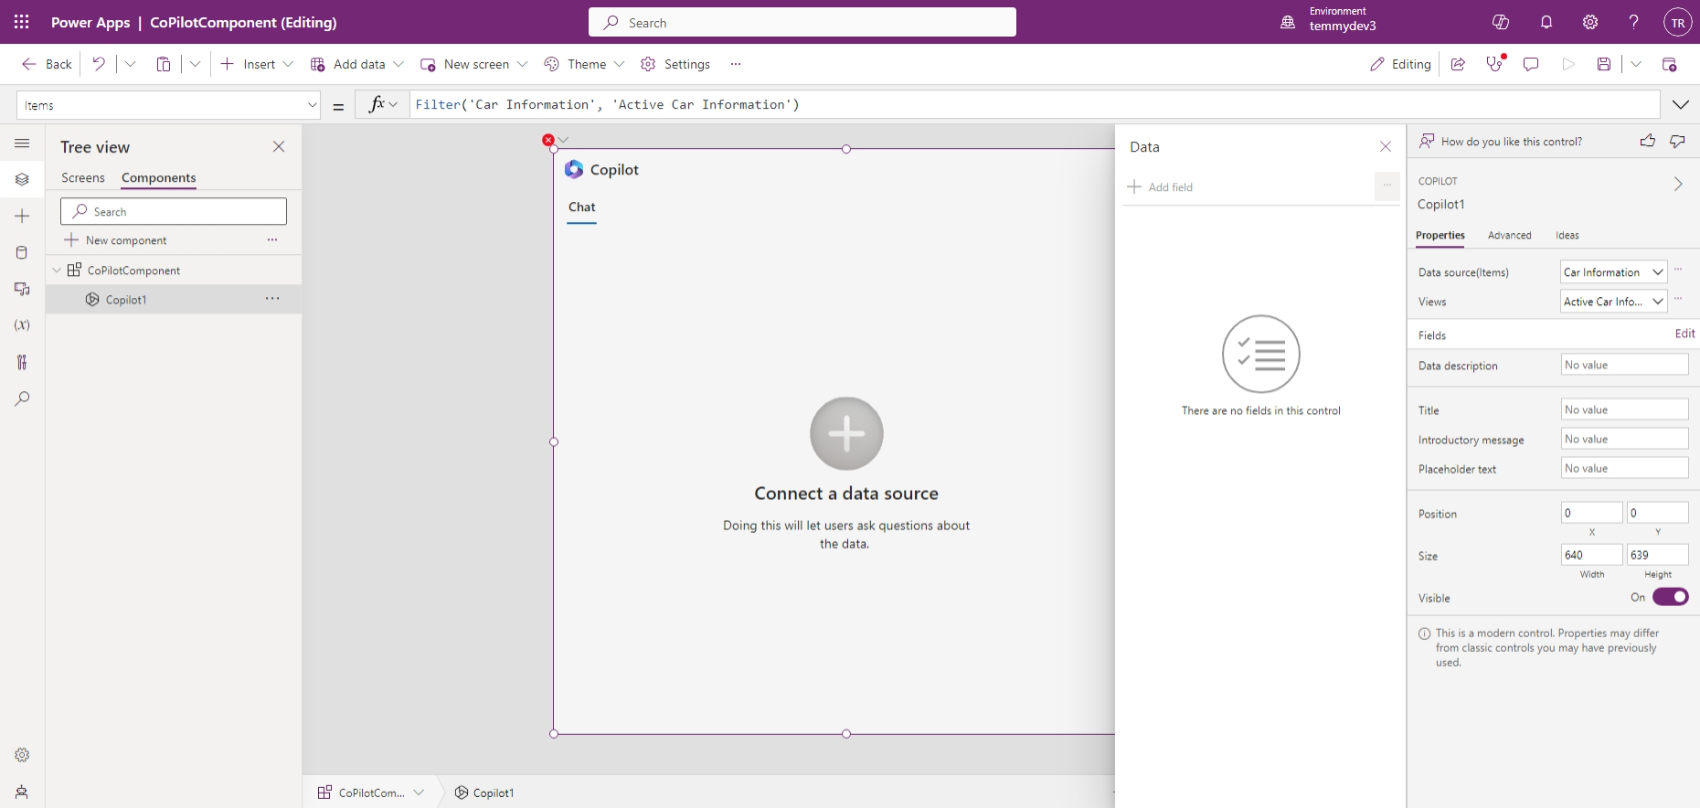
In the screenshot, you can see that we have an "error" even though the setup is valid.
So, without further ado. Let's dig into the implementation! 😊
Table and Canvas Apps
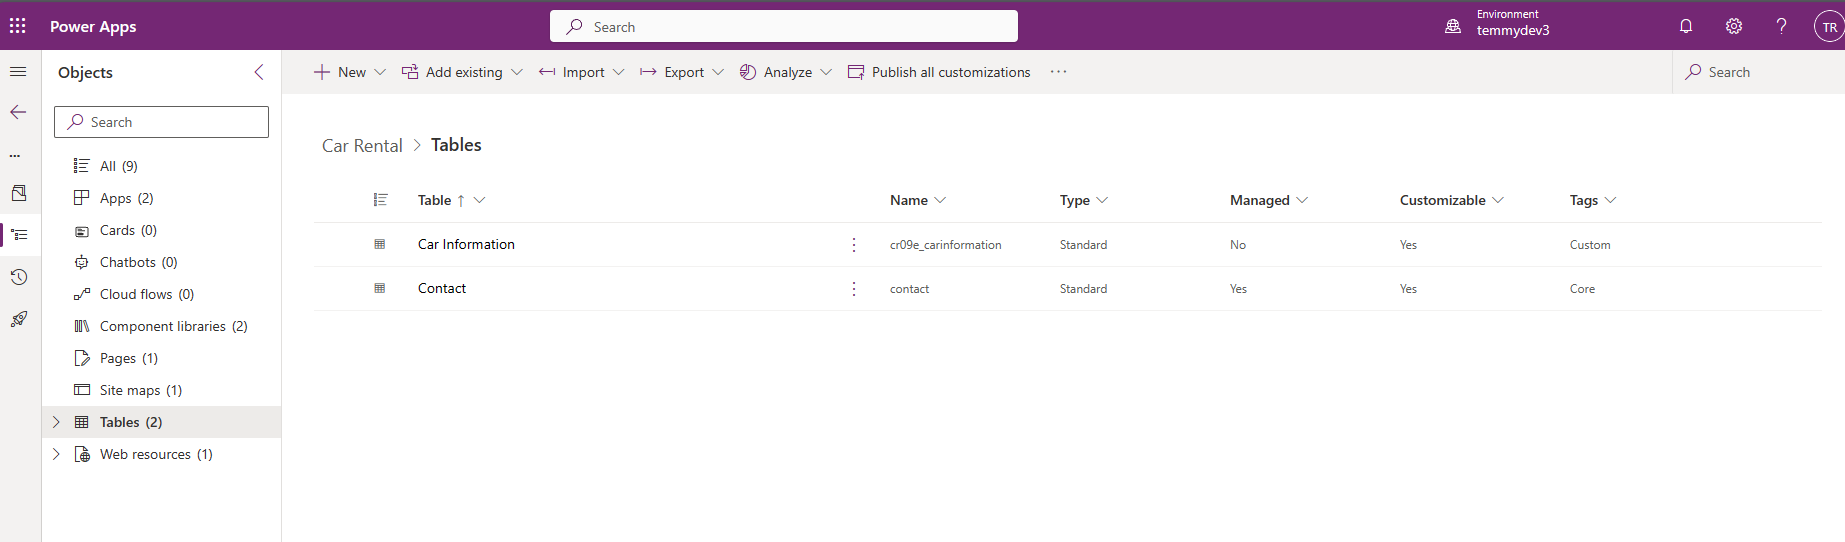
The specified tables that I will use are Contact and Custom Table Car (which I generated using Copilot - including the sample data 💪):
Then, for the Canvas Apps, I created the below App:
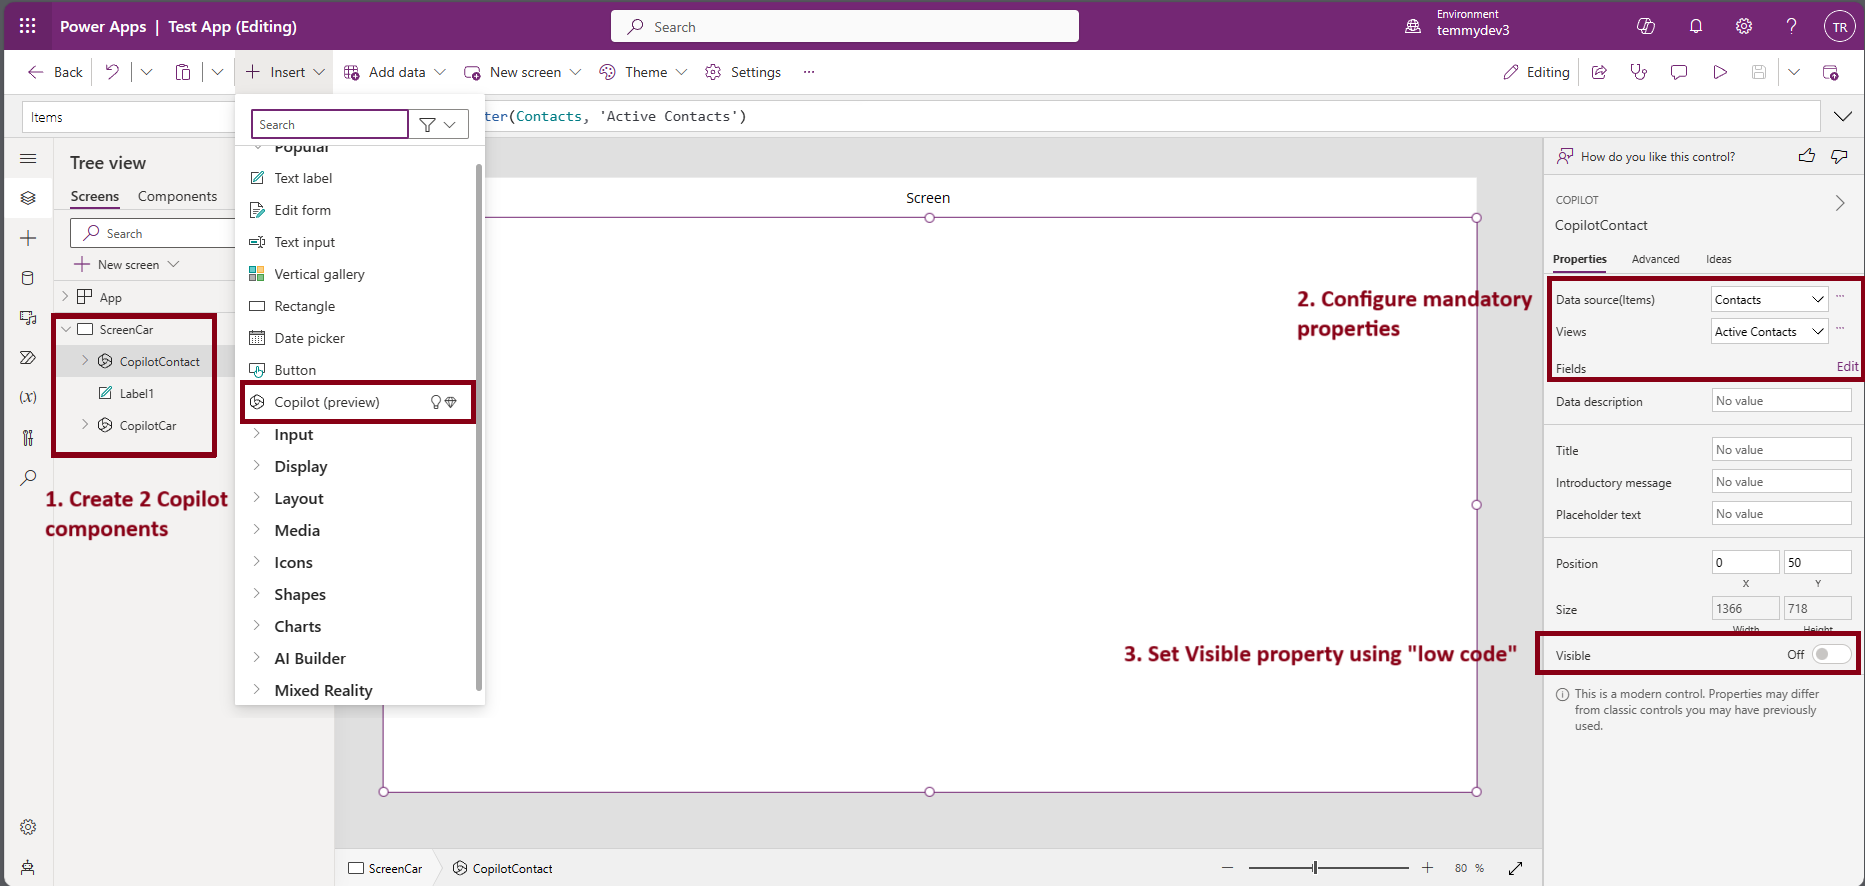
As you can see, the App contains one screen with two AI Copilot Controls. There are some mandatory settings before we can use the AI Copilot Control (#2 in the picture). Then, the last is to set the code to change the visibility of the AI Copilot component based on the Parameter supplied when opening the App:
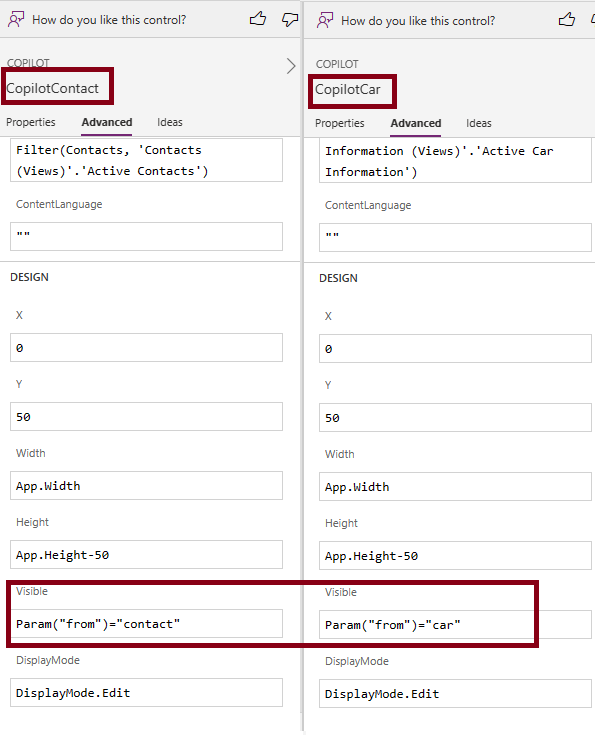
We will supply this Param("from")via JavaScript which I will explain in a bit. As you can see, from the Canvas App, we can get the parameter using the Paramfunction and supply the string parameter that we will send.
JavaScript and how to call it
Next, I prepared the below JS code:
var fx = fx || {};
(function() {
    this.getAppUrl = async function() {
        const result = await Xrm.WebApi.retrieveRecord("canvasapp", "4aae9e4b-6f2b-4127-907b-c1a378a24466", "?$select=appopenuri");
        return (result || {}).appopenuri;
    };
}).apply(fx);
var commandBar = commandBar || {};
(function() {
    this.openUrl = async function(from) {
        const appUrl = await fx.getAppUrl();
        if(!appUrl) return;
        const url = `${appUrl}&from=${from}`;
        Xrm.Navigation.openUrl(url, {height:800, width:1000});
    };
}).apply(commandBar);
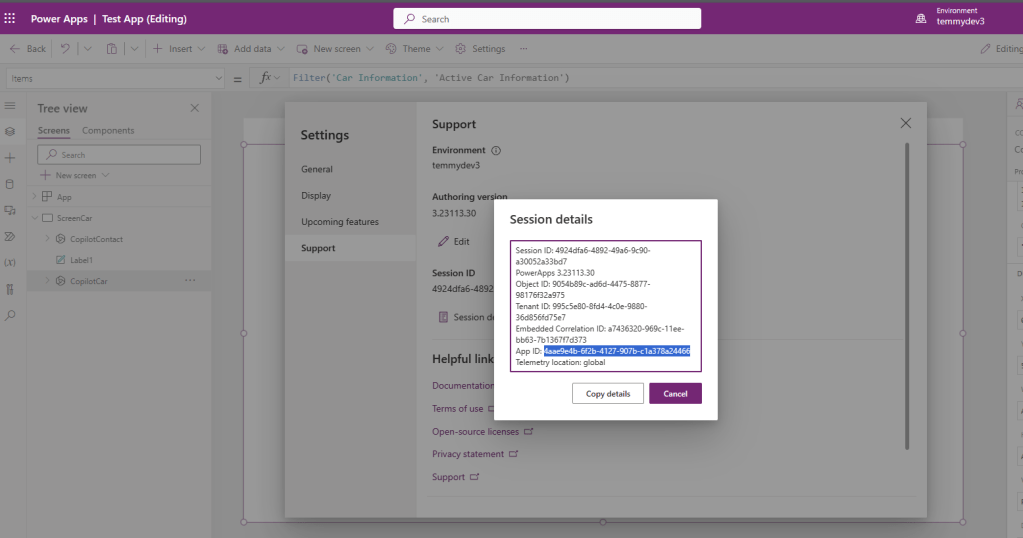
As you can see when we created the Canvas App, automatically we had an ID that we could hardcode in case we want to call it. From the Canvas App > Settings >Support > Sessions Detail you can get the AppId:
Back again to the code, we will retrieve the information from table "CanvasApp" and then we will select column "appopenuri". The sample of the URL will be like:
| https://apps.powerapps.com/play/e/[environmentid]/a/[appid]?tenantId=[tenantid]a&hint=1cab393a-e9e6-4992-a964-f360c012919e&sourcetime=1702098878618 |
|---|
Sample appopenuri
Once we get the "appopenuri", we just need to combine the string with the parameter that we want to add (which is "from" in line #16). For opening the Canvas App, we will use Xrm.Navigation.openUrl.
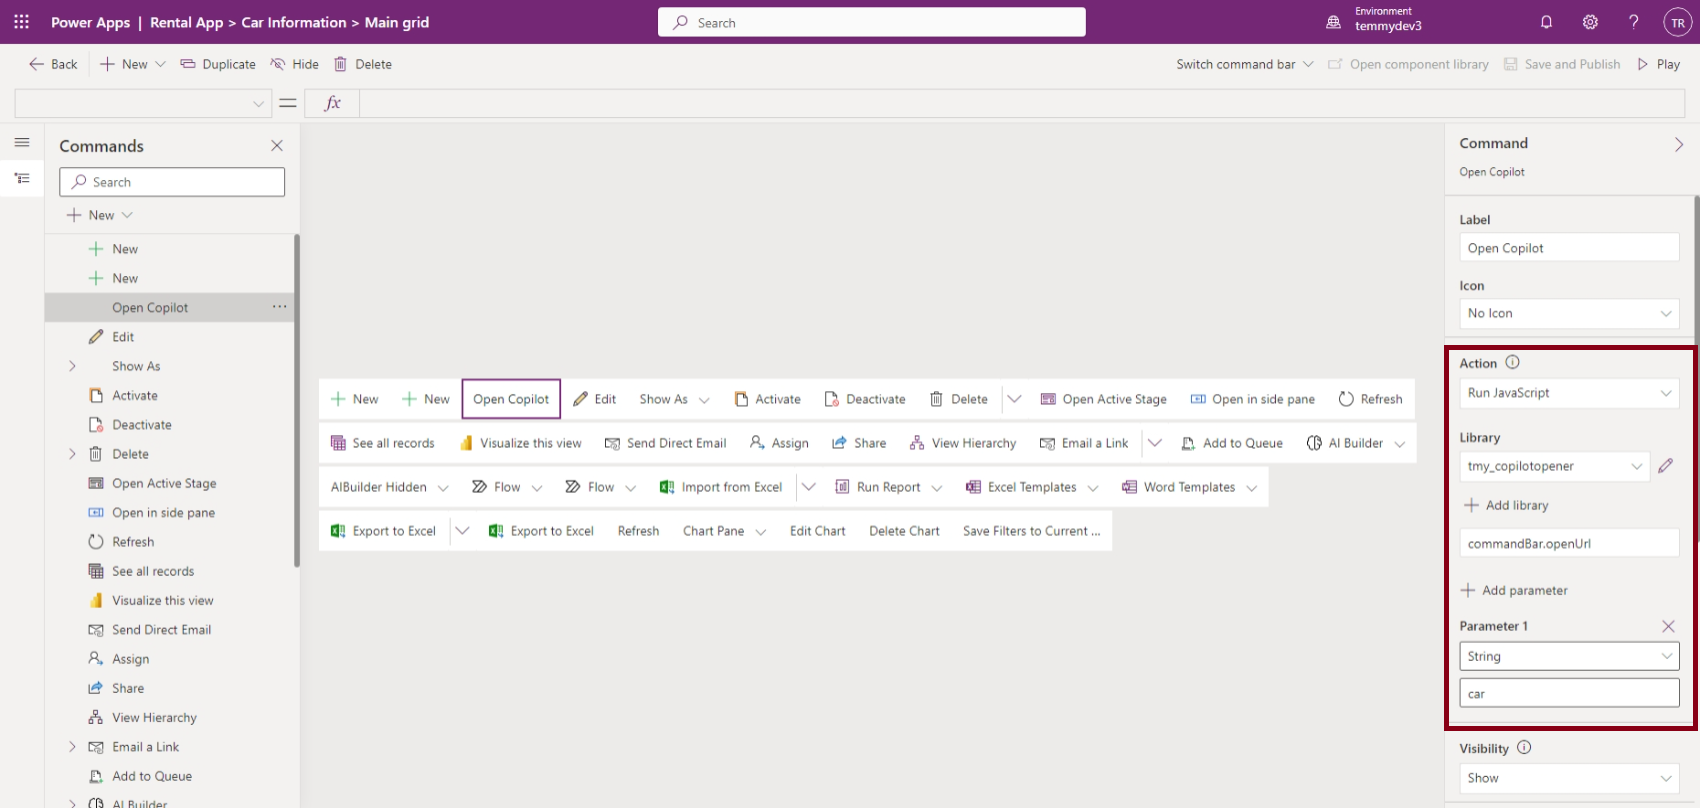
Last, we only need to call the JavaScript. In this demo, I edit the Command Bar of the Car and Contact table > create new Button > and set the Action like below:
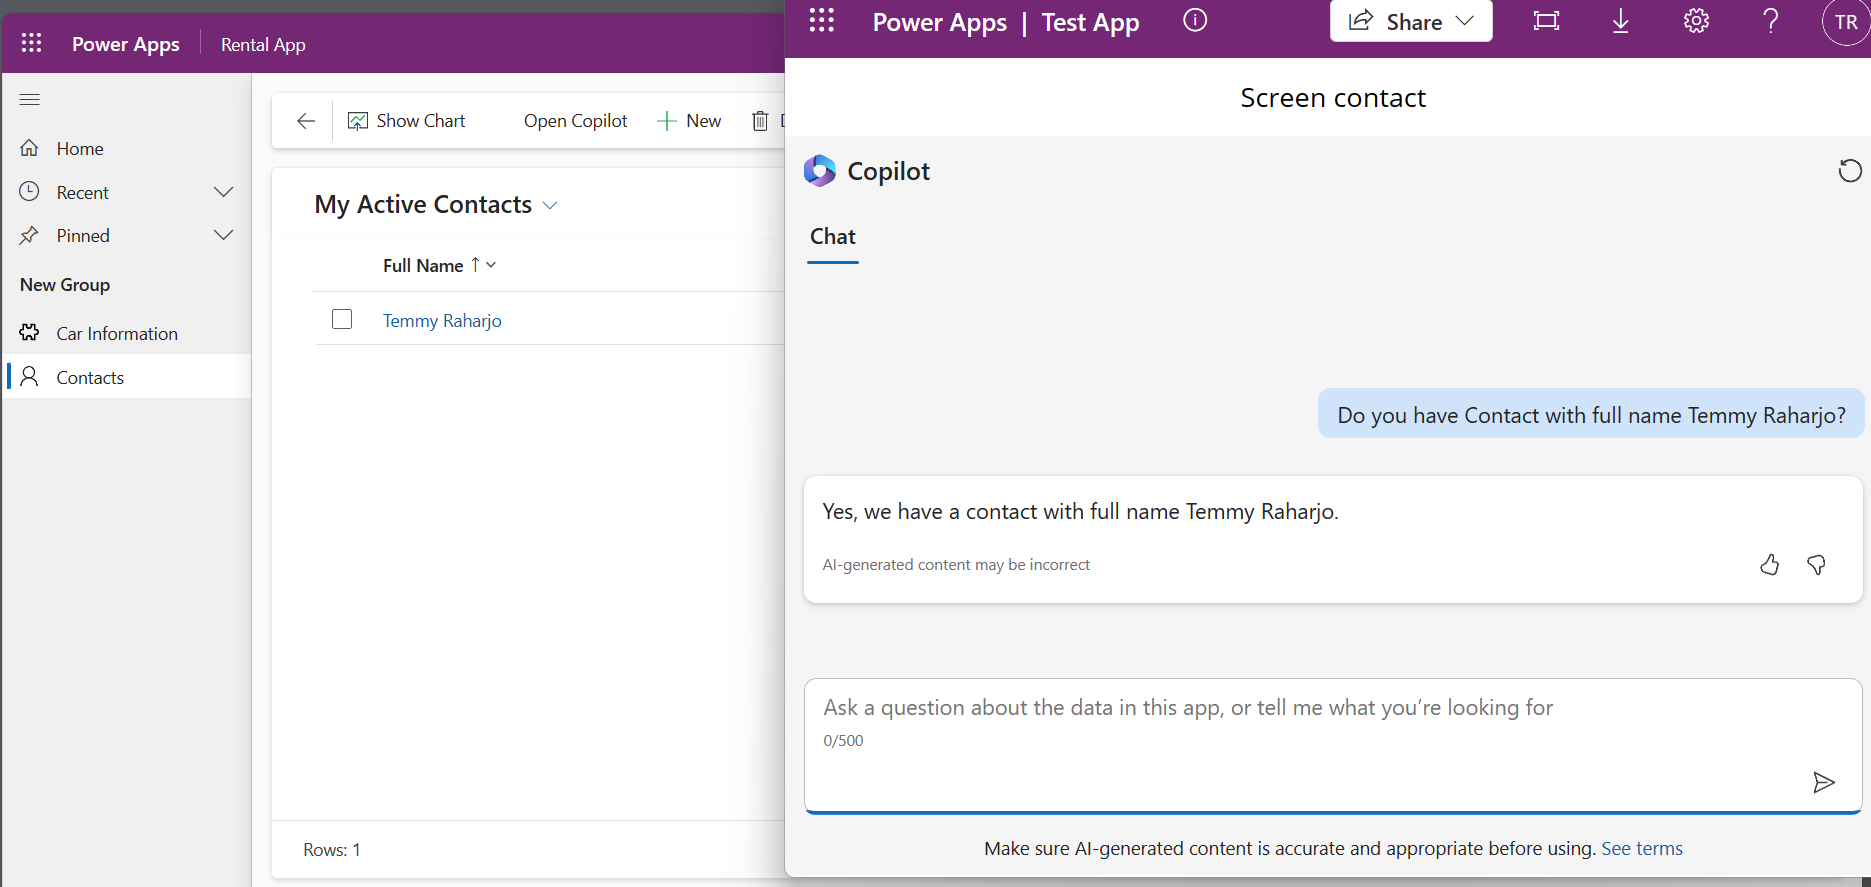
Once you are done with all the above, you can test, and here is the screenshot from my end:
Happy CRM-ing!
Leave a comment
Your comment is sent privately to the author and isn't published on the site.