Architecture , dynamics-crm , powerplatform
Let's learn about the Dataflows

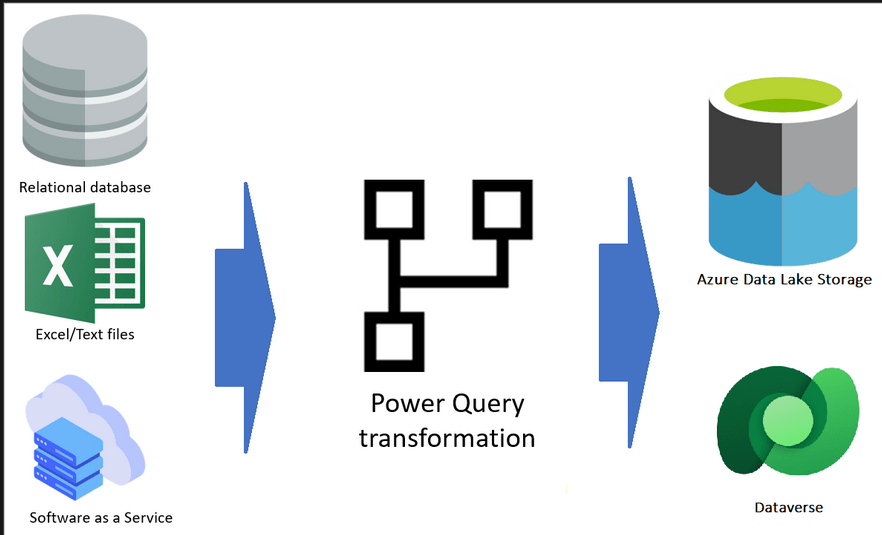
Have you ever heard about Dataflows? Dataflowsis an automation to copy (from various data sources) > Transform (Power Query Transformation - which leverages the same technology with PowerBI) > and paste (to Dataverse/Power BI workspace/Azure Data Lake Storage Account). I will not re-invent the wheels with the diagram that I took from the documentation (which is already self-explanatory):
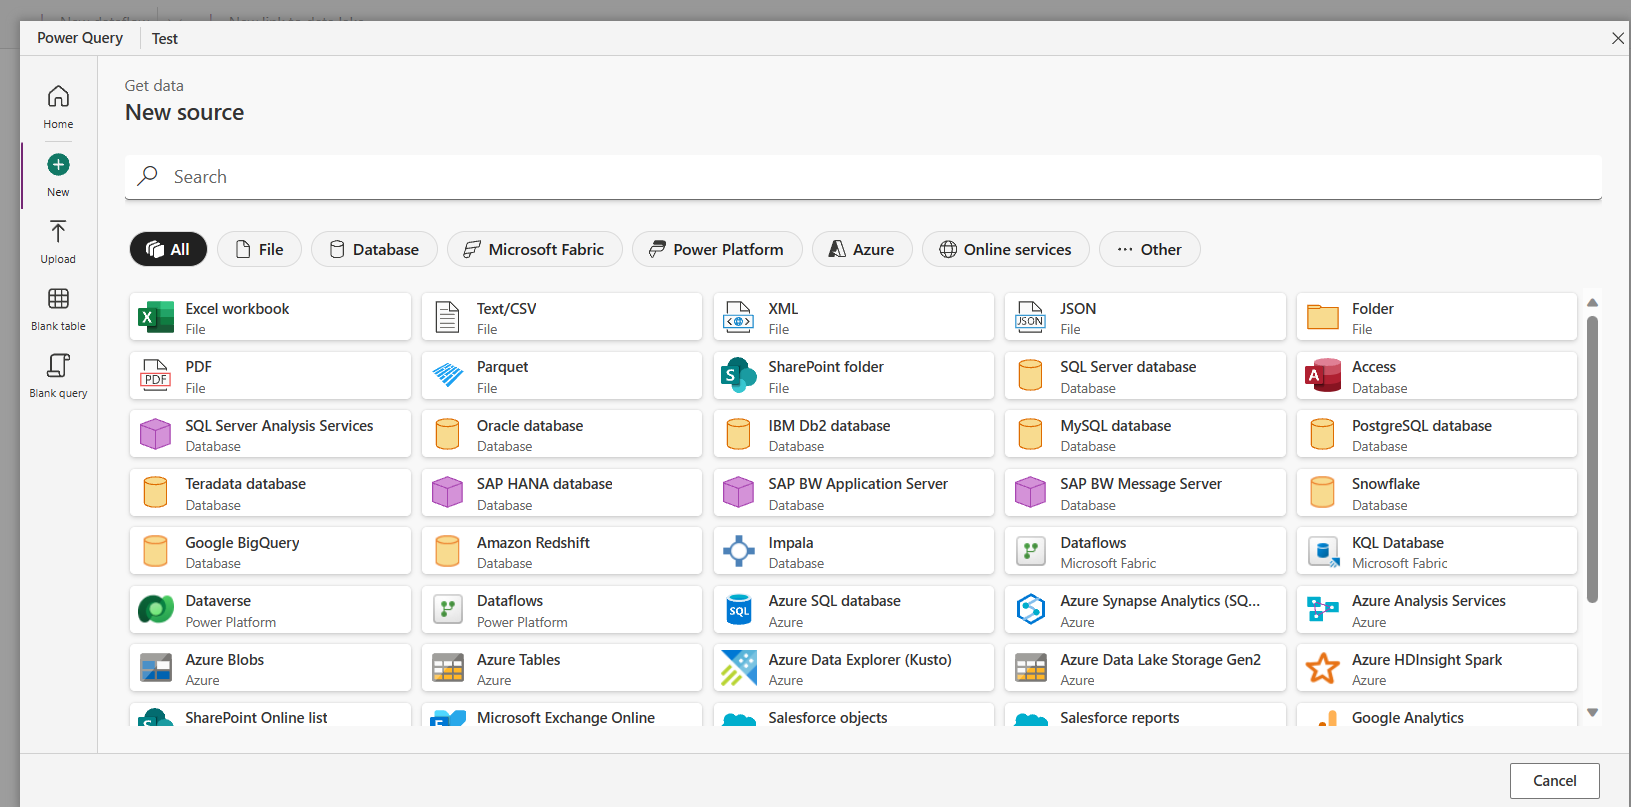
The official documentation said that we selected more than 80 data sources. The image below is a sample of the data sources:
Today, we will learn to copy data from one Dataverse to another Dataverse environment (the easiest implementation). But, in reality, the sample scenario that you can do is to set the source from your on-prem DB and target the data to Dataverse. In this scenario, you can turn your legacy system and fully leverage Power Platform capabilities (including implementing the Copilot). 🔥
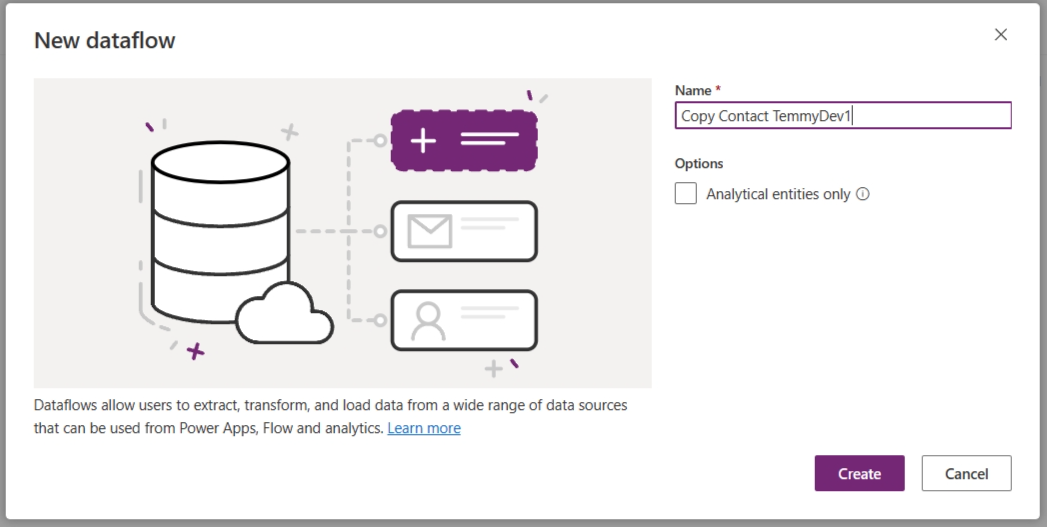
Create your first dataflow
Go to make.powerapps.com > go to the Dataflows (if this option is not there, you need to go to "More" and find it) > New dataflow > set the name for your dataflow:
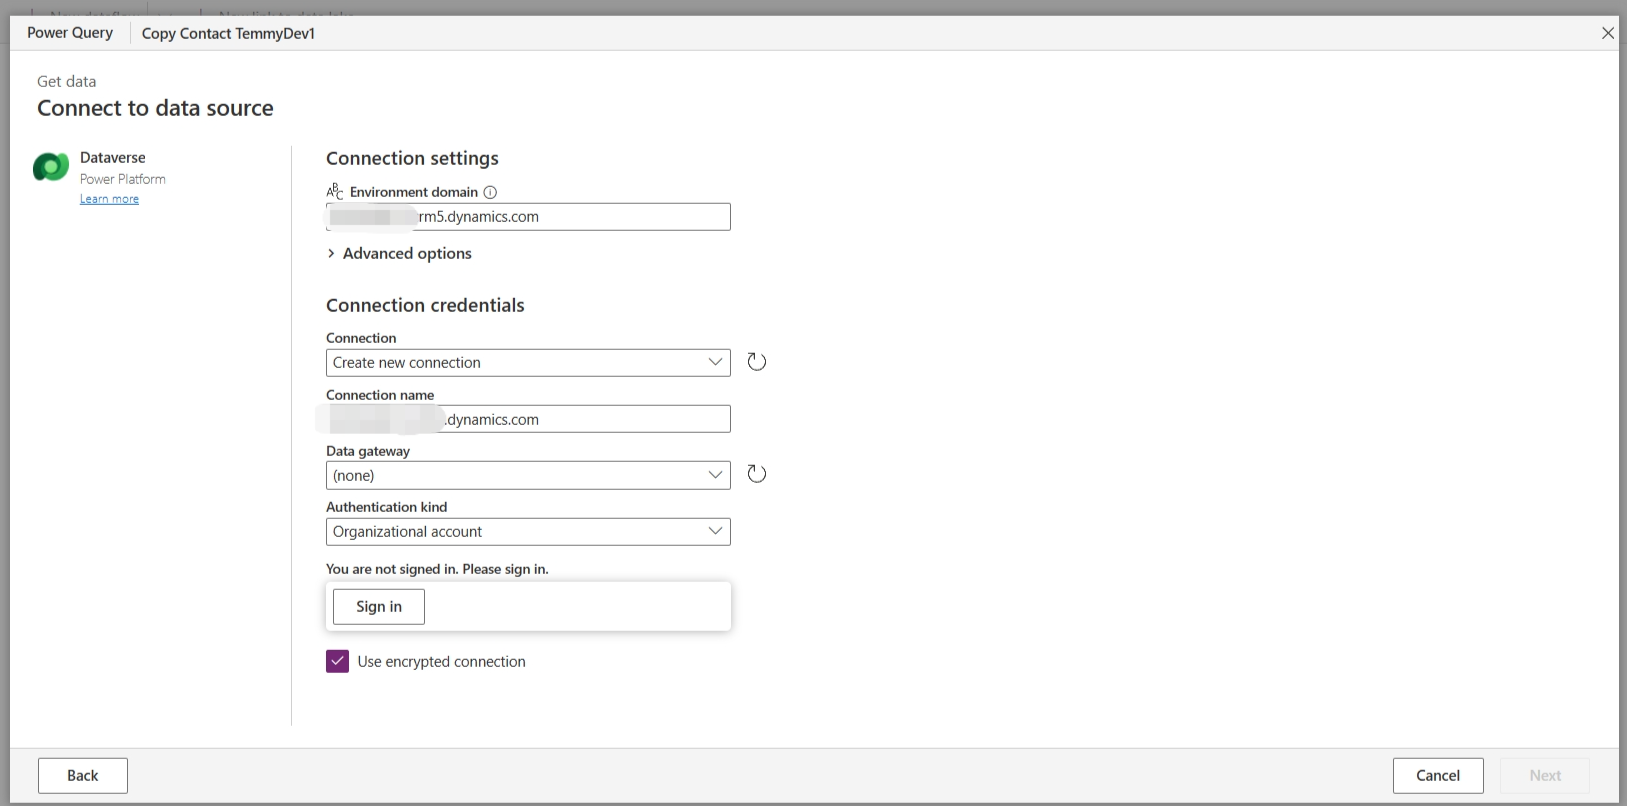
Once you click the "Create" button, you will be redirected to the data sources you can select. For this demo, I chose "Dataverse" and you can fill in the information needed to connect to the Target Env:
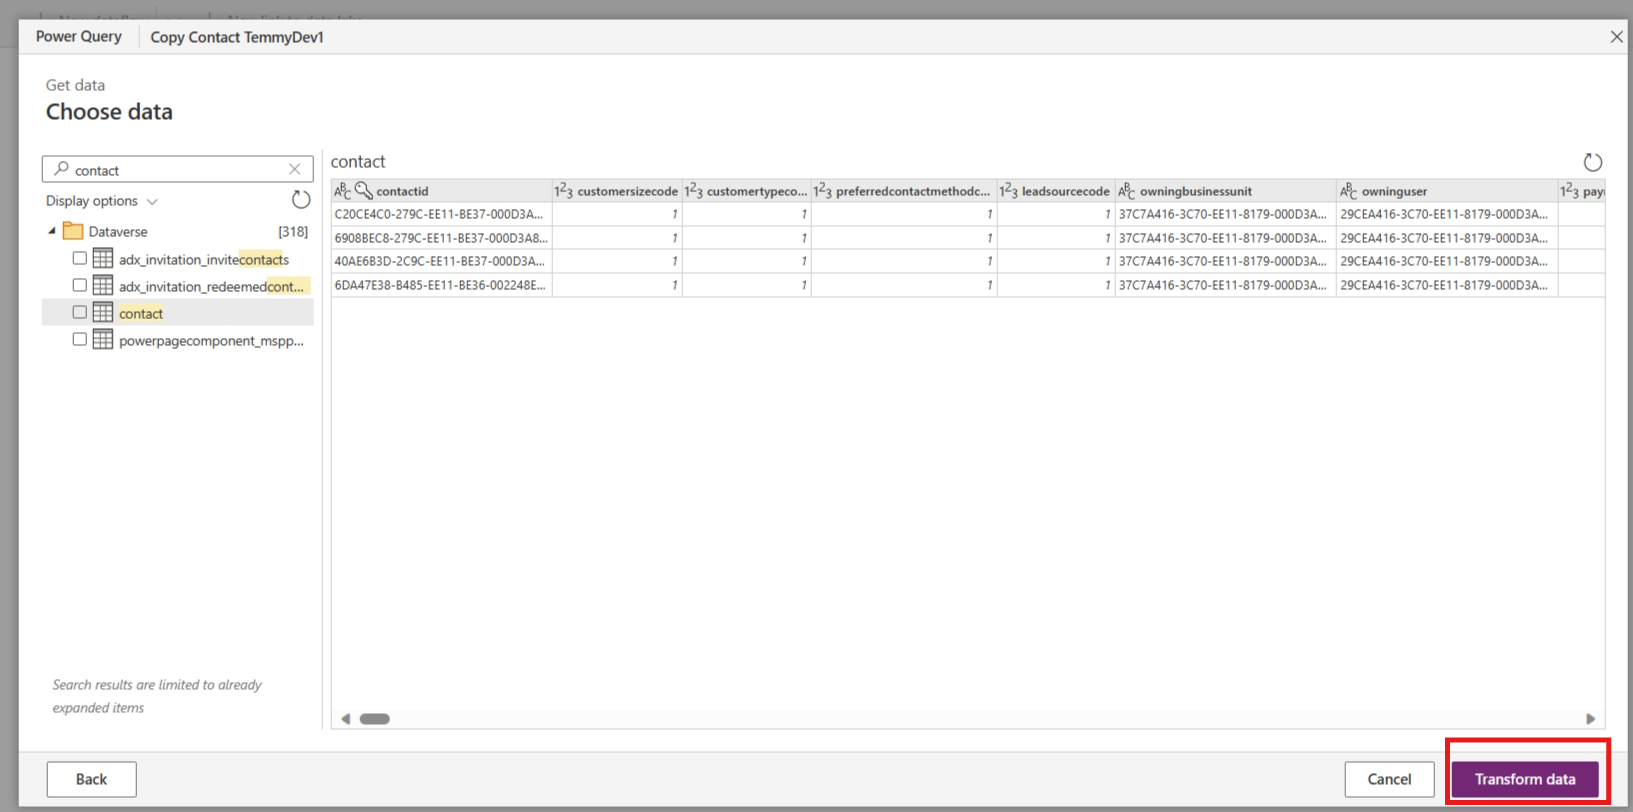
Once you click Next, this information will be saved as a Connection component (which you can put in the solution later for Export-Import purposes) and you can select which table you want to work on it. Again, in this demo, I'll choose Contact > You can click the "Transform data" button:
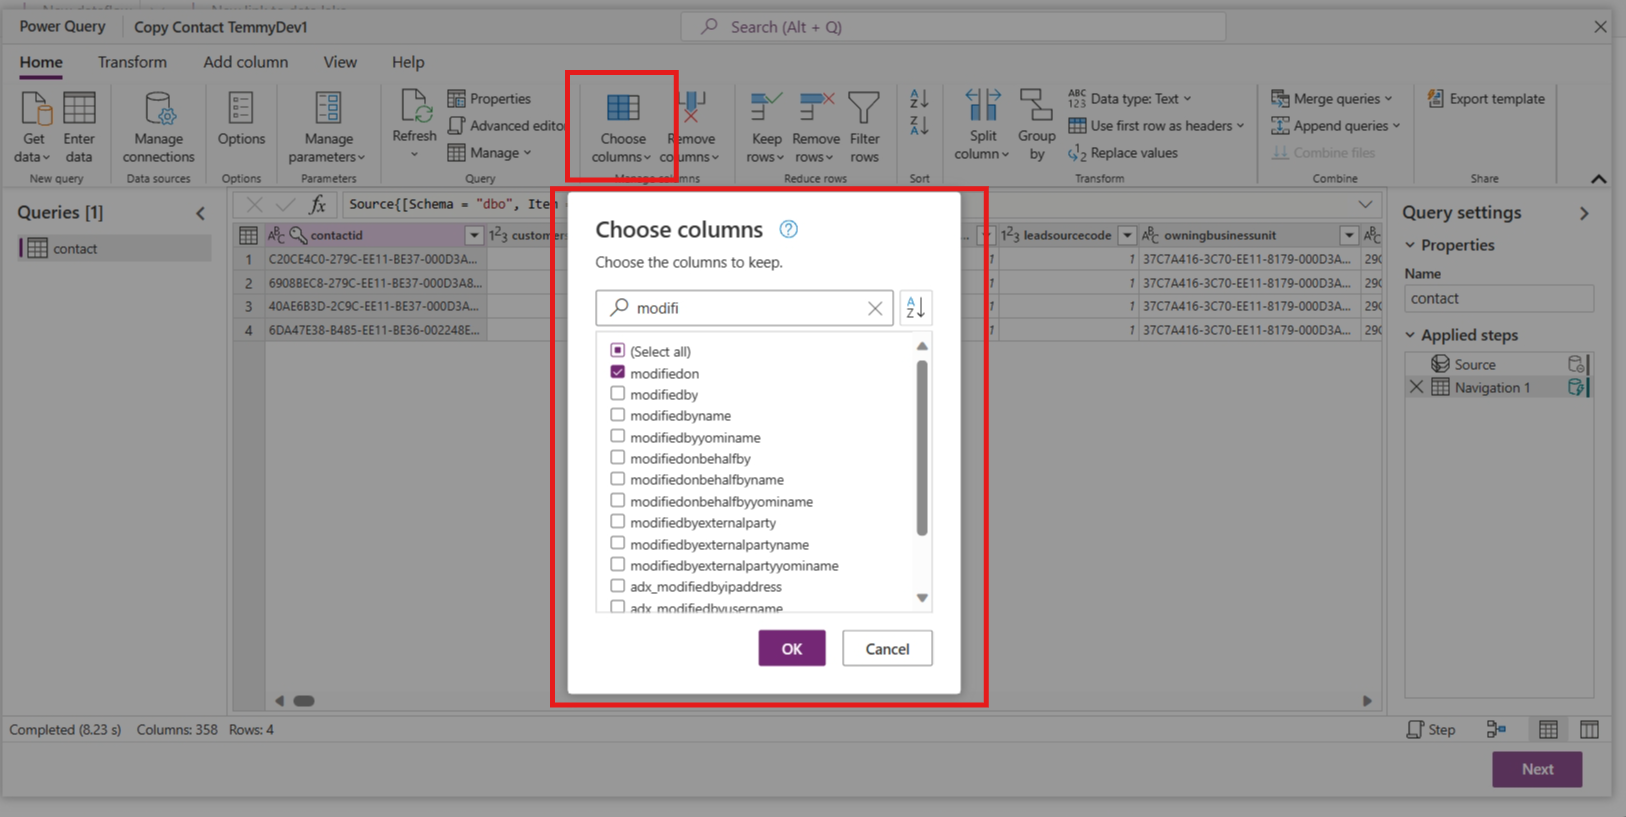
In the next dialog, you can start work on how to transform the data. In my case, I just need to choose the columns necessary for the demo: ContactId, FirstName, LastName, ModifiedOn, and CreatedOn:
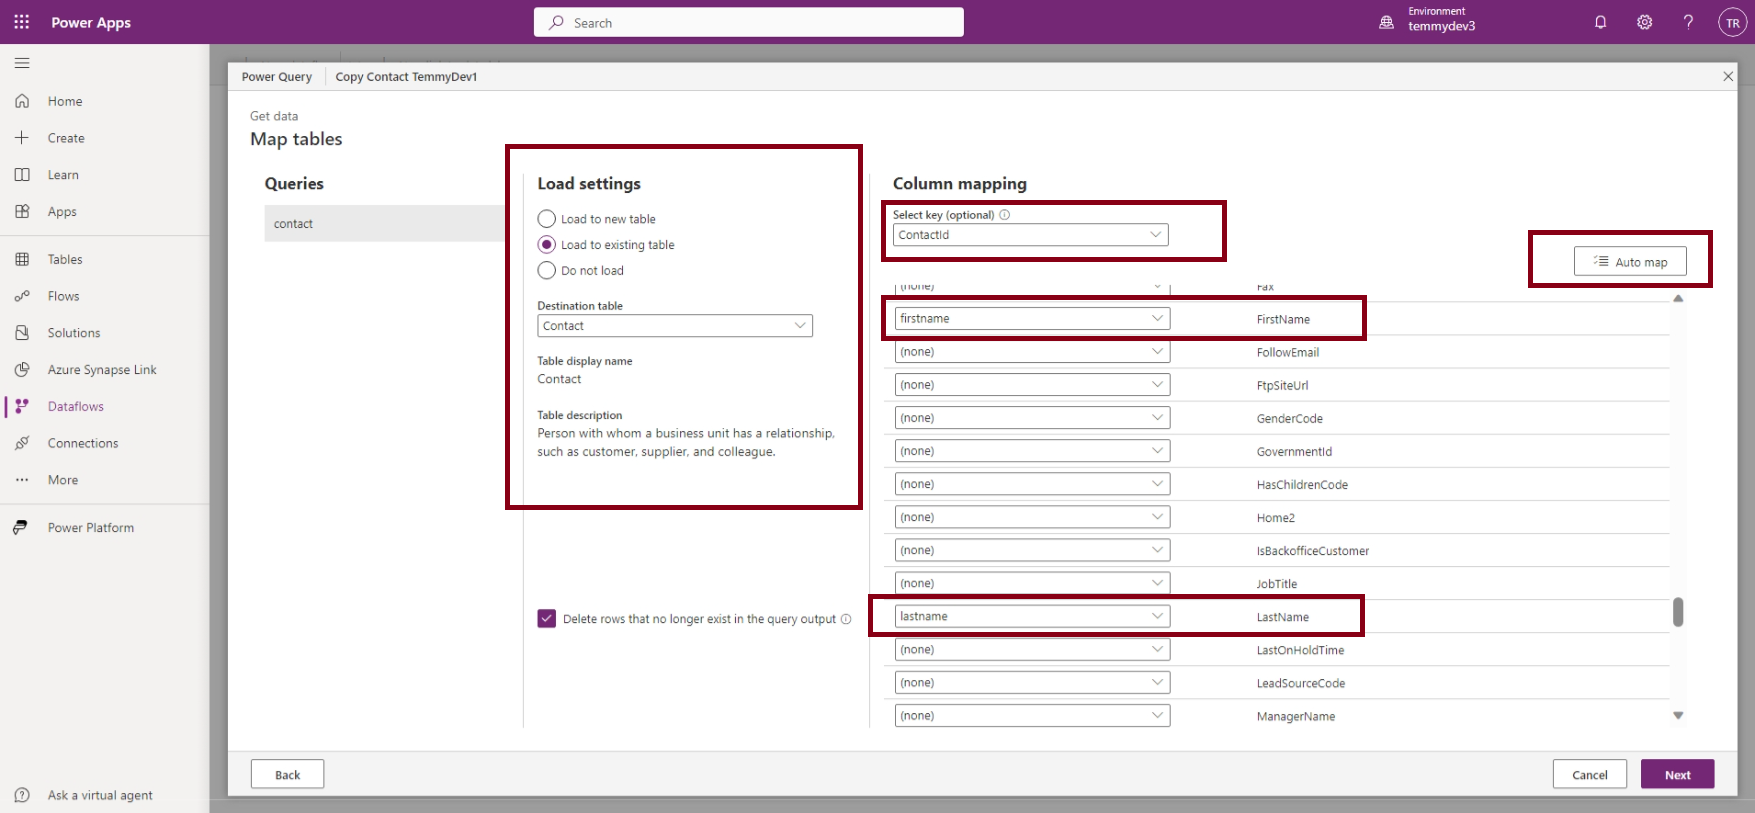
Once done, you can hit the "Ok" and "Next" to go to the Mapping dialog. In this dialog, you can choose to create a new Dataverse table (on the target environment) or you want to select the existing table. In the below image, you can see that I chose to use the existing Contact table and map the necessary attributes (you also can hit the "Auto map" button). I also selected the "Delete rows that no longer exist in the query output":
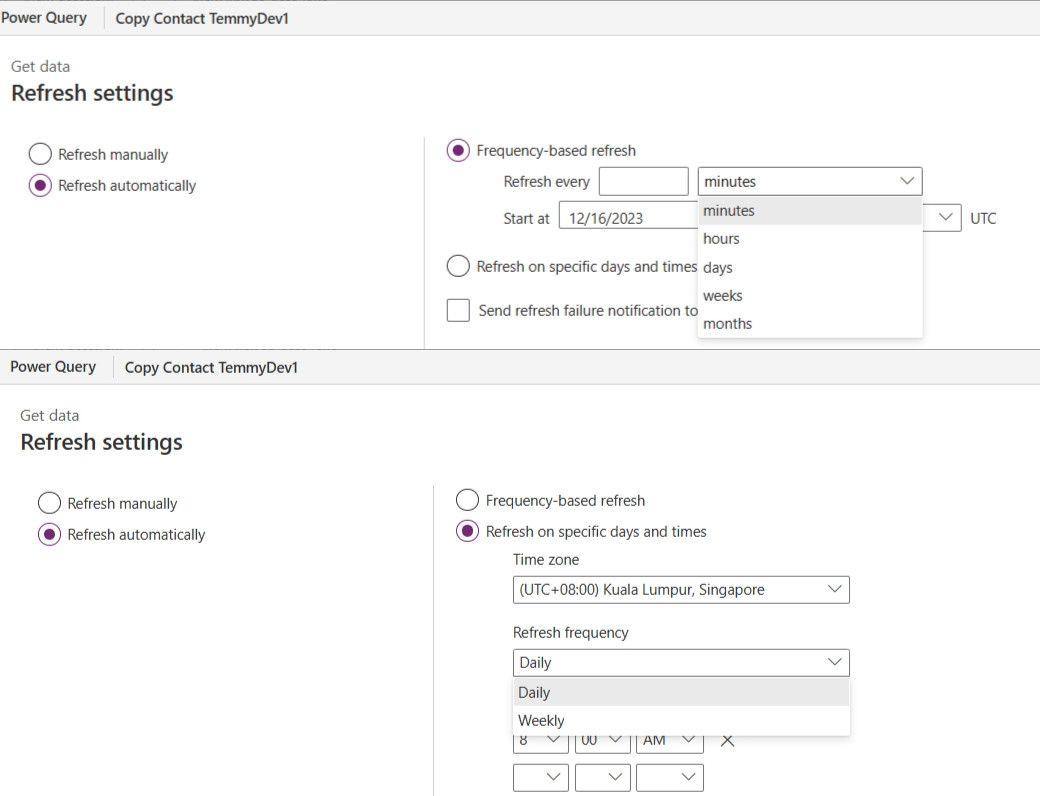
In the Refresh settings dialog, I chose to use "Refresh manually" (but you also can choose to have automation):
Full refresh behavior
With the default setting, we actually get the full refresh behavior. Meaning, the system will scan the full source table and sync the target table.
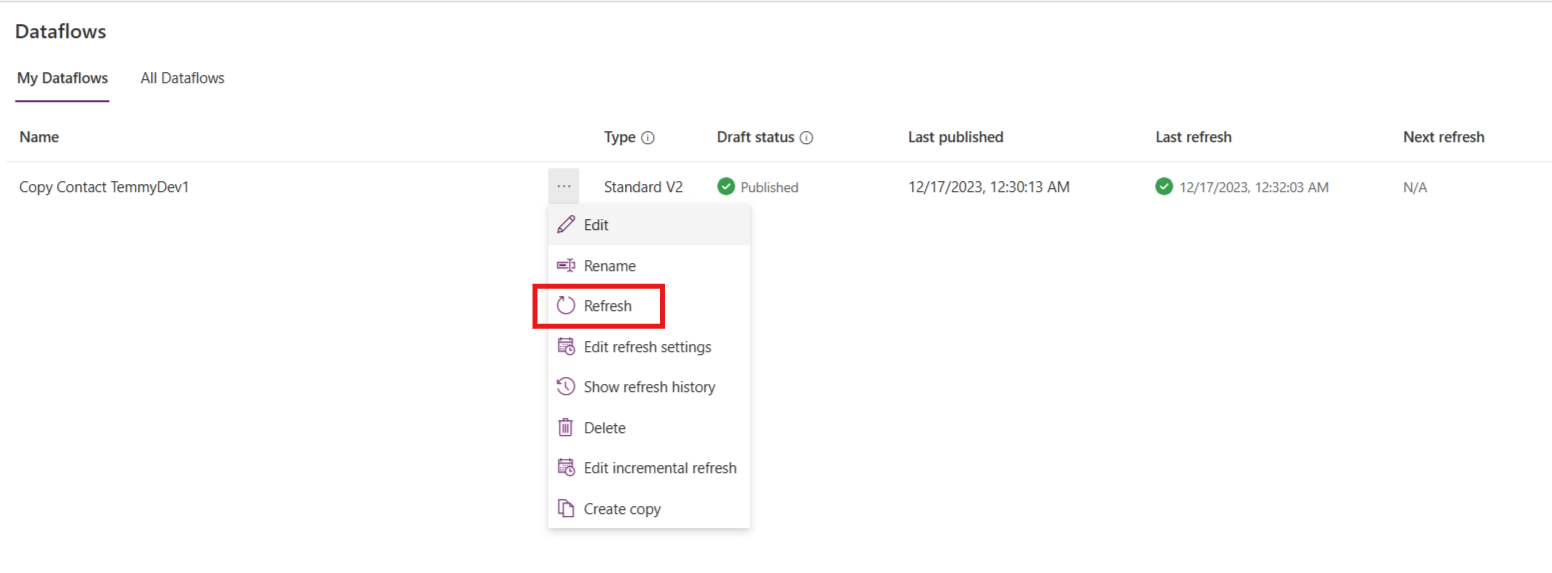
I created several records in the source environment > go to make.powerapps.com > Dataflows > select your dataflow > hit the "..." > click the Refresh option:
Once the refresh process is completed, you can review the sync process (in my testing, for around 4-5 rows, it needs 2-5 mins for full refresh). In the below image, you can see that the "ContactId" is the same from the "Source" to the "Target" environment:
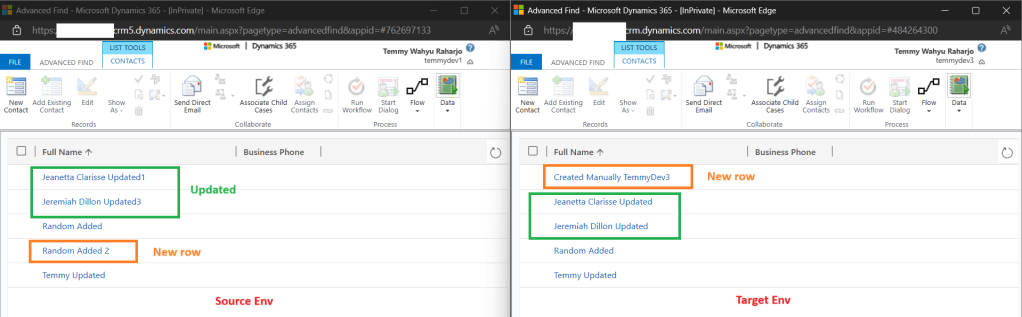
I also tried to update several data in the Source Environment and create new rows in the Source and Target environment:
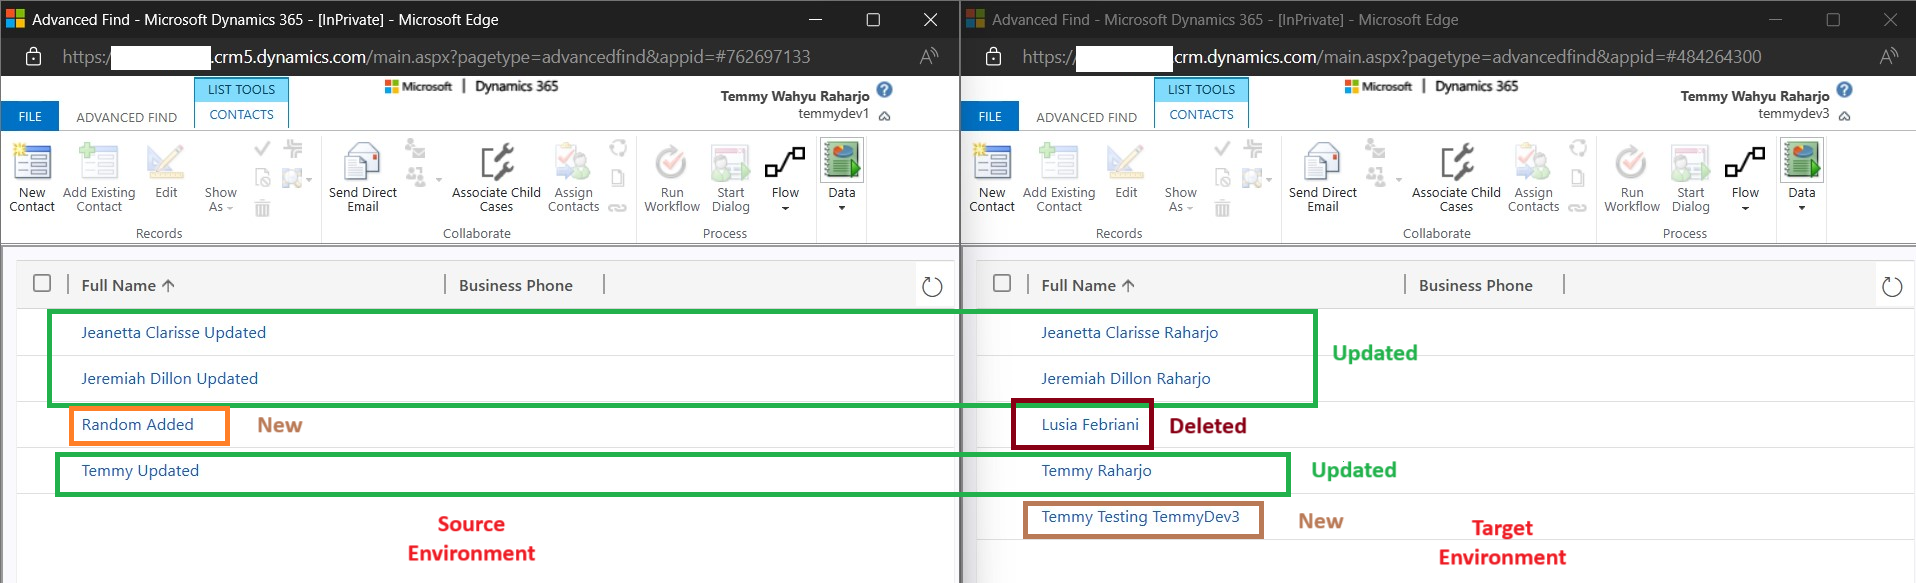
Once I'm done modifying, I click the Refresh process again, and here is the result:
As you can see, because we click "Delete rows that no longer exist in the query output", then the final result after the sync is the same as the Source environment.
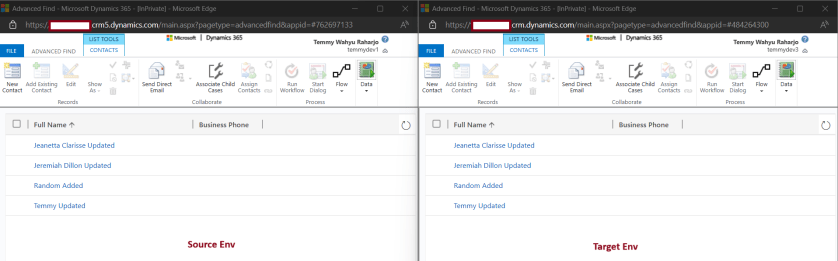
If we didn't click "Delete rows that no longer exist in the query output", here is the data that I prepared:
Once we click "Refresh" here is the result:
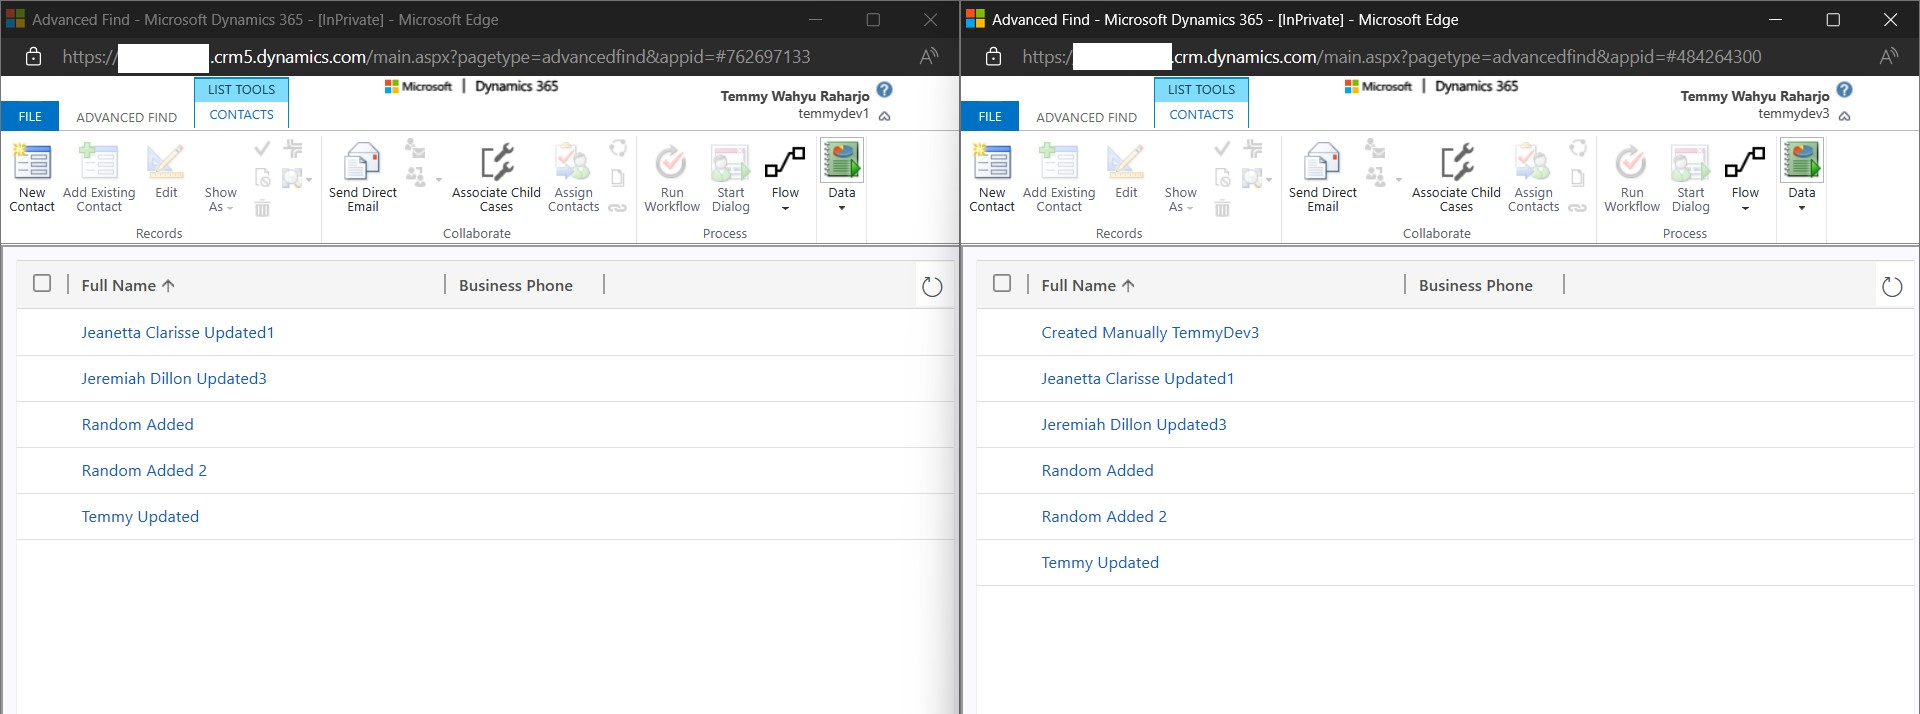
As you can see, the record that we created in the Target Environment will still exist and the updated rows from the source will be synced.
Incremental Refresh Behavior
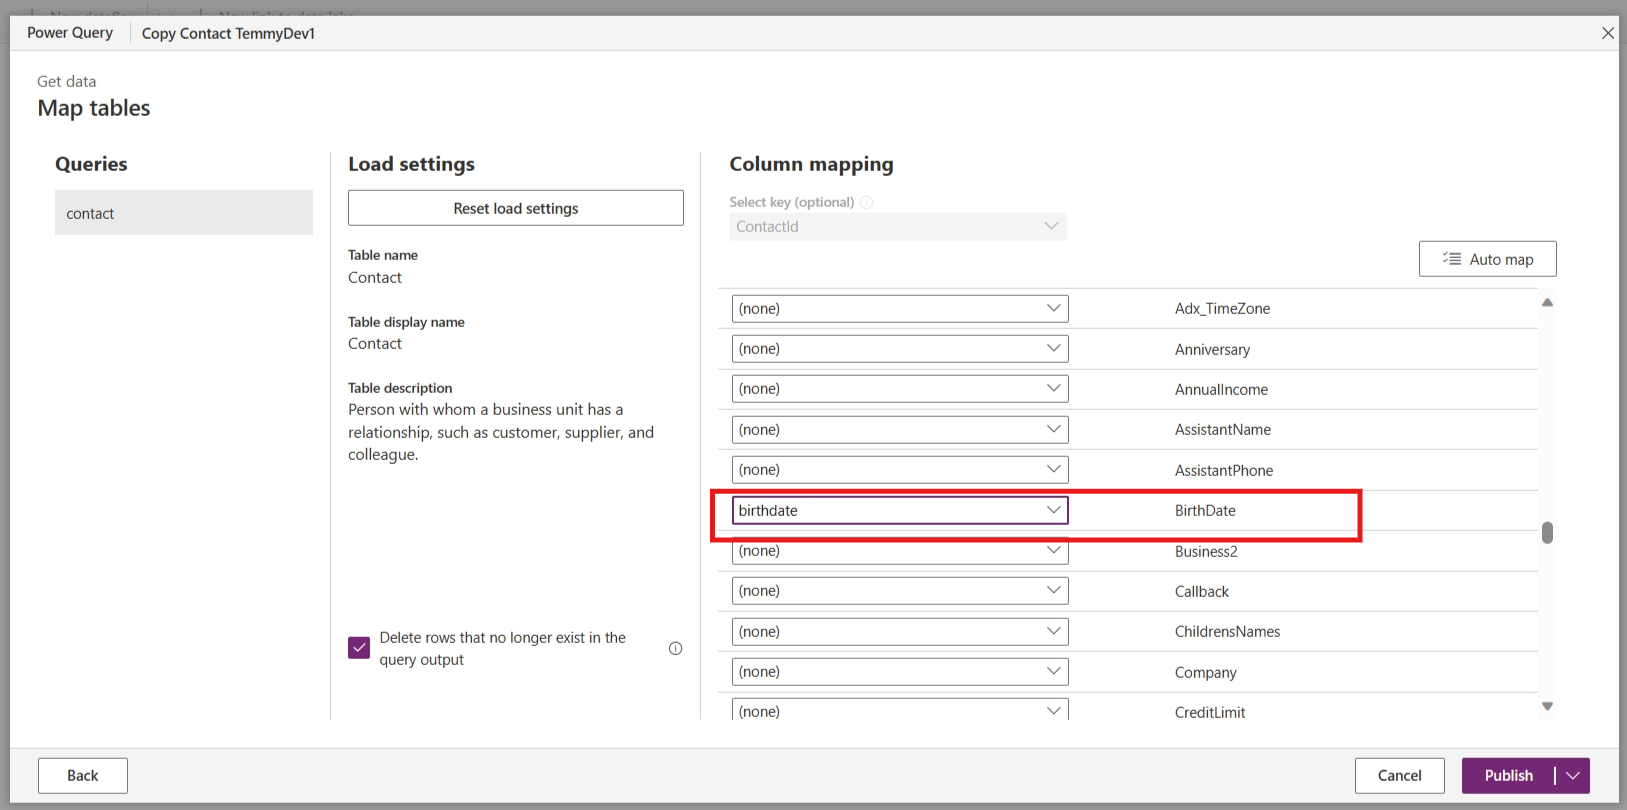
First, we need to have an additional date time that is set-able for us. In this example, I will use the Birthday column and update the Columns and Mapping:
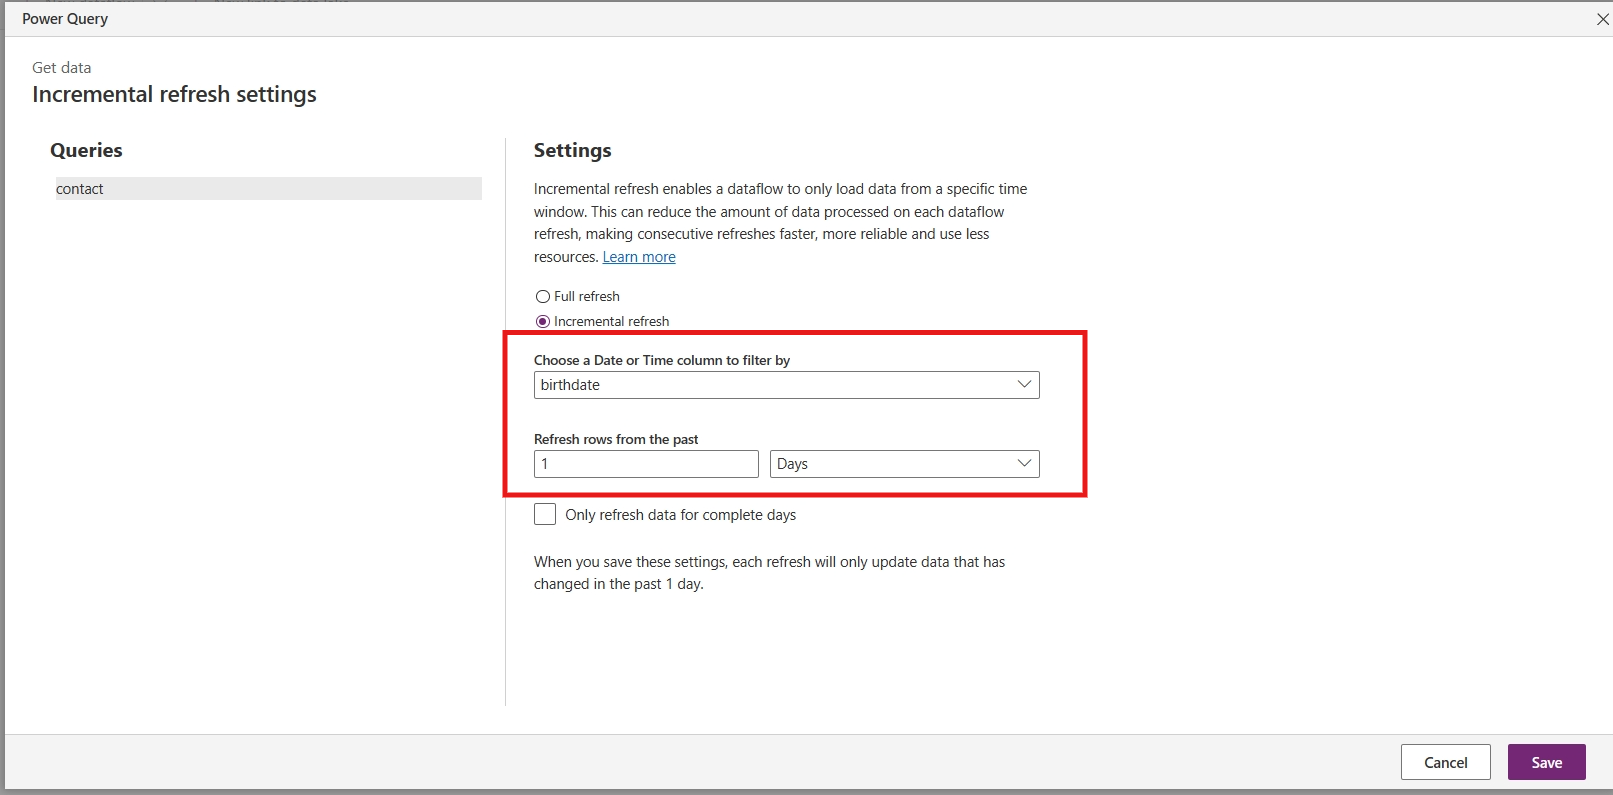
Once you are done, you can click Publish. Next, go to your dataflow > ... > Edit incremental settings > set to "Incremental refresh" and update like the below:
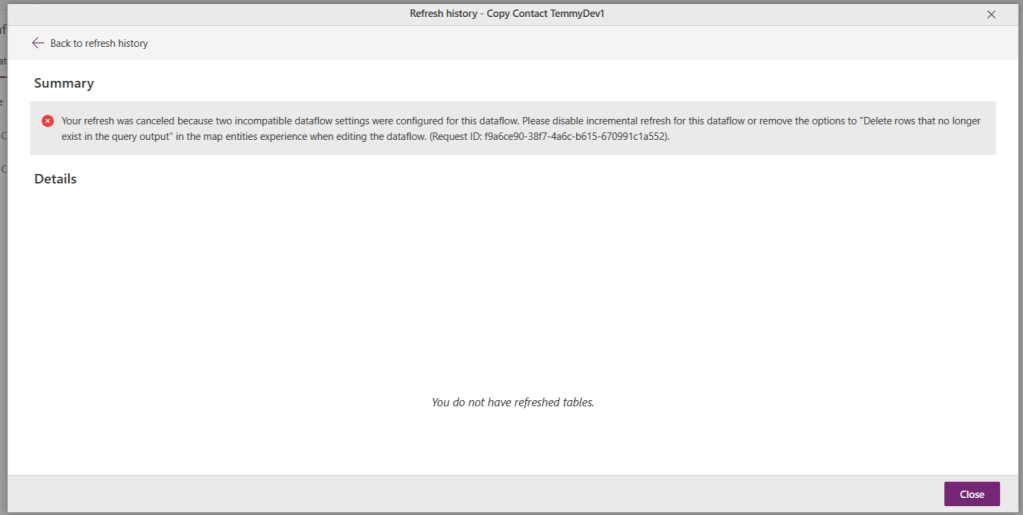
Once you save the above setting, then you "Refresh" the dataflow. You will encounter an error '"Your refresh was canceled because two incompatible dataflow settings were configured for this dataflow. Please disable incremental refresh for this dataflow or remove the options to Delete rows that no longer exist in the query output in the map entities experience when editing the dataflow':
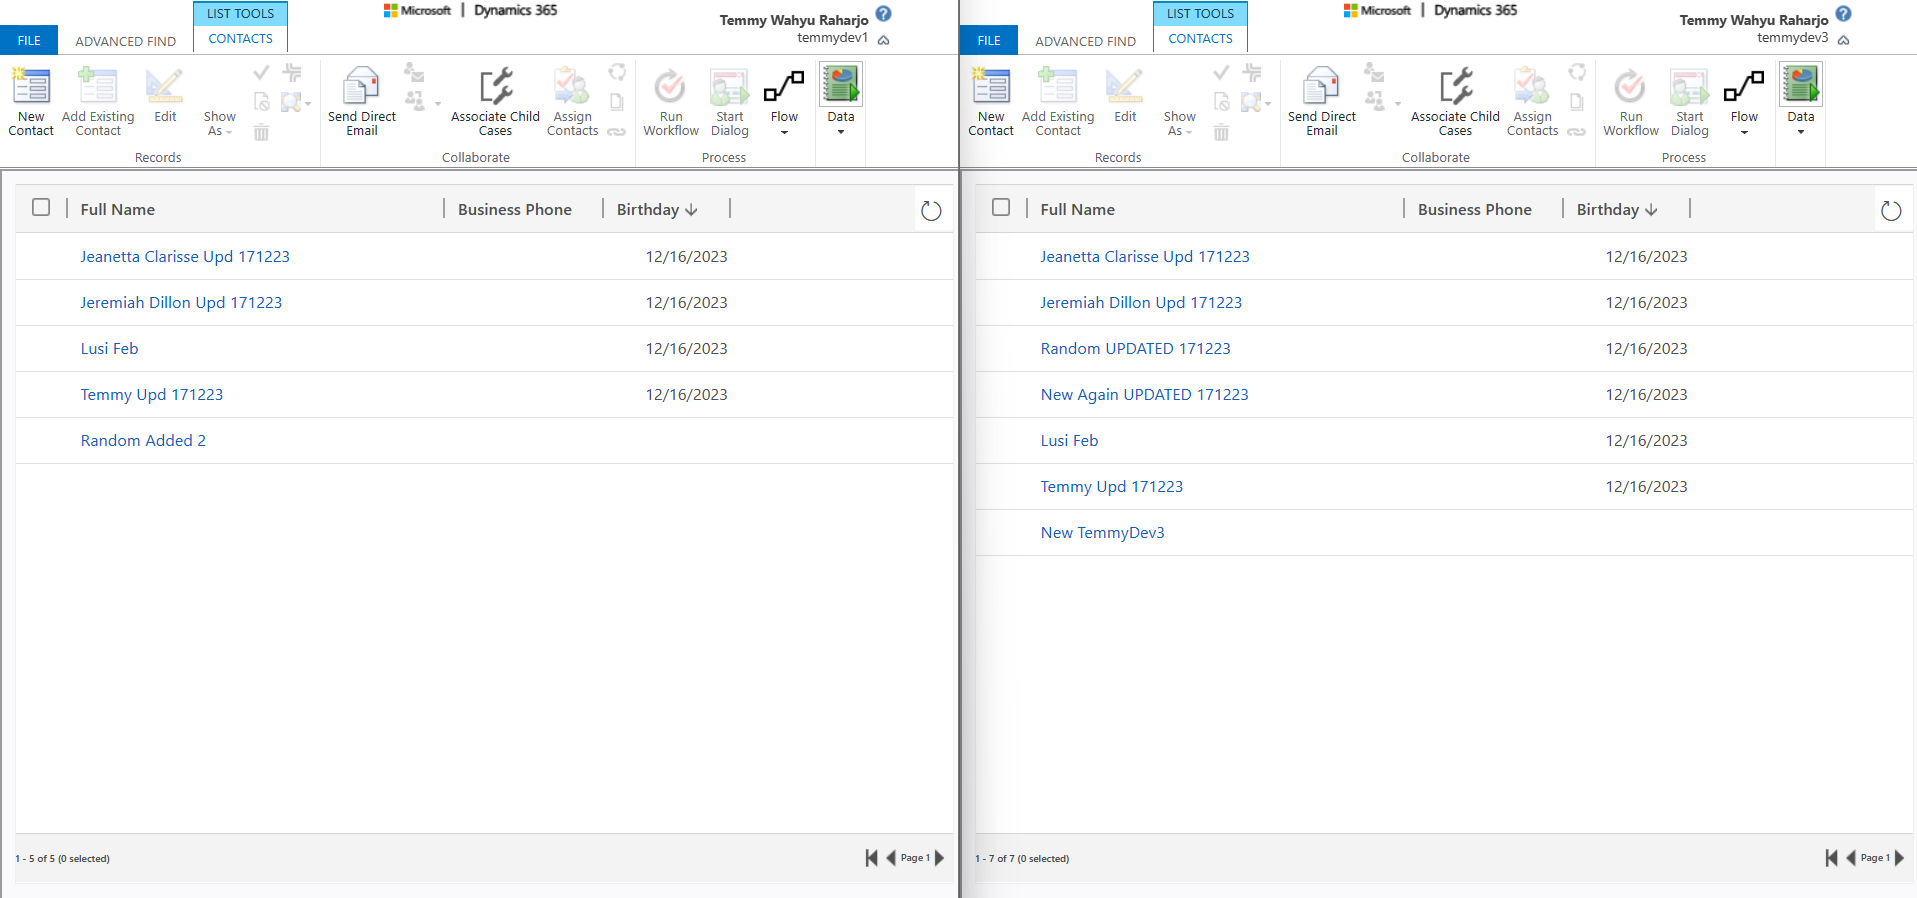
You need to set the mapping > and untick the "Delete rows that no longer exist in the query output". Once the dataflow has been published > I prepared the below modification of the data:
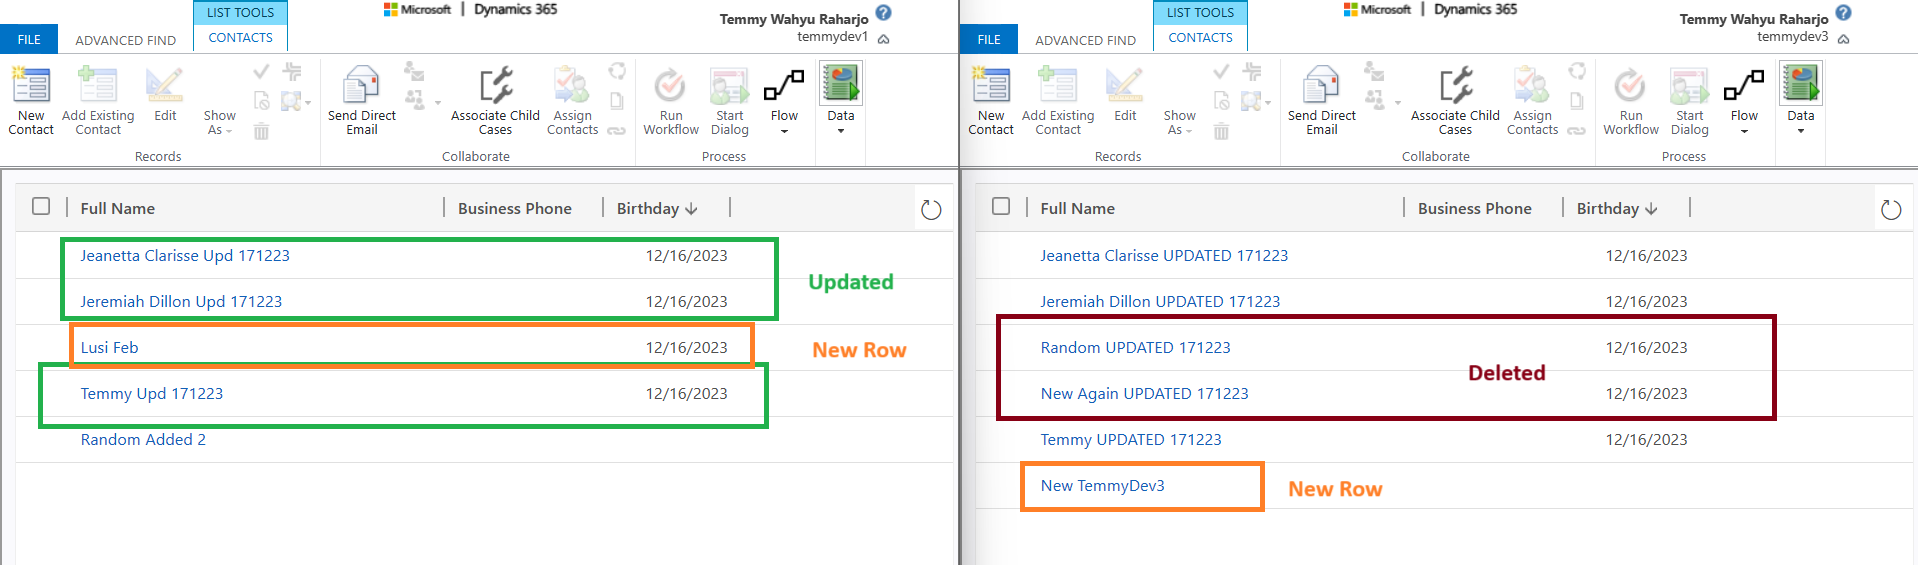
And here is the result (which combination of previous data + new/updated data):
Summary
Here are the key takeaways:
- Full refresh is kinda like a "read-only" mode in the target environment.
- Incremental refresh is the "best practice" as the resources needed will be less and faster.
- We can "refresh" the dataflow using PowerAutomate which you can learn from here.
Leave a comment
Your comment is sent privately to the author and isn't published on the site.