Azure , dynamics-crm , powerplatform , tips
[Virtual Entity - Preview] Setup Azure Cosmos DB SQL API Data Provider

Today we will learn how to set up Virtual Entity in Dynamics CRM using Azure Cosmos DB SQL API Data Provider from this link. For those who don't know what is Virtual Entity is, the purpose of the Virtual Entity is to show data from the external data sources into Dynamics CRM. But in this setup, the data will be read-only.
Create Azure Cosmos DB
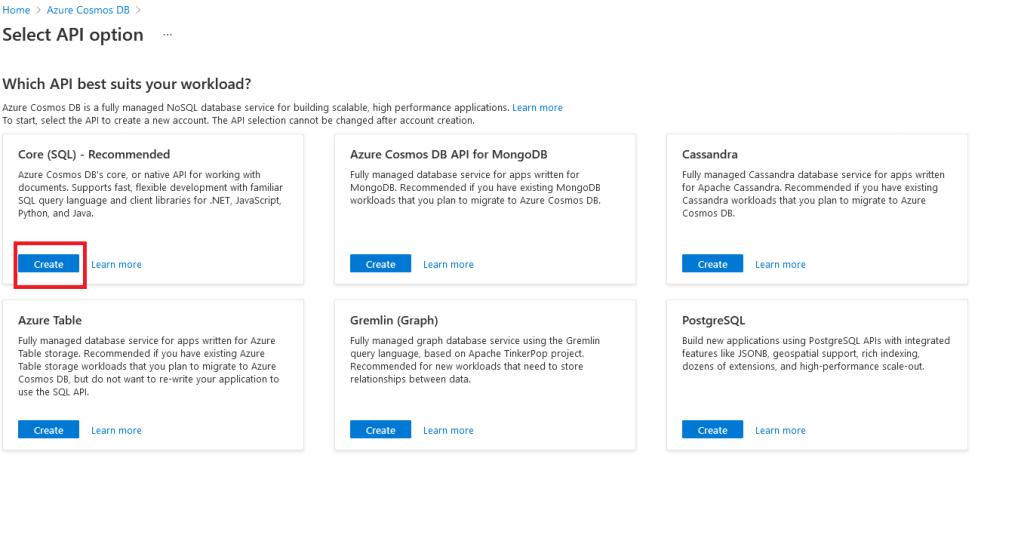
First, we need to go toportal.azure.com > Azure Cosmos DB. From there you can click Createbutton > Select Core (SQL) - Recommended > hit Createbutton.
 Create Azure Cosmos DB
Then the basic create form will be shown and you need to fill in Resource Group, the Name, Location, and Capacity mode. Because this is just for a demonstration purpose, I'll select Serverless(the cheapest option). For more detail about this configuration,you can click here. Then you can click Review + createbutton, and create the resource (you can set Global Distribution, Networking, Backup Policy, Encryption, Tags).
 Azure Cosmos Basics Form
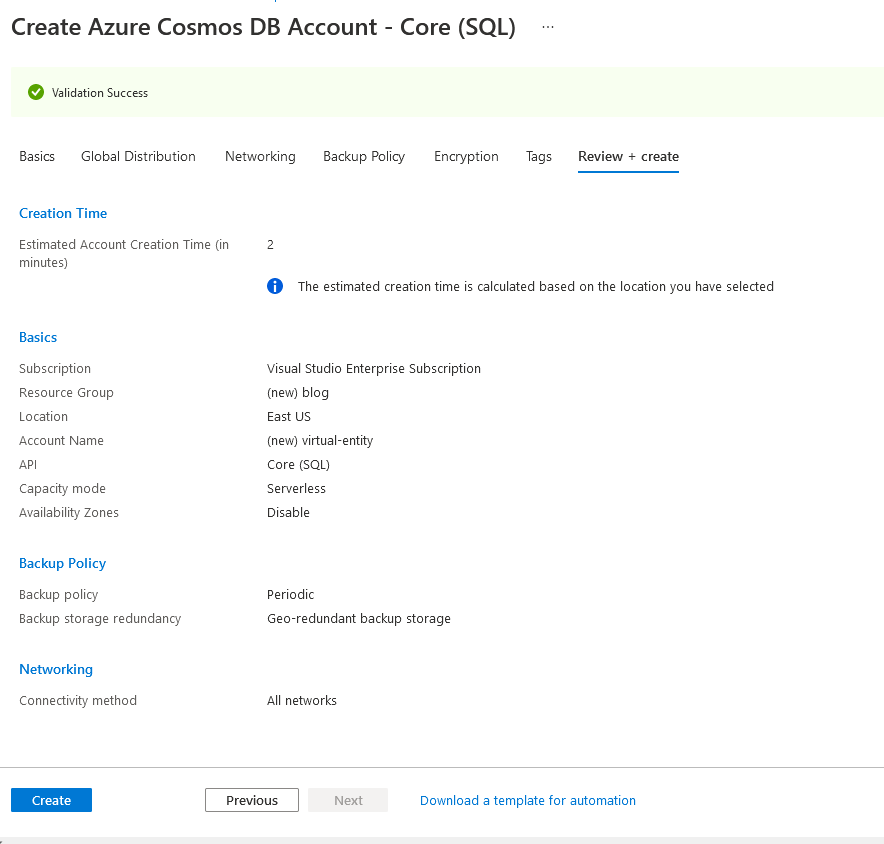
Below is the Summary Page of the Create Azure Cosmos DB Account - Core (SQL):
 Summary Page
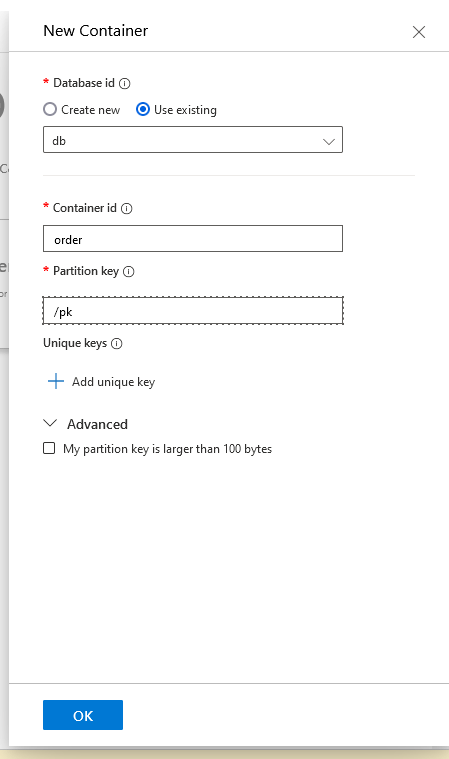
Once the Azure Cosmos DB account is created, you can go to the Data Explorer blade > hit the New Containerbutton. Fill in Database id (Create new > named the container as "db"), Container id as "order", Partition key as "/pk" (We will not use this in the demonstration. But if you want to learn more, you can click here), and hit the OKbutton.
 Create Container
You can refresh the whole page and click Data Explorer blade again, then you can click the New Item button and you can fill in the below format (you can create multiple items):
{
    "id": "ad0e5fb0-6d90-48f8-8b4e-a0c9647e922e",
    "name": "Temmy Wahyu Raharjo",
    "quantity": 2,
    "orderid": "ORDER-002",
    "ordertype": 1,
    "amount": "100",
    "delivered": false,
    "date": "11/13/2021 8:34:00 AM"
}
Create Data Provider in Dynamics CRM
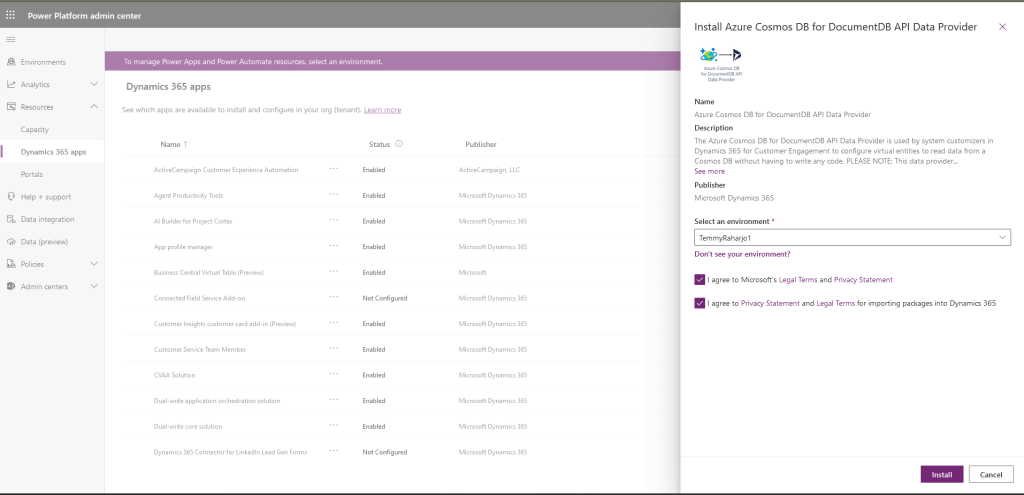
We need to install Azure Cosmos DB for Document DB API Data Provider (once per environment). You can go to this link > hit the Get it nowbutton > Sign in using your Dynamics CRM Email > Select the environment.
 Install Azure Cosmos DB for DocumentDB API Data Provider
In the next step, we can create Data Provider. But unfortunately, we can't use the new Solution design in make.powerapps.com. So what we need to do is click the gear button > click the Advance settings > (In the Settings section) Administration > Virtual Entity Data Sources > hit the New button > Choose Azure Cosmos DB for DocumentDB API Data Provider > click the OK button***.***
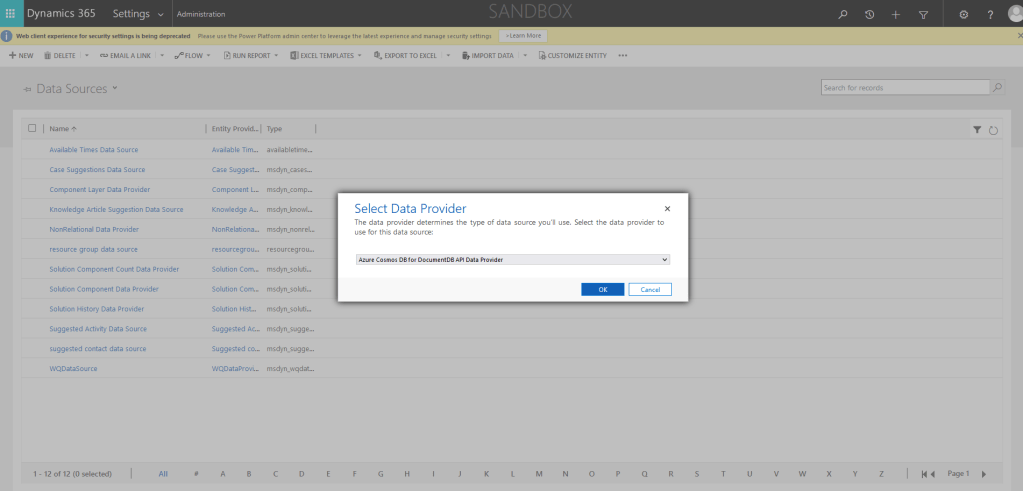 Create Data Provider
From here you can fill in Name as "Blog DataSource", Collection Name as "db".
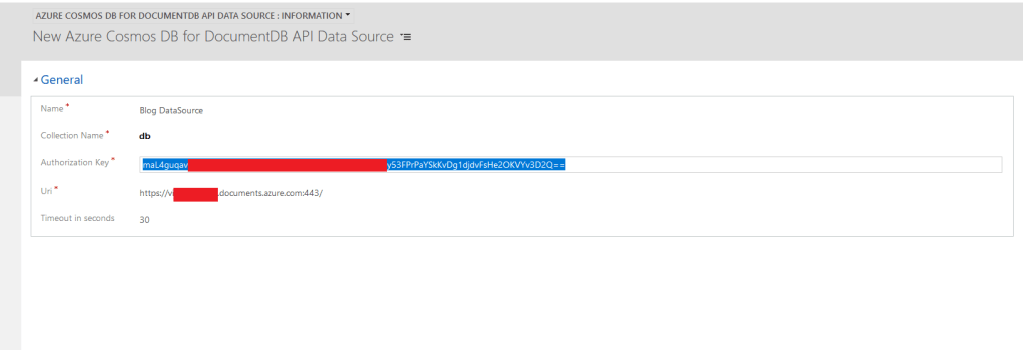 Setup new Data Provider
To get the Authorization Key, and Uri, you can go to the Azure Cosmos DB account that you set up earlier > go to Keysblade and copy the Primary Key/Secondary Key + the Urito be set in the previous dialog:
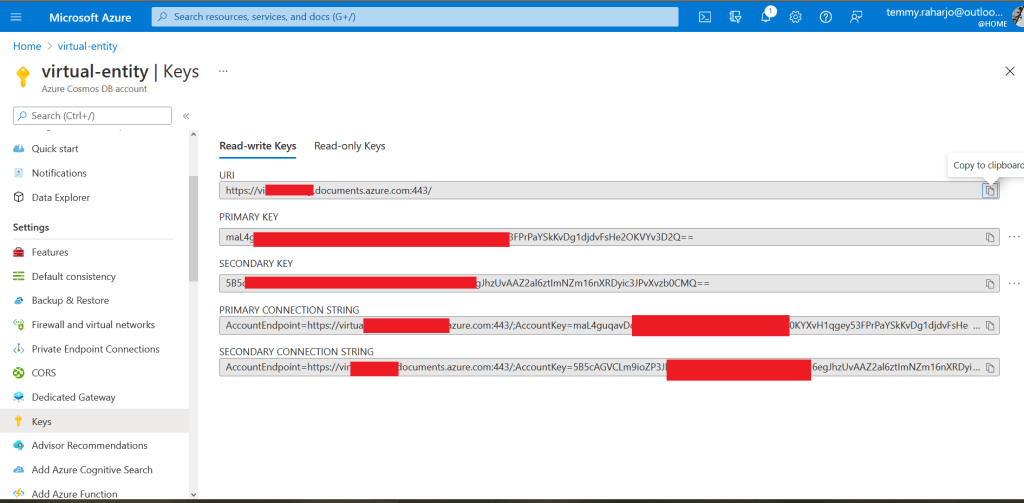 Azure Cosmos DB Account Keys
Create Table in Dynamics CRM
The last step is to create the table to reflect the external data source. Go to the solution that you created for this demonstration > Entities> click the Newbutton.
Fill in all the information like below:
 Create CRM Table
Below are all the fields that I created for the demonstration:
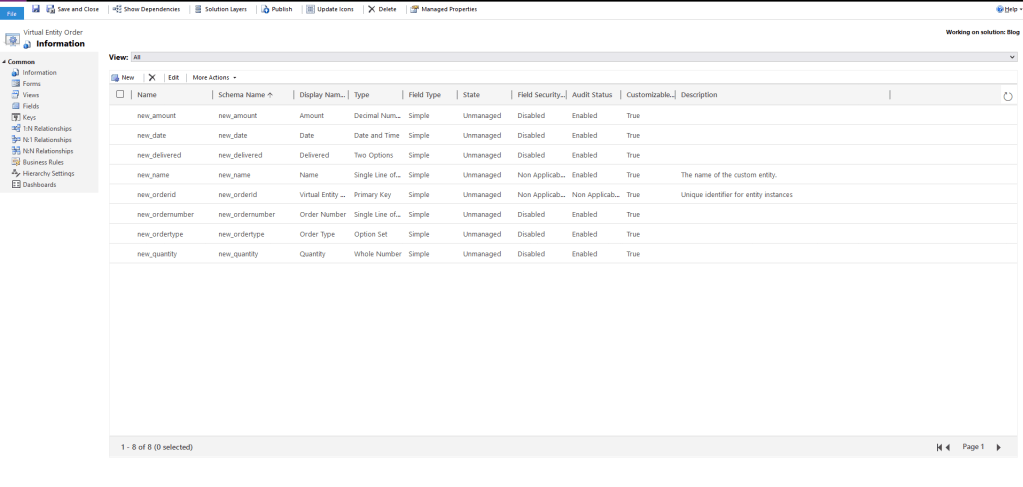 Setup Fields
To give you a brief explanation below is the Order Number field's setting:
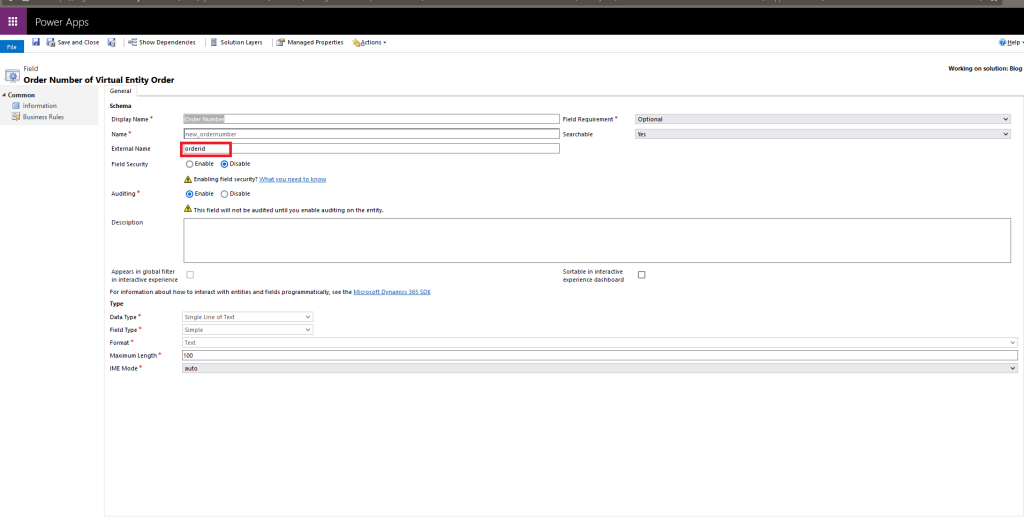 Sample setting
Once you are done with all the settings, you can set up the Views and the Forms. Here is the result:
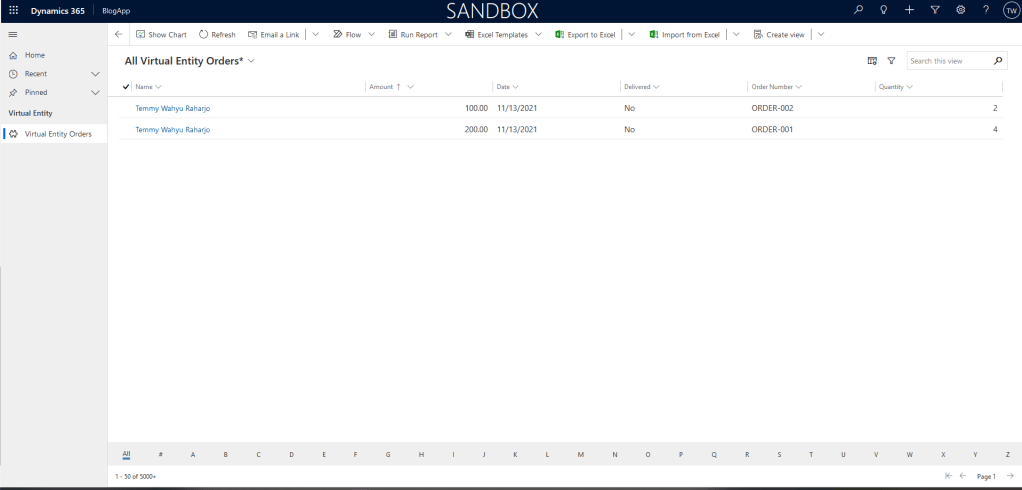 Result
Happy trying!
Leave a comment
Your comment is sent privately to the author and isn't published on the site.