dynamics-crm , powerplatform , tips
Let's try Power Platform Pipelines

One of the latest features that most people waiting for is the Power Platform Pipelines. I created 3 Developers' environments for demonstration and enabled the Managed Environments feature. For those who want to try it, you can follow this link to get your own environment to test (the link will show you how to join Microsoft 365 Developer Program).
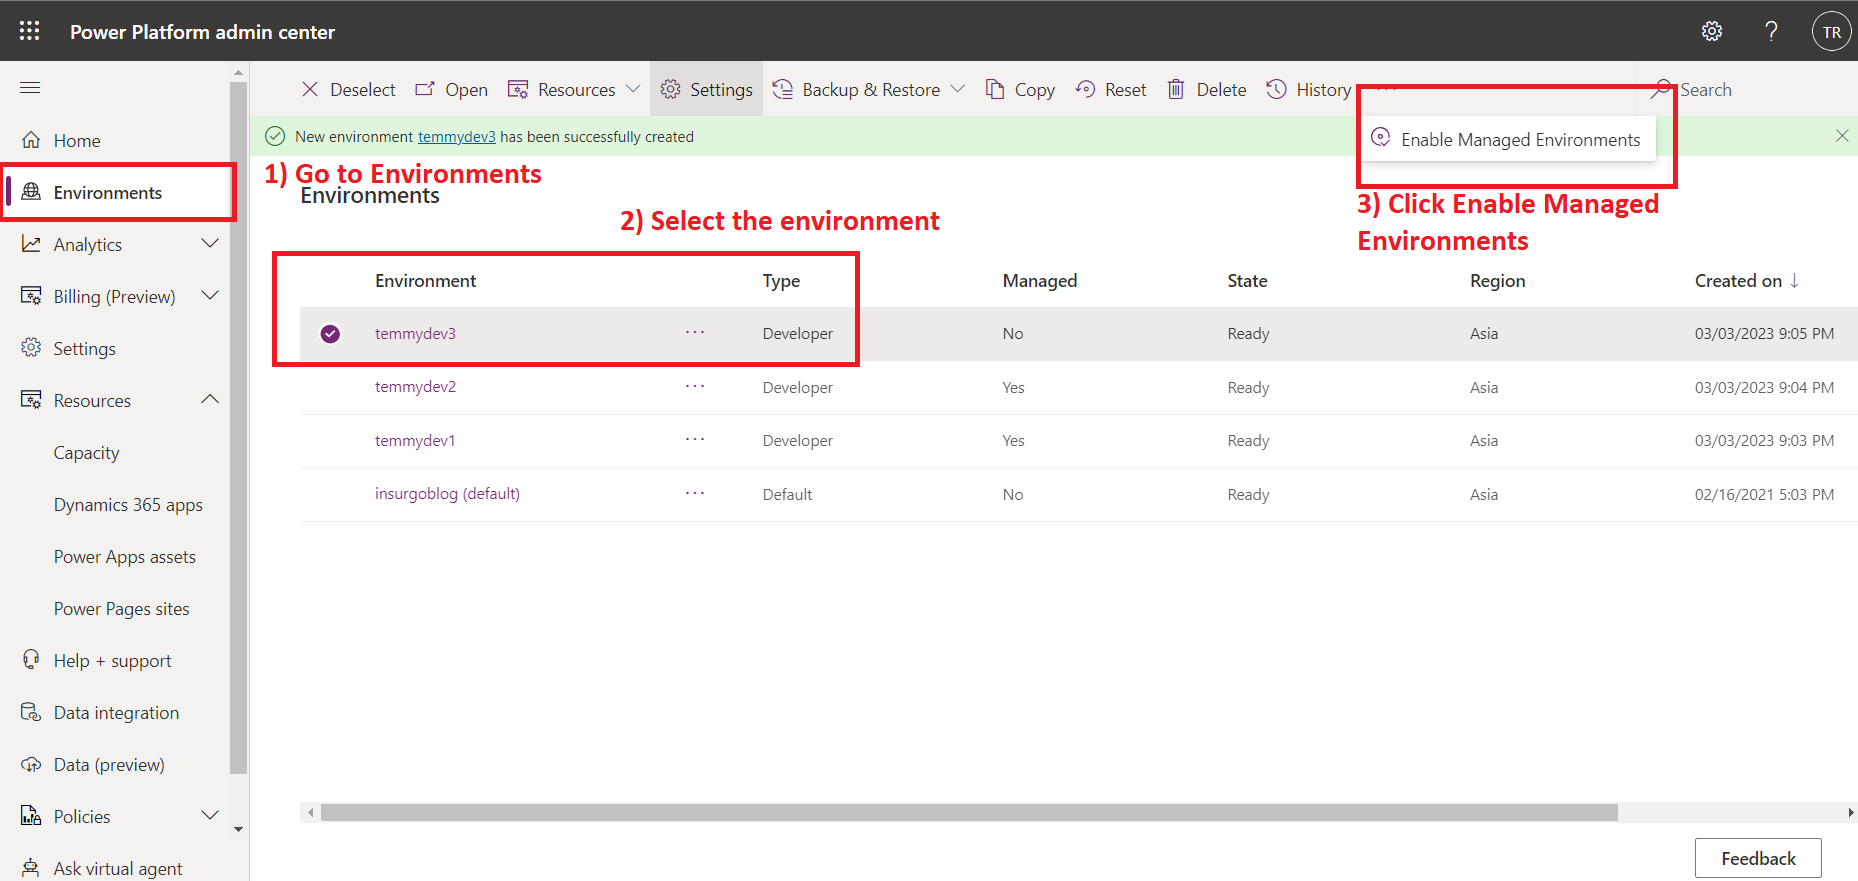
Enabling the ***Managed Environments***is pretty easy. You just need to go to admin.powerplatform.com > go to Environments > select your environment > click Enabled Managed Environments:
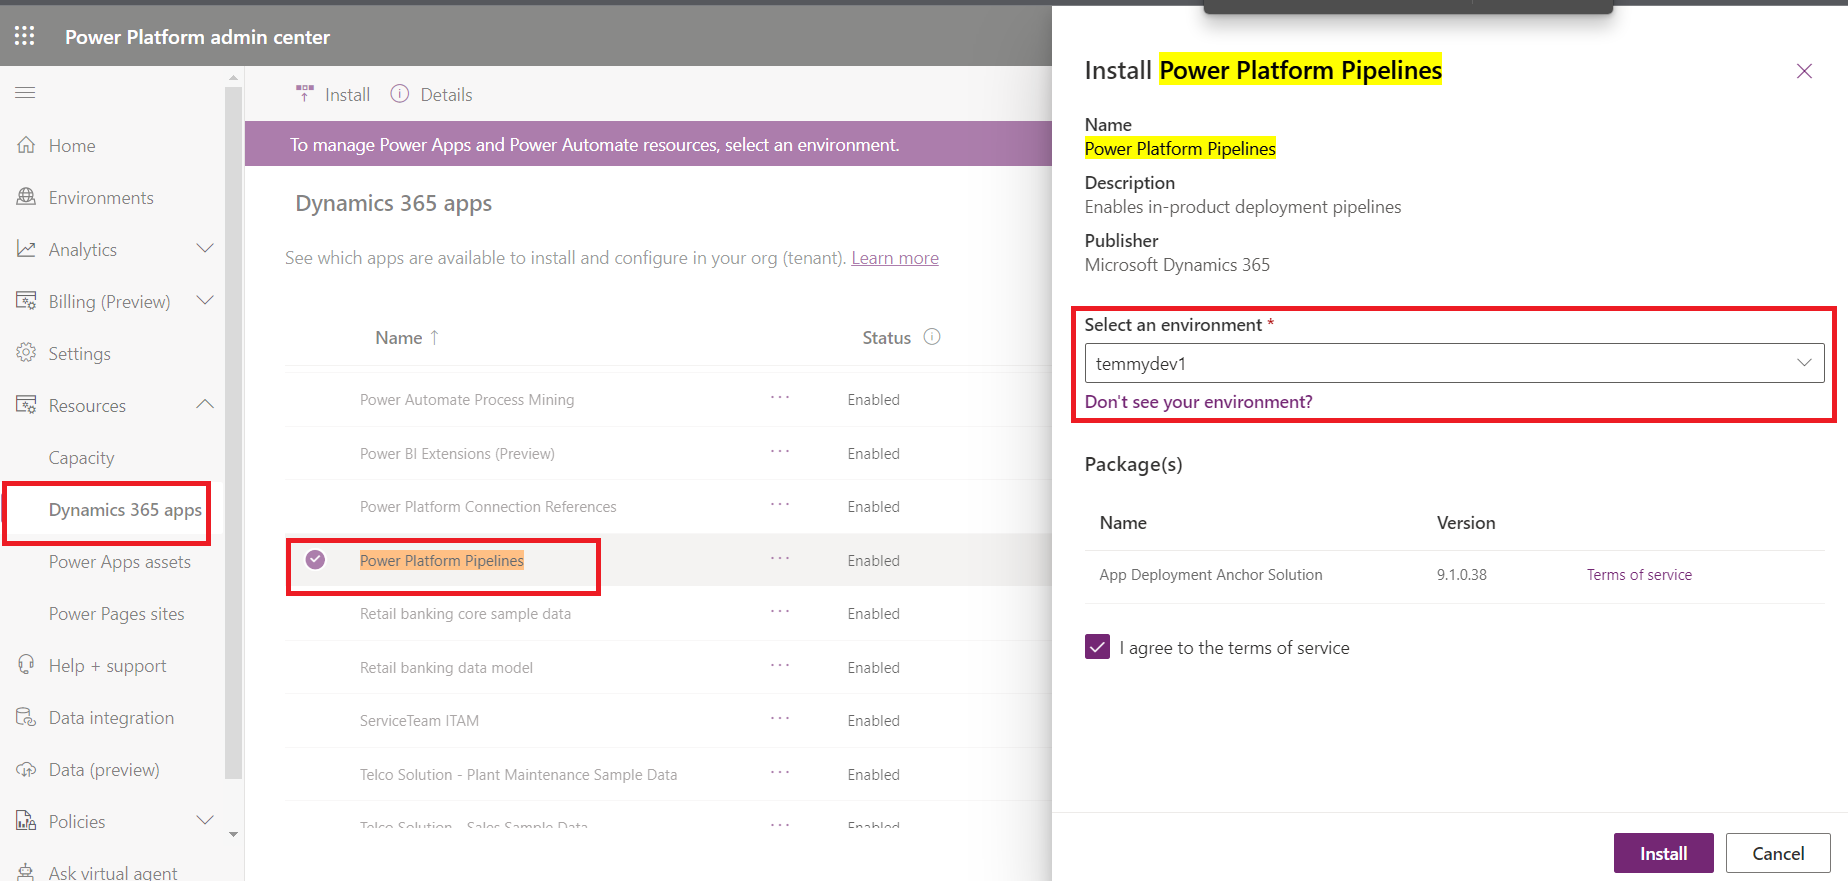
Next, go to Resources > Dynamics 365 apps > go find Power Platform Pipelines > installed it to the host environment that you want. For this demonstration purpose, I select temmydev1 as the host. The explanation from the official documentation, the host environment will act as the storage and the main control for the pipeline itself.
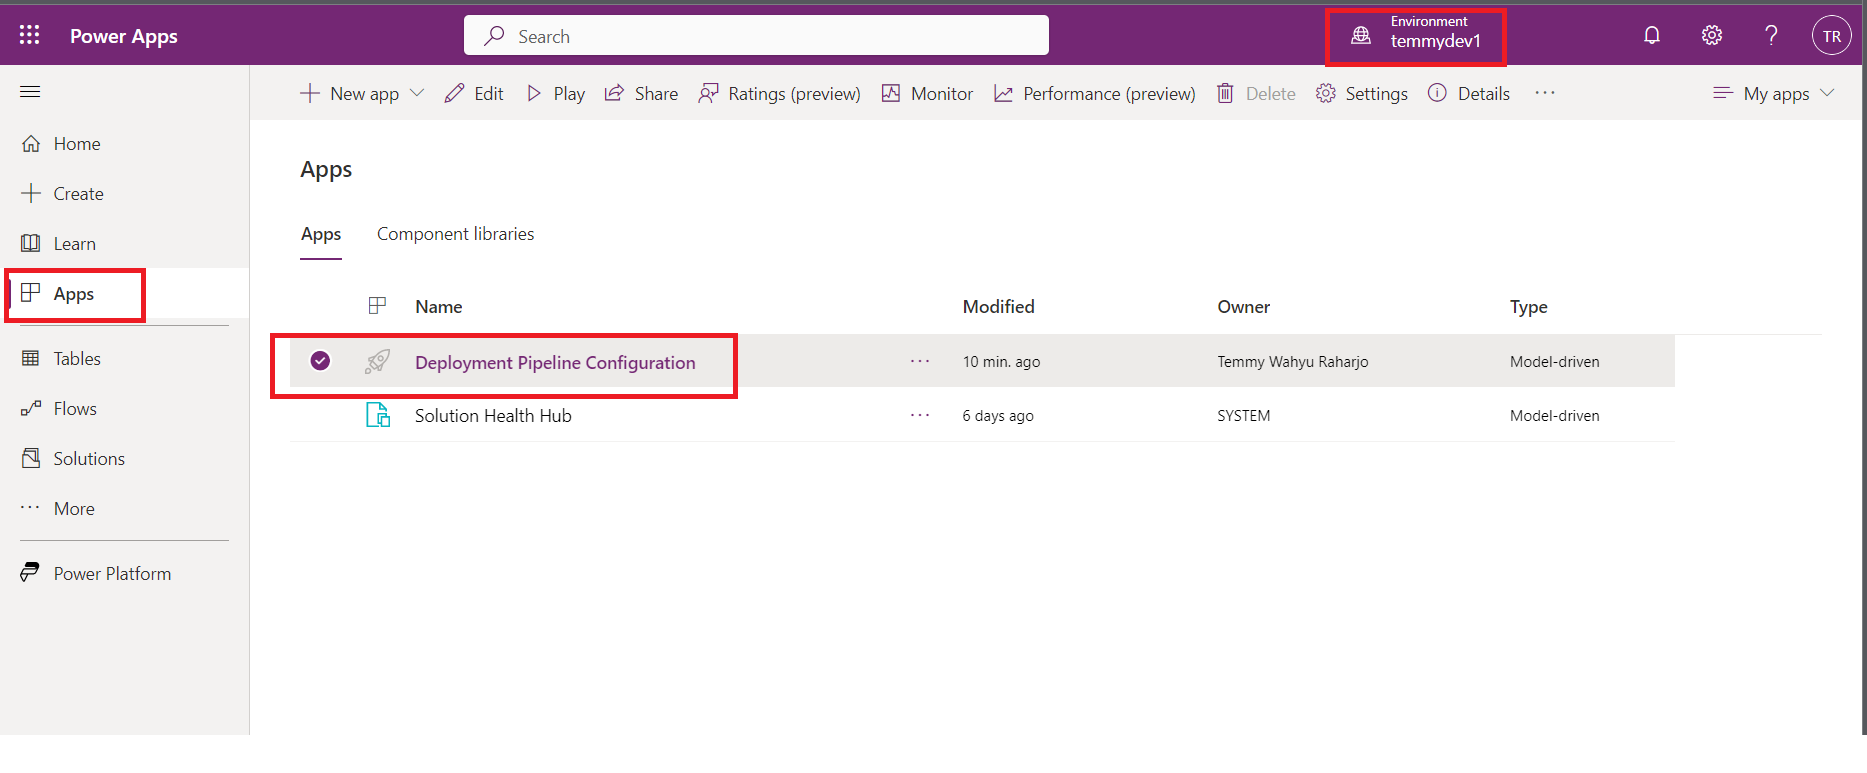
Once the Power Platform Pipelines installed, you can go to make.powerapps.com > go to the host environment that you are selected earlier > there you will see the Deployment Pipeline Configuration app:
Inside the app, we need to set up all the environments that we have first. We need to go to Environments > New:
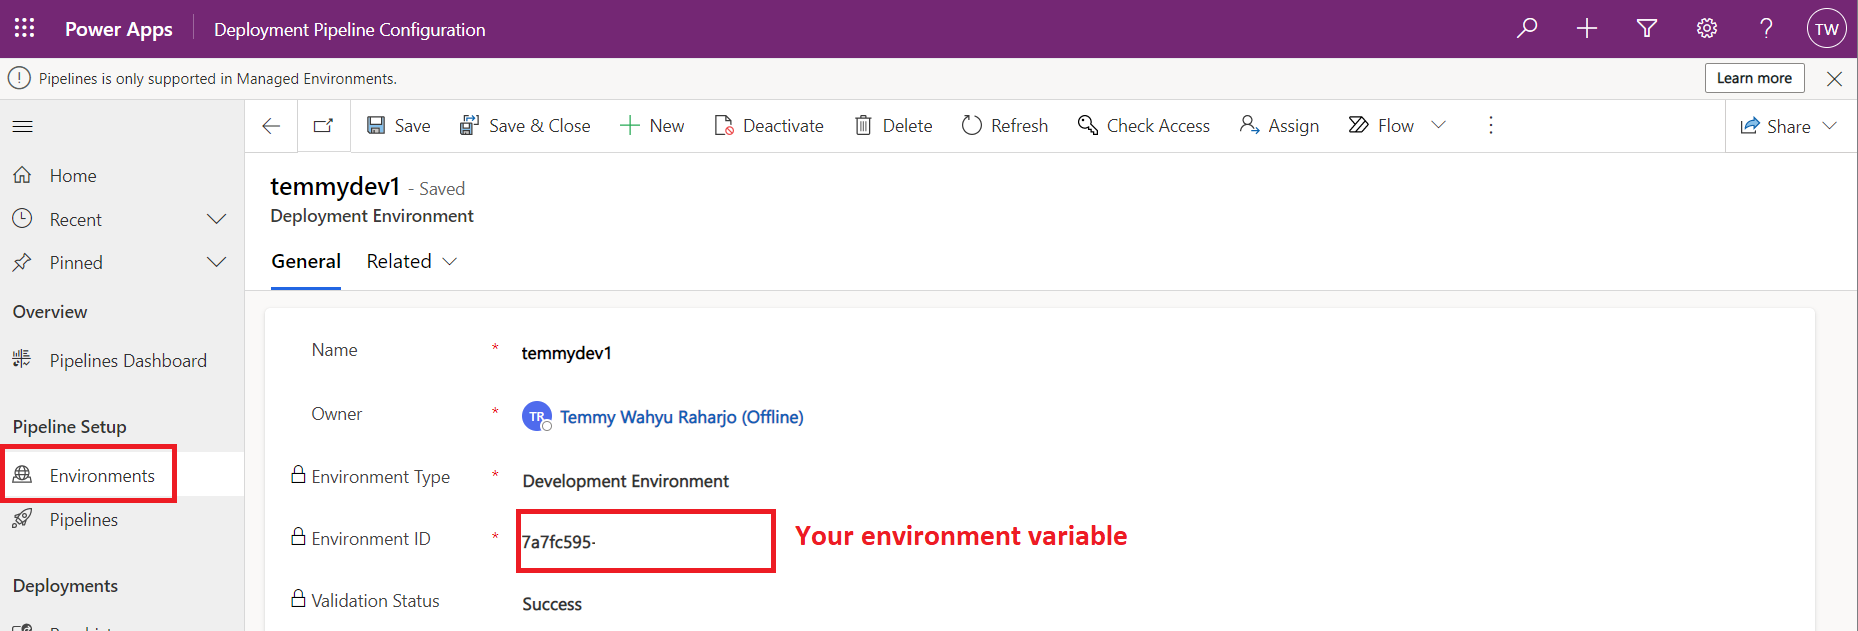
To get the environment variable, you can go to admin.powerplatform.com > Environments > select the environment that you want to know the id:

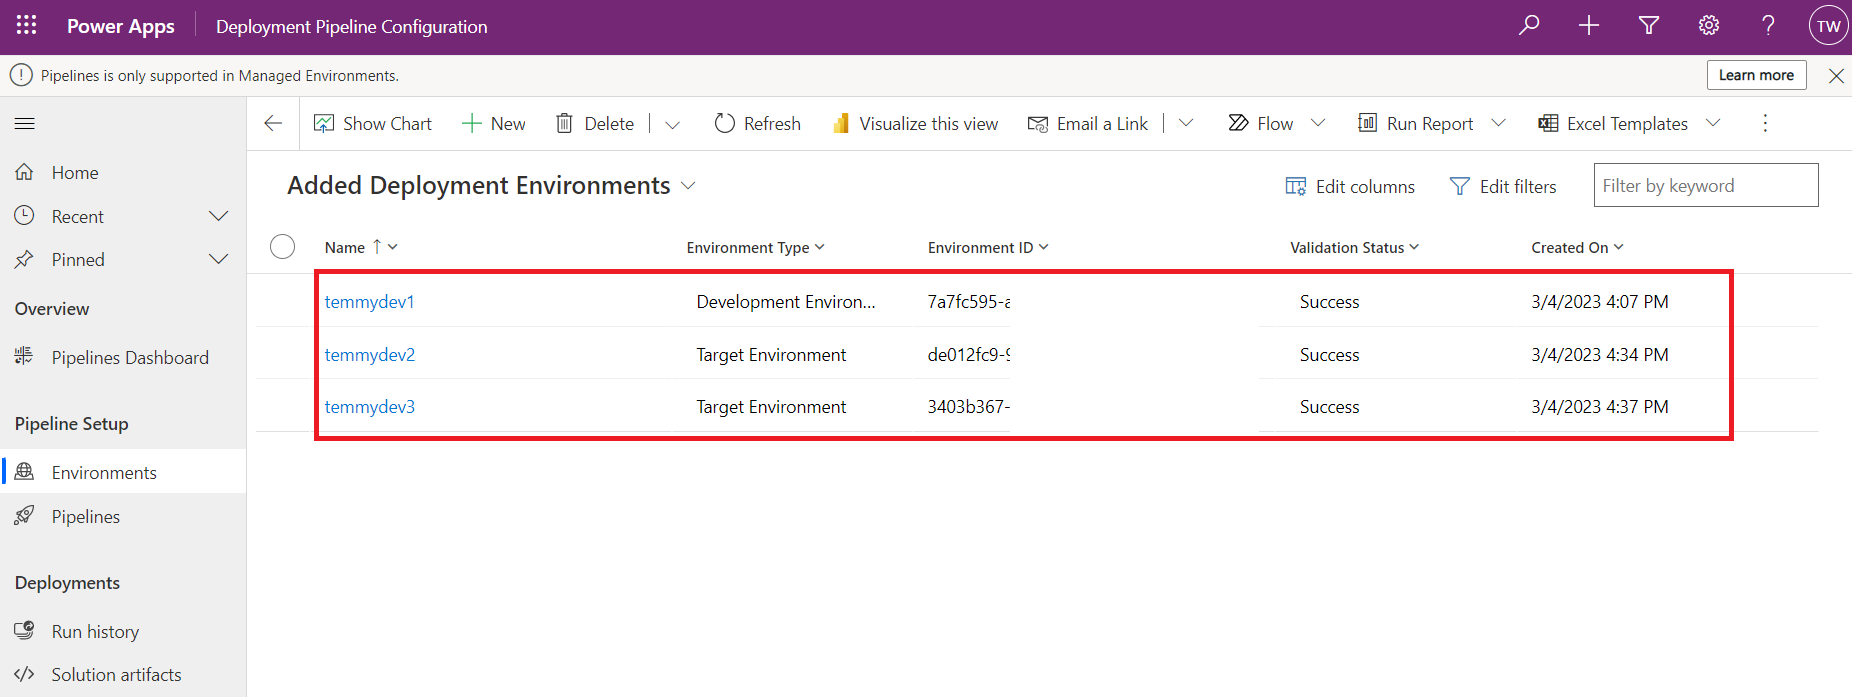
Once everything is okay, click the Save button > if the Validation Status becomes "Success" you can go to the next step (if "Failed", most likely you enter the wrong Environment Id. Please follow the previous step). Do these steps for all the Environments that you want to use (as the pipeline). Below are my settings for the Environments:
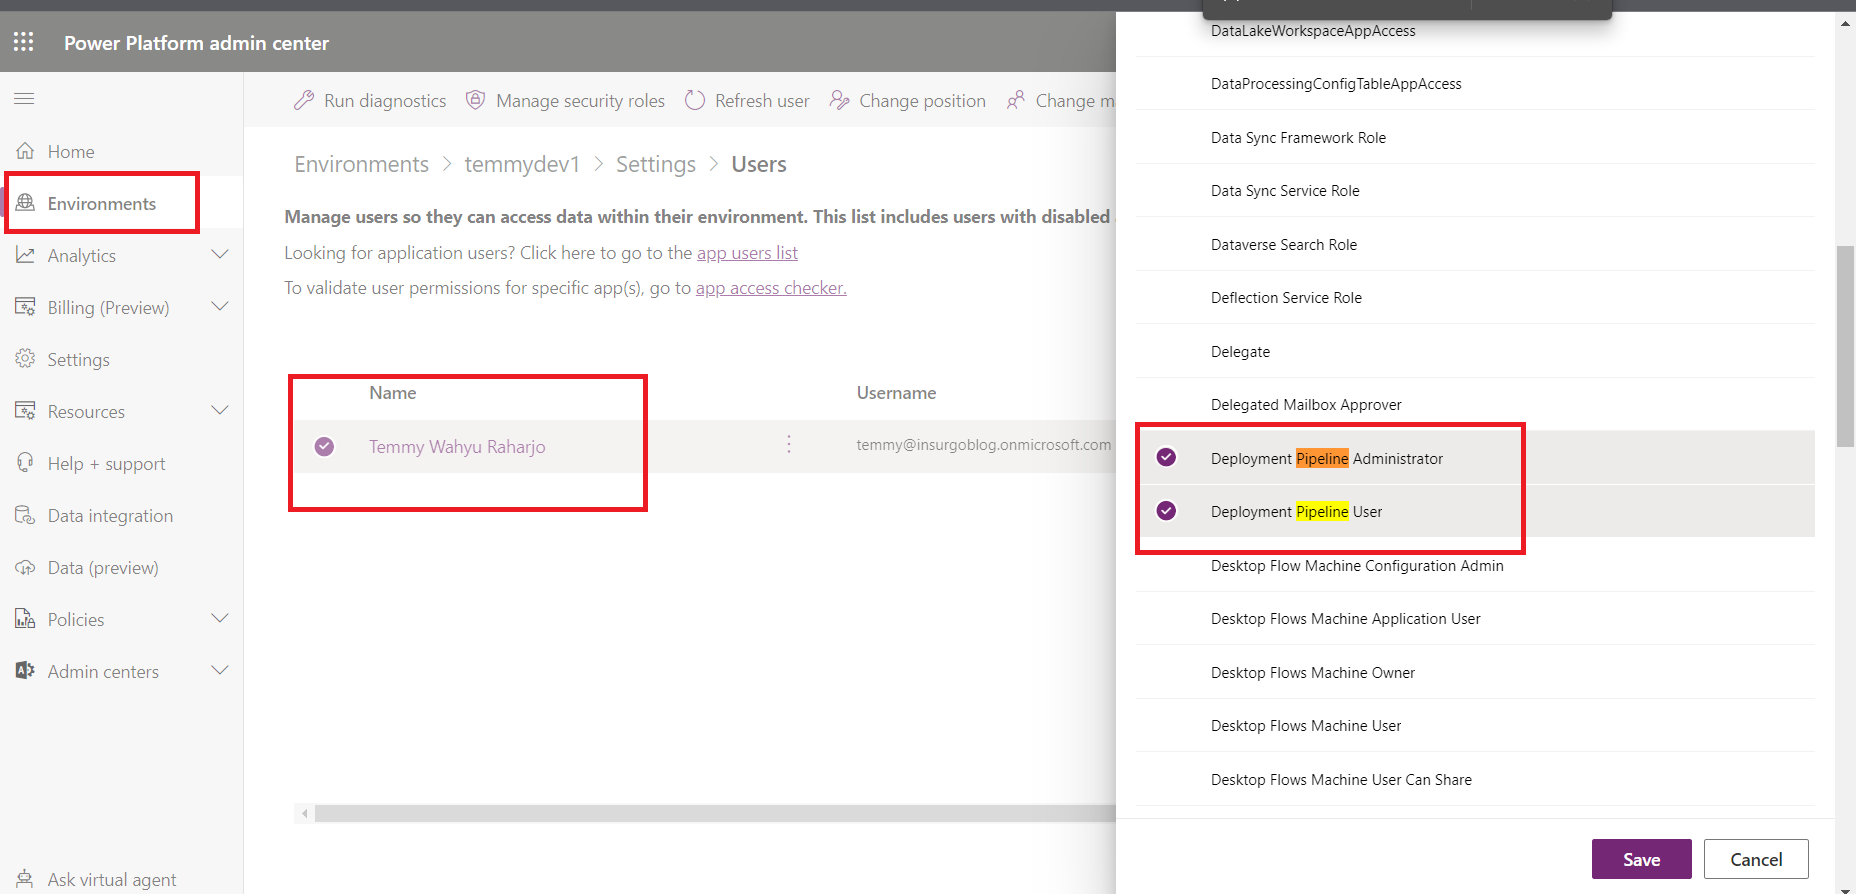
Next, add the security role "Deployment Pipeline Administrator" and "Deployment Pipeline User" to the user that you want to use as the Pipeline administrator. Go to admin.powerplatform.com > select the host Environment > Settings > User + permissions > select the user that you want to use as the Pipeline administrator > add those roles:
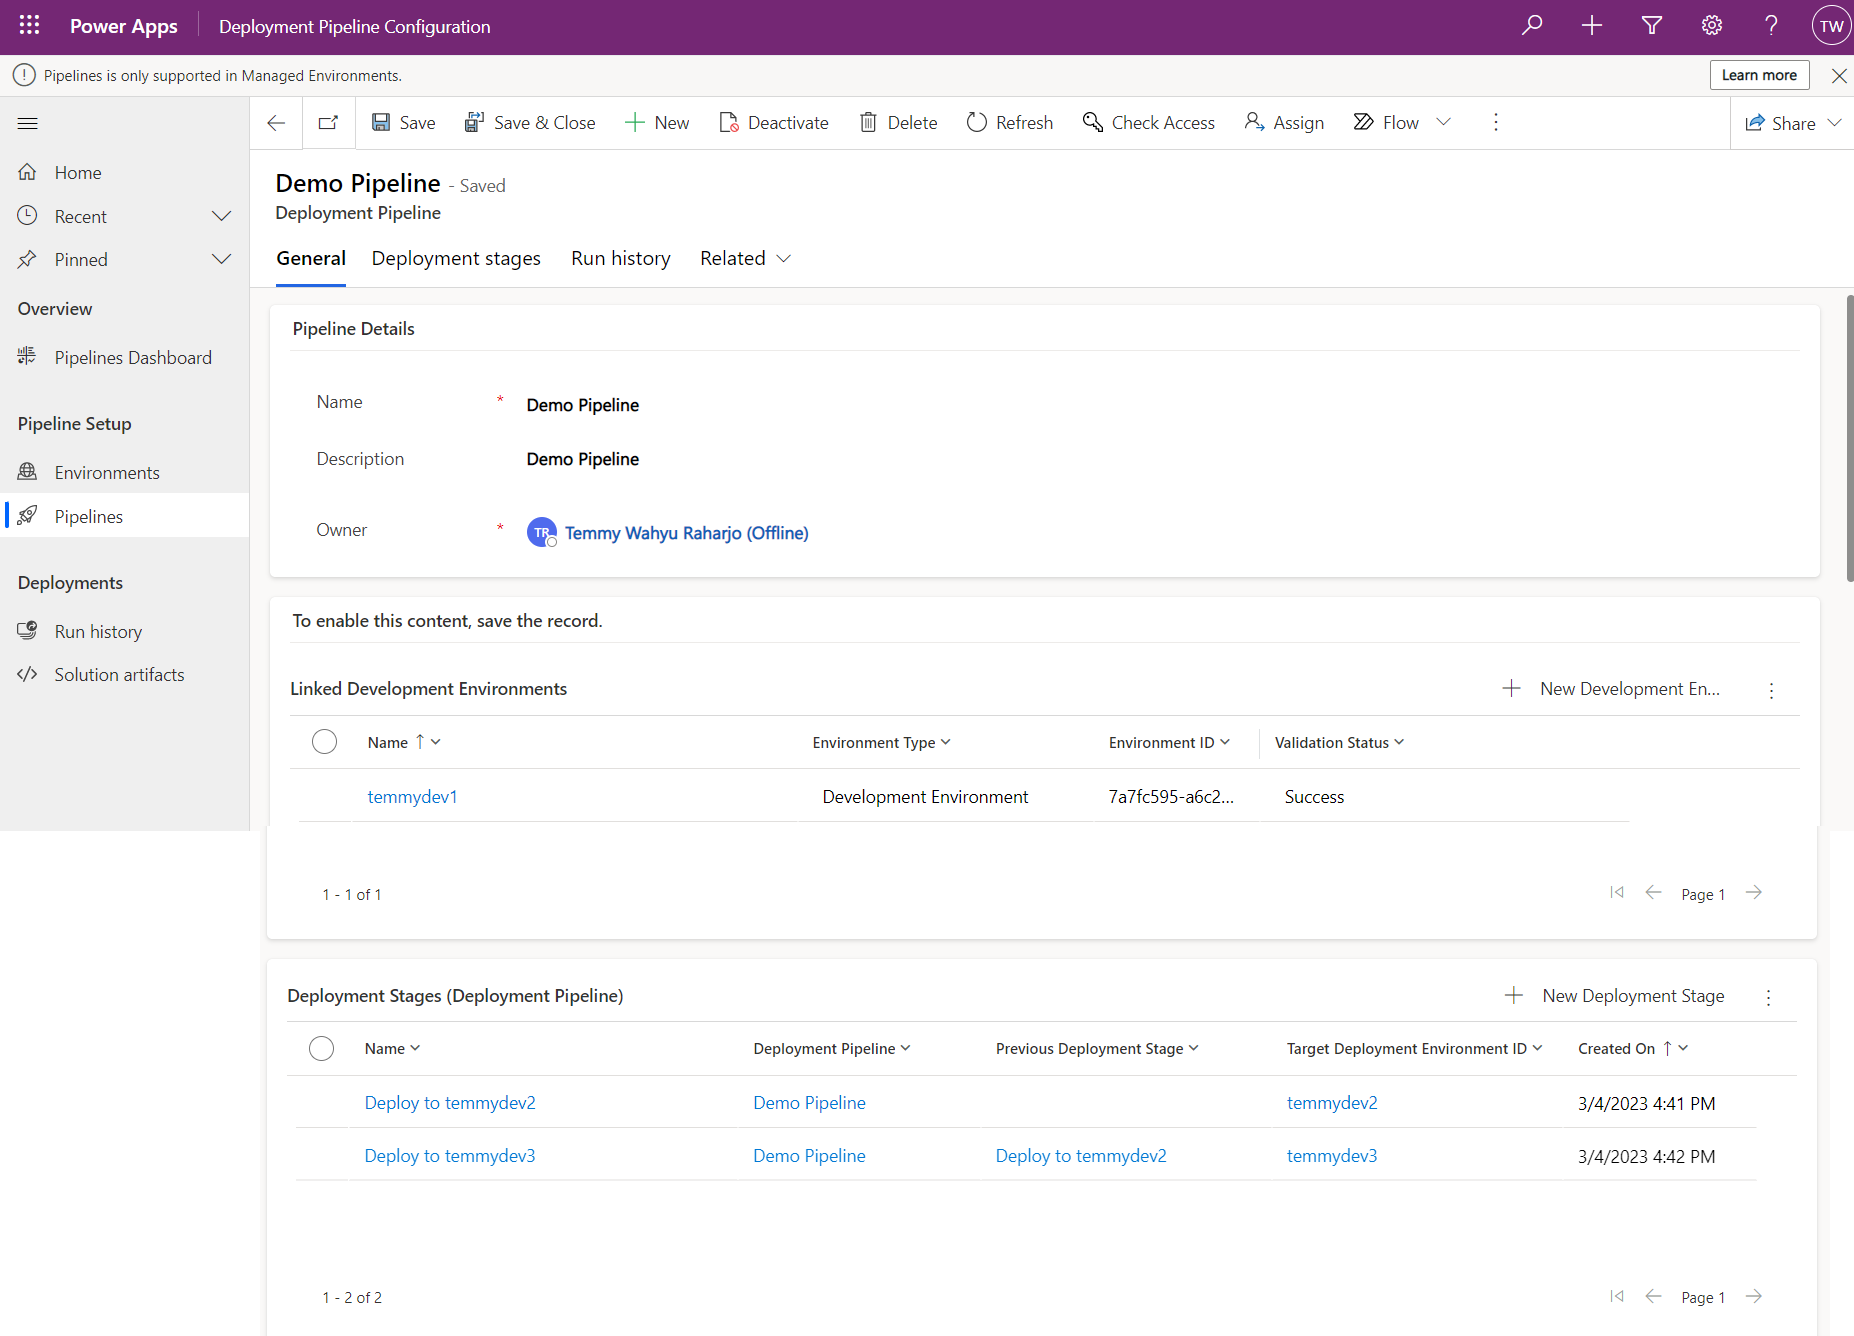
Again, we still need to set up the Pipeline. Go to the "Pipeline" > New > Enter the name + description as what you like. On Linked Development Environments, you can add existing the dev environment. Then for Deployment Stages, you can click new, and enter the information below. Basically, this will capture the setting for flow from Dev > to higher environments (SIT/UAT/Prod):
Run the Pipeline
Go to your Dev environment and prepare a solution to be deployed to higher environments. For example, I create below JS component:

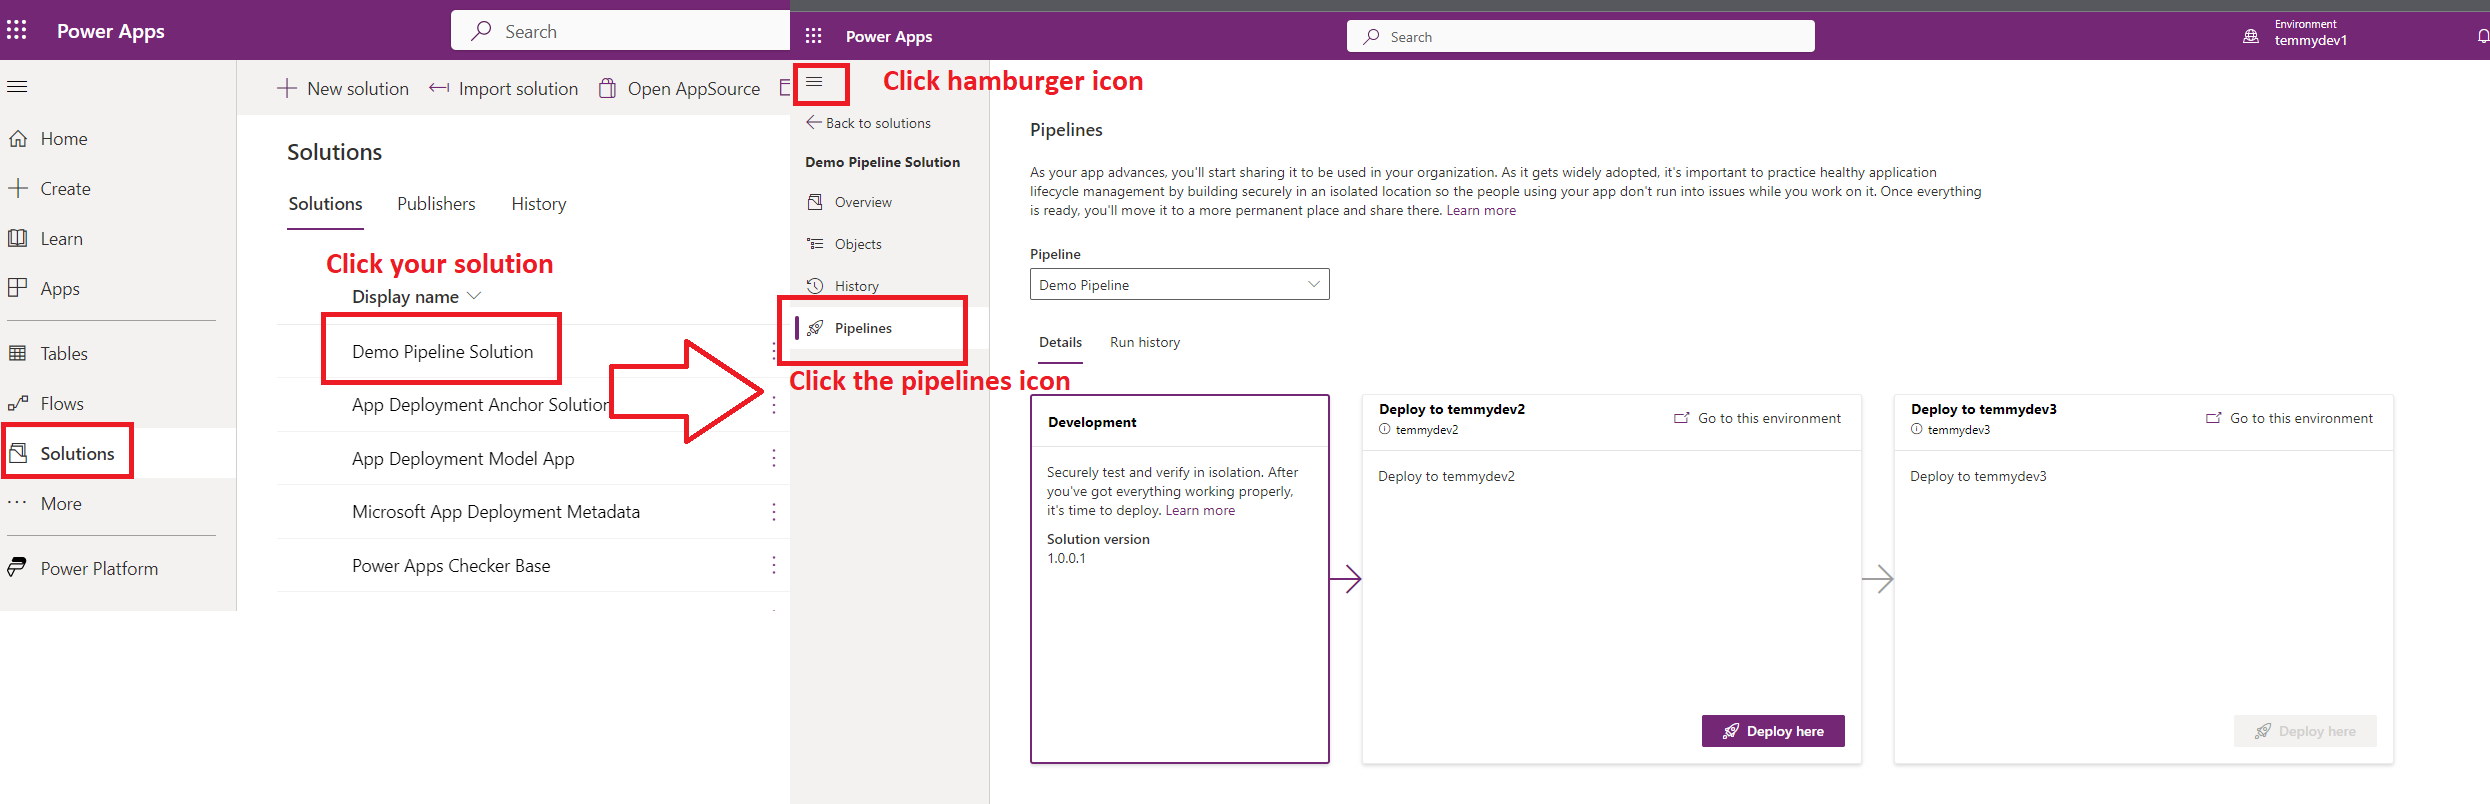
Once you are ready to try your pipeline, go back to your Solutions > select the Unmanaged Solution > click the hamburger navigation, and select Pipelines icon > there you can find the information for deploying (at first, I can't find this navigation. After checking the youtube link, I only know how to get there):
Let's click the "Deploy here" button:
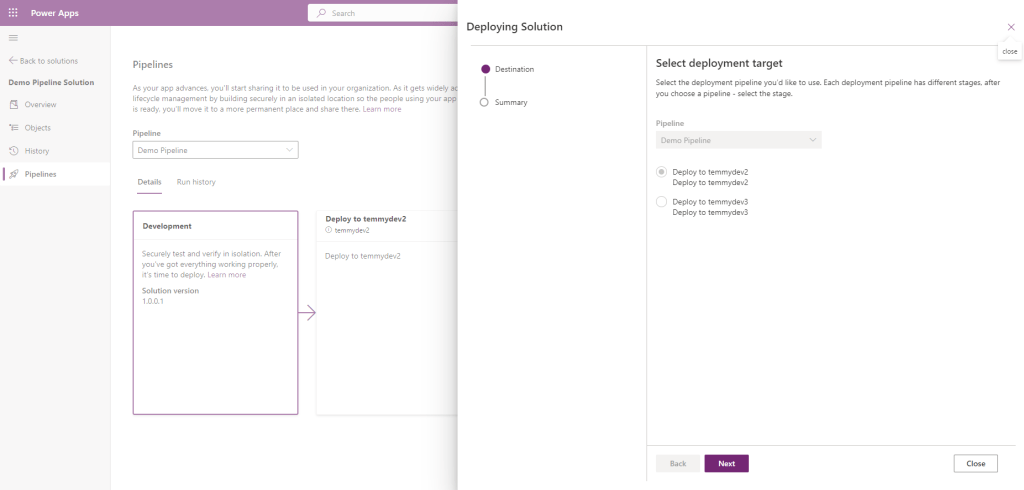
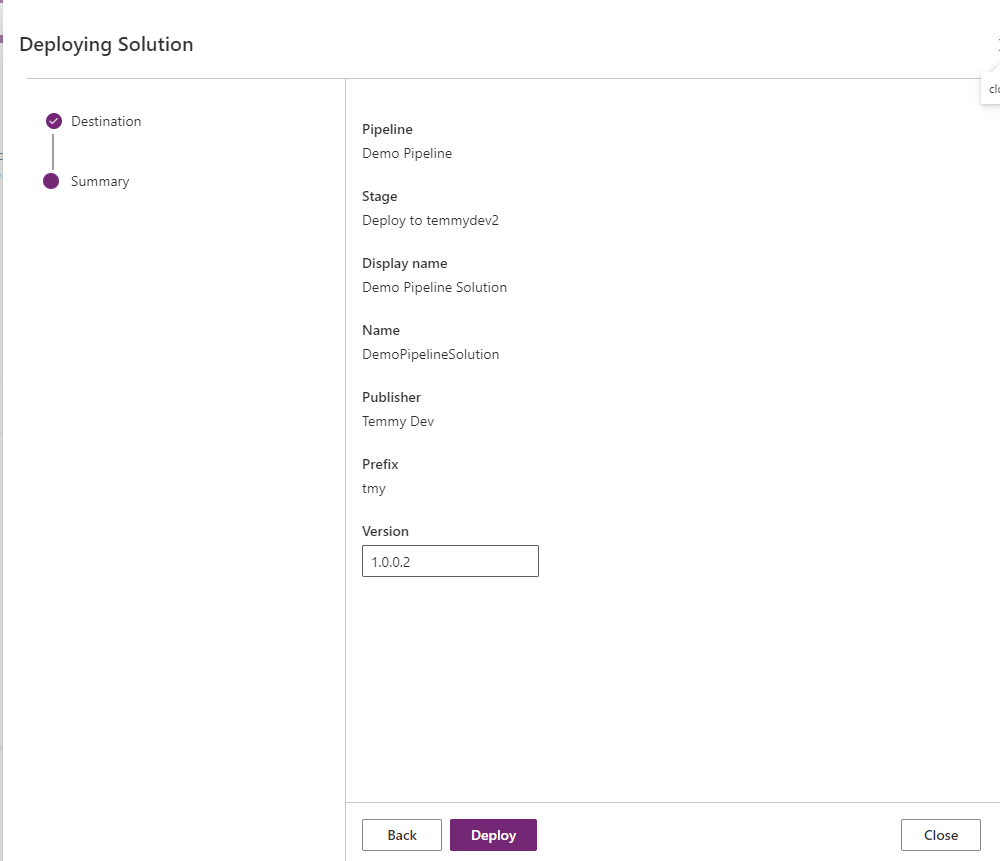
Click the Next button and click the Deploy button:
The system will automatically import the solution and we need to wait until the import is finished (here I can't find any setting to import as "Unmanaged"):
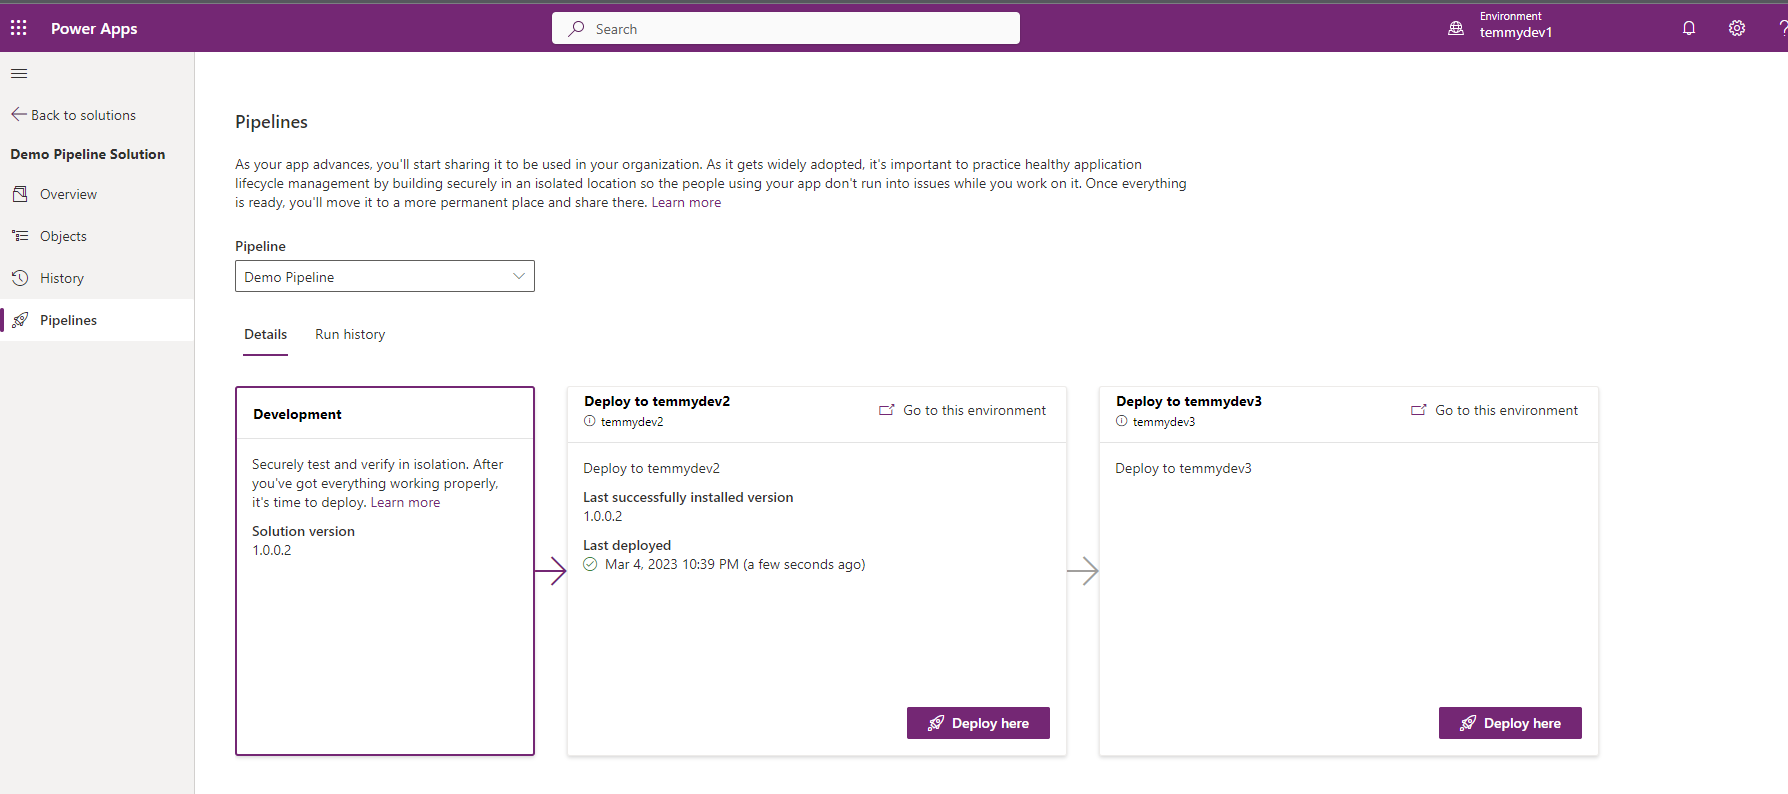
Then, you can inspect the solution in the target environment, and here is the result from my side:

As you can see, the solution was imported as a "Managed" solution.
I think that's all for today's blog post. What I'm thinking, this feature is a kinda "low-code" ALM that is very easy to set up without needing very deep technical skills. But there is also a drawn back as we need to follow as is flow (most organizations got lots of checking that are being put in the ALM process). But for sure, this is a nice feature to try for simple operations and you must try it!
Happy CRM-ing!
Leave a comment
Your comment is sent privately to the author and isn't published on the site.